Archive for March, 2009

Flourless Chocolate Torte

Wednesday, March 11th, 2009

First, sorry for the long break in posting! My husband and I were refinishing our guest room. 2 buckets of spackle, a roll of fiberglass tape, and a few buckets of paint later…we are tired but done.

In tastier news, my mother-in-law gave me this recipe for a Flourless Chocolate Torte – she first made it for my mother, who follows a gluten-free diet, at a family function a few years ago. The cake was an instant hit – it’s very rich and chocolatey, almost fudgey. Even the non-gluten-free folks in the room thought it was incredible! Unlike a lot of gluten-free cakes, it is incredibly moist and has a lovely texture. This recipe is now legend in our circle – friends and family alike have procured this recipe and make it for special occasions – I made one this week in preparation for a weekend celebration and can’t wait until Saturday to try it!

This recipe does require a fair amount of work – not something to try when you’re looking for something quick to whip up, but the results are very tasty and worth the time and effort.

Jan’s Flourless Chocolate Torte

Ingredients:

12 oz semi-sweet chocolate (I used chocolate chips)

1 oz (by weight) unsweetened cocoa powder

1 and 1/2 sticks of salted butter (sliced into tablespoon sized pieces)

8 eggs

1 tsp vanilla

1/8 tsp salt

2/3 cup brown sugar

Preheat oven to 350 degrees.

Melt the chocolate chips, cocoa powder, and butter in a double boiler (or a Pyrex bowl over a saucepan of hot water). Meanwhile, butter a springform pan (mine was 12 inches) and line the bottom with parchment paper. Cover the outside with a piece of aluminum foil – this cooks in a water bath, and using the foil keeps the water from seeping in!

Separate the 8 eggs. Add the vanilla to the egg yolk bowl and mix.

When the chocolate mixture has finished melting, remove it from the heat so it has the chance to cool a little. Take 1-2 tablespoons of the melted chocolate mixture and add it to the egg yolks, mixing well (this will gradually increase the yolk temperature so the eggs don’t cook!) Then add the egg yolk mixture back into the bowl with the rest of the melted chocolate mixture.

With the egg whites – add the salt and begin to whip the eggs in a bowl, gradually adding the brown sugar as you go. When all the sugar is incorporated beat on high until peaks begin to foam.

Stir about one half of the egg white mixture into the chocolate and egg yolk mixture until they are well mixed. Then gently fold in the rest of the egg white mixture, preserving the fluffiness of the egg whites as much as you can.

Pour the mixture into the prepared springform pan. Place the springform pan in a roasting pan and fill to about 1 inch depth with warm/hot water. Bake for 40-50 minutes; the cake is done when a good crust has formed.
Mint Brownie Cups

Wednesday, March 4th, 2009

I picked up a bag of Andes Creme de Menthe baking chips at Target shortly after Christmas. I had thought that they’d be the perfect addition to some chocolate chocolate-chip cookies or basic brownies, as they’re essentially crushed Andes mints. After my holiday baking frenzy wound down, I promptly forgot about them.

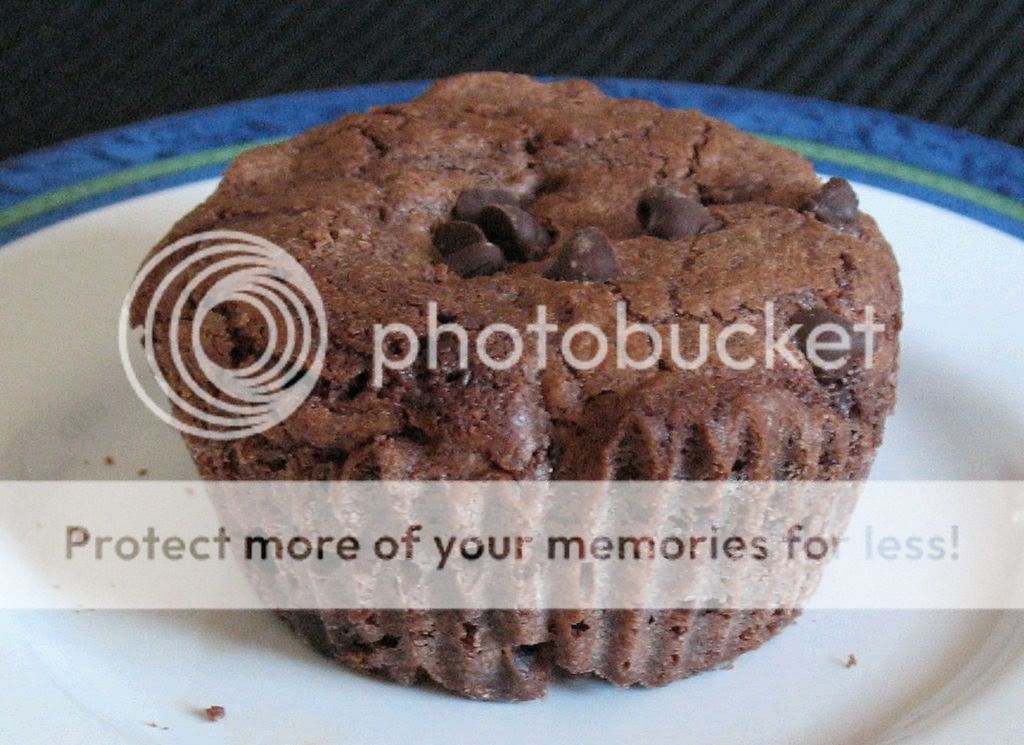
As I was perusing older recipes from some of my favorite blogs, I found the perfect recipe in which to use my crushed Andes mints: the Peppermint Brownie Cups on Baking Blonde’s Weblog. The recipe looked like the perfect combination of mint and chocolate, and I liked that the brownies were pre-portioned using a muffin tin. I always say that I’m going to freeze most of the brownies that I make, but within a matter of days my husband and I have consumed every last one. Once the pan is out of the oven, my self-discipline goes out the window!

This was only my second time making brownies from scratch, and they’re just perfect! The brownies have a rich, chocolate flavor and a consistency that’s dense and chewy, but not too heavy. I followed the recipe quite closely, deviating only to use my Creme de Menthe Chips in place of the Peppermint Crunch Chips, and to top the brownies with mini chocolate chips.

After enjoying several of the brownies, I stashed the rest in the freezer. When a chocolate craving hits, these perfectly-portioned brownies will be ready in an instant!

Peppermint Brownie Cups

Yields 14-16 brownies
6 TBS butter
6 oz semisweet chocolate (chopped)
2 oz. bittersweet chocolate (chopped)
1 cup sugar
2 eggs
1/4 tsp peppermint extract
1/4 tsp vanilla
3/4 cup all-purpose flour
1/4 teaspoon baking powder
1/4 teaspoon salt
1/2 cup Milk Chocolate Chips
2 cups Andes Creme de Menthe Chips or Andes Peppermint Crunch Baking Chips

Preheat oven to 350 degrees.

Line a muffin tin with paper liners. Lightly spray liners with cooking spray.

In a heat-proof bowl, melt together butter and chocolate in the microwave in 30 second intervals stirring after each interval until smooth. Allow to cool for 5 minutes.

In a large bowl, whisk together flour, baking powder, and salt in a medium bowl; set aside.

Whisk or beat the sugar into the chocolate mixture. Add eggs and peppermint extract mixing until combined and smooth. Add flour mixture and mix until combined. Gently fold in the 1/2 cup chocolate chips and 1/2 cup Andes Peppermint Crunch Baking Chips.

Carefully pour batter to prepared each muffin liner filling about 2/3 full. Sprinkle a few Andes Peppermint chips over the top of each individual brownie. . Bake for 18-23 minutes or until a cake tester comes out with a few crumbs.

*Baking time will depend on your oven, watch carefully so you don?t overbake! Mine were done in 20 minutes.

Allow to cool before removing from muffin pan.
Keep brownies in cupcake liners until ready to serve to help prevent them from drying out.


Mint Chocolate Chip Ice Cream

Sunday, March 1st, 2009

As I mentioned in my sorbet post, I’ve been stockpiling homemade ice cream and sorbet recipes for quite awhile. Mint Chocolate Chip is one of my favorite flavors, so I was quite excited when I saw this recipe on the blog Proceed with Caution.

This was my first attempt at homemade ice cream, so I hesitated to stray from the original recipe. I was quite pleased to find an ice cream recipe that didn’t use copious amounts of whipping cream and egg yolks. Since I’ve read conflicting information on consuming uncooked Egg Beaters, I followed the ice cream making method set forth by Mark Bittman in How to Cook Everything, but used the ingredients and proportions found on Proceed with Caution. I’ve included both the original and modified preparation methods below.

When I was done mixing the base, I adjusted the flavor slightly. I found that I needed to increase the amount of sugar by two tablespoons (1/2 cup total) and I also decided to add an additional teaspoon of peppermint extract (1 1/2 teaspoons total). Since I like lots of chocolate bits in my ice cream, added a full cup of mini chocolate chips.

The finished product is rich, creamy and refreshingly minty. I’m happy that I had such a great recipe to follow for my first foray into homemade ice cream and will be consulting Proceed With Caution for other frozen confections.

Mint Chocolate Chip Ice Cream
Adapted from Doc Wilson, as found on Proceed with Caution

1/4 cup Egg Beaters
1/2 can of fat free sweetened condensed milk
1/2 cup white sugar
4 ounces heavy whipping cream
16 ounces fat free half and half
4 ounces skim milk (or 1%, or 2%, whatever you have)
1/8 tsp salt
1 1/2 teaspoon mint extract
2 tsp vodka OR mint schnapps OR “The Good Doctor” (optional)
1 cup mini chocolate chips

In a large mixing bowl whisk together egg beaters, sweetened condensed milk, and sugar until thoroughly mixed. Add heavy whipping cream, half and half, skim milk, salt, vodka or schnapps, and mint extract. For the very best results (who wants anything less?), let the mix chill in the refrigerator for about four hours which allows the mix to “age” before freezing according to the directions with your ice cream freezer. Add the mini chips in the last 5 minutes of freezing. This recipe makes the perfect amount to fit in a 1.5 quart ice cream maker. Makes between 4 and 5 cups of ice cream.

My revised preparation:
1. Pour half and half into small saucepan and heat, stirring occasionally, until steam rises. Remove from heat.
2. In a separate bowl, use a whisk or electric mixer to beat Egg Beaters, sweetened condensed milk and sugar together. Beat in 1/2 cup of hot half and half and then stir this mixture into the saucepan with the remaining half and half.
3. Cook over medium-low heat, stirring almost constantly. Continue until the mixture reached 170-180 degrees or is slightly thickened. Do not bring the mixture to a boil.
4. Pour the mixture into a separate bowl and stir in the cream and milk.
5. Once the mixture has cooled slightly, but is still hot, add the salt, mint extract and vodka. Taste the mixture and add more sugar or mint as needed.
6. Chill the mixture for several hours. You can speed up the process by placing the bowl containing the mixture in a large bowl filled with ice and water.
7. Freeze in ice cream maker according to manufacturer’s directions Add the mini chips during the last five minutes.