Archive for the ‘Appetizers’ Category

Pesto Pinwheels

Wednesday, January 28th, 2009


My cousin Sue regularly brings these pesto pinwheel appetizers to family gatherings. These appetizers are light and flaky and have a delicious pesto and Parmesan flavor. They’re best when served warm. However, they can be made ahead of time and reheated immediately before serving.

Pesto Pinwheels

Pepperidge Farm puff pastry sheets (package of 2)
7 oz. container of pesto
Grated Parmesan cheese
1 egg, lightly beaten
water

1. Let pastry sheets thaw until soft, then roll out flat.
2. Spread 1/2 of the pesto onto each sheet.
3. Sprinkle Parmesan cheese over pesto.
4. Roll pastry sheet up, wrap in plastic wrap and chill for at least an hour.
5. Preheat oven to 350
6. Slice rolled pastry sheet in 1/4 inch slices.
7. Place slices on baking sheet, about 1 inch apart.
8. Mix lightly beaten egg with a small amount of water to make an egg wash.
9. Brush slices with egg wash.
10. Bake for 10-12 minutes or until pastry starts to brown.

Bacon and Cheese Log

Wednesday, January 28th, 2009

Danielle sent me her Bacon and Cheese Log recipe. It’s an old family favorite.

According to Danielle, “This recipe dates back to 1973 in our family and came to us from our great friends and neighbors across the street from the house I grew up in. I can remember eating it as a very young child at my parent’s parties and now I make it at my own parties. It is such a classic, delicious crowd-pleaser!”

The topping can be made in advance and frozen or prepared immediately before heating.
Bacon and Cheese Log

1 pound shredded sharp cheddar cheese
8 slices raw bacon, finely chopped
1 tsp. Worcestershire sauce
1 medium onion, chopped
1 tsp. dry mustard
2 tsp. mayonnaise
2 packages party rye bread

To Prepare in Advance:
1. Thoroughly combine all ingredients (except bread).
2. Roll into log 1-1.5″ diameter. Wrap in plastic wrap and freeze.
3. Slice frozen log into thin slices and place on party rye bread.
4. Place rye bread on cookie sheet and broil for several minutes, until cheese is browned and bubbly.

To Use Immediately:
1. Thoroughly combine all ingredients (except bread).
2. Spoon small amount of mixture onto bread.
3. Place rye bread on cookie sheet and broil for several minutes, until cheese is browned and bubbly.

Chocolate Chip Cheese Ball

Wednesday, January 28th, 2009

My cousin Debbie usually makes this Chocolate Chip Cream Cheese Ball for family gatherings. It’s sweet, but not too sweet, and is a nice contrast to other savory appetizers. Full-size graham crackers (pictured above) or miniature graham sticks make fun dippers.

Chocolate Chip Cheese Ball

1 package (8 ounces) cream cheese, softened
1/2 cup butter, softened
1/4 teaspoon vanilla extract
3/4 cup confectioners’ sugar
2 tablespoons brown sugar
3/4 cup miniature semisweet chocolate chips
3/4 cup finely chopped pecans, or mini chips
Graham crackers

1. In a mixing bowl, beat the cream cheese, butter and vanilla until fluffy.
2. Gradually add sugars; beat just until combined.
3. Stir in chocolate chips.
4. Cover and refrigerate for 2 hours.
5. Place cream cheese mixture on a large piece of plastic wrap; shape into a ball.
6. Refrigerate for at least 1 hour.
7. Just before serving, roll cheese ball in pecans or mini chips. Serve with graham crackers.

Spinach and Artichoke Dip

Friday, December 19th, 2008

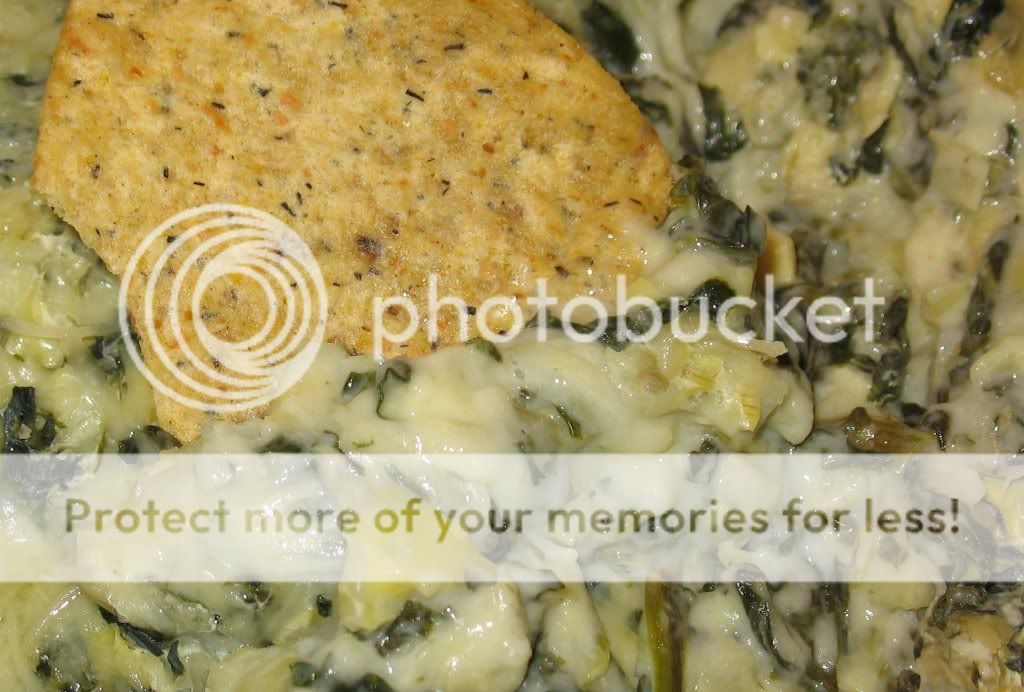
I’ve received the Kraft Food and Family magazine for a few years. It’s a free, seasonal publication that contains easy recipes for everyday meals, appetizers and desserts. I have a number of Kraft recipes in my “Recipes to Try” binder, including this simple one for Spinach and Artichoke dip.

This spinach and artichoke dip recipe is delicious and easy to prepare. It’s funny how two vegetables that don’t look or smell too good on their own can taste so wonderful when combined with a few other ingredients.

I followed the recipe pretty closely. I used Cain’s Fat Free Mayonnaise, as I have found this to be the most flavorful of the reduced fat/fat free mayos I’ve tried. Because I wasn’t paying close attention, I added 1/4 cup more mozzarella cheese than the original recipe called for. Since I liked the creaminess of the recipe, I’ll keep adding 3/4 cup of mozzarella cheese. In the future, I’ll probably add more garlic powder because I would prefer a little more garlic flavoring.

I served the spinach and artichoke dip with multi-grain Tostitos, but I also saw guests dipping assorted crackers. The dip was a hit!

Cheesy Spinach and Artichoke Dip

From KraftFoods.com

1 can (14 oz.) artichoke hearts, drained, finely chopped
1 pkg. (10 oz.) frozen chopped spinach, thawed, drained
3/4 cup Grated Parmesan Cheese
3/4 cup Mayonnaise
3/4 cup Shredded Mozzarella Cheese
1/2 tsp. garlic powder

1) Preheat oven to 350.
2) Mix all ingredients until well blended.
3) Spoon into 9-inch pie plate or quiche dish.
4) Bake uncovered for 20 minutes, or until heated through

This dip can be assembled in advance. Cover and refridgerate for up to 24 hours. Bake, uncovered, as directed, but add 5-10 minutes more to ensure that the dip is heated through.

Stuffed Mushrooms

Friday, December 19th, 2008

Stuffed mushrooms are a favorite appetizer of mine, and I was thrilled to receive this easy recipe from a friend of mine. I’m not a fan of seafood, so I was happy to find a recipe that did not require it.

As written, this recipe seems to produce more stuffing than is needed. I’ve tried scaling it differently, but always end up with a little extra. I typically use a little less olive oil than the recipe calls for and frequently add a few shakes of dried oregano.

The resulting stuffed mushrooms are soft and tender with a moist, flavorful filling.

Stuffed Mushrooms

1 lb mushrooms
1 tbsp dried parsley
1/2 cup grated Parmesan cheese
6 tbsp olive oil, divided
1/2 cup bread crumbs
1/4 tsp garlic powder
2 eggs

1) Preheat to 350
2) Clean mushrooms and remove stems.
3) Pour 2 tbsp olive oil in the bottom of an 8X8 glass plan
4) In a small bowl, mix bread crumbs, cheese, eggs, parsley, garlic powder and two tbsp oil.
5) Fill mushroom caps and place in pan.
6) Bake, covered with foil, for 20-30 minutes. Mushrooms are done when water appears in the bottom of the pan.
7) Serve immediately.
5) Pour remaining oil over tops of mushrooms.

Artisan Bread

Thursday, December 11th, 2008

I love bread.

Despite my love of bread, I did not try making it until I found this recipe. There was something intimidating about working with yeast (silly, I know) and I didn’t want to deal with hand-kneading bread for several minutes. Last winter, I stumbled upon a review for Artisan Bread in Five Minutes a Day by Jeff Hertzberg and Zoe Francois in the Boston Globe. Easily creating crusty no-knead artisan bread at home with a bowl and spoon? I was sold!

The central idea behind Artisan Bread in Five Minutes a Day is that “Pre-mixed, pre-risen, high moisture dough keeps well in the refrigerator.” Initially mixing the dough takes about 10 minutes or less and shaping/baking a loaf only requires 5 minutes of attended preparation time.

The book contains several dough recipes, and each of these recipes can be shaped into different kinds of loaves or enhanced with additional flavors. So far, I have only used the Master Recipe to make a basic boule. The loaves I have baked have a nicely crackled crust and an airy, moist interior.

I follow the Master Recipe quite closely. While the recipe calls for unbleached flour, I often use bleached flour because that is what I usually have on hand. It’s worth noting that book suggests using the scoop and sweep method to measure flour: gently scoop the flour and level with a knife or spatula – don’t press down. I also shape my dough into an oblong loaf, as opposed to a boule.

The Master Recipe makes enough dough for 4 1 pound loaves of artisan bread. The book claims that the dough can be refrigerated for up to two weeks, but it hasn’t lasted that long for me. For this reason, I usually halve the recipe and only make 2 loaves.

I’ve found that the dough is lighter and airier if you allow it to rise for 3-4 hours. It’s much easier to work with the dough if you refrigerate it for several hours before shaping a loaf. Regardless of when you handle the dough, it is sticky. I make sure to remove my rings and sometime spray some cooking spray on my hands.

The recipe suggests using a pizza peel coated in corn meal to move the dough into the oven. I have found that a rimless cookie sheet coated with a generous coating of flour works fine. Corn meal does make the transfer easier, but I’ve just started using it recently. While the recipe suggests working dough by hand, it’s also possible to mix it using a stand mixer.

The master recipe from Artisan Bread in Five Minutes a Day is available online, but the book goes into much more detail and provides a number of other recipes. I highly recommend it!

Artisan Bread in Five Minutes A Day: Master Recipe

Makes four 1-pound loaves

3 cups lukewarm water (about 100? F)
1 1/2 tablespoons granulated yeast (1/2 tablespoon = 1 1/2 teaspoons)
1 1/2 tablespoons kosher or other coarse salt
6 1/2 cups unsifted, unbleached all-purpose white flour
Cornmeal for the pizza peel

1.In a 5-quart bowl, mix the yeast, water and salt. Add all the flour, then use a wooden spoon to mix until all ingredients are uniformly moist. It is not necessary to knead or continue mixing once the ingredients are uniformly moist. This will produce a loose and very wet dough.

2.Cover with a lid (not airtight). Allow the mixture to rise at room temperature until it begins to collapse, about 2 hours, but no more than 5 hours.

3. After rising, the dough can be baked immediately, or covered (non completely airtight) and refrigerated up to 14 days. The dough will be easier to work with after at least 3 hours refrigeration.

4. On baking day, prepare a pizza peel by sprinkling it liberally with cornmeal to prevent the bread from sticking when you transfer it to the oven. Uncover the dough and sprinkle the surface with flour. Pull up and cut off a 1-pound (grapefruit-size) piece of dough (serrated knives are best). Store the remaining dough in the bowl and refrigerate for baking at another time.

5. Hold the mass of dough in your hands and add a little more flour as needed so it won’t stick. Create a smooth ball of dough by gently pulling the sides down around to the bottom, rotating the ball a quarter-turn as you go. While shaping, most of the dusting flour will fall off. The bottom of the loaf may appear to be a collection of bunched ends, but it will flatten out during resting and baking. Shaping the loaf this way should take no more than 1 minute.

6.Place the dough on the pizza peel. Allow the loaf to rest for about 40 minutes. It does not need to be covered. The bread may not rise much during this time.

7. Twenty minutes before baking, place a pizza stone on the center rack of the oven. If you don’t have a baking stone, use another baking sheet. Remove any upper racks. Place a broiler pan on a rack below the pizza stone or on the floor of the oven. Preheat oven to 450 F.
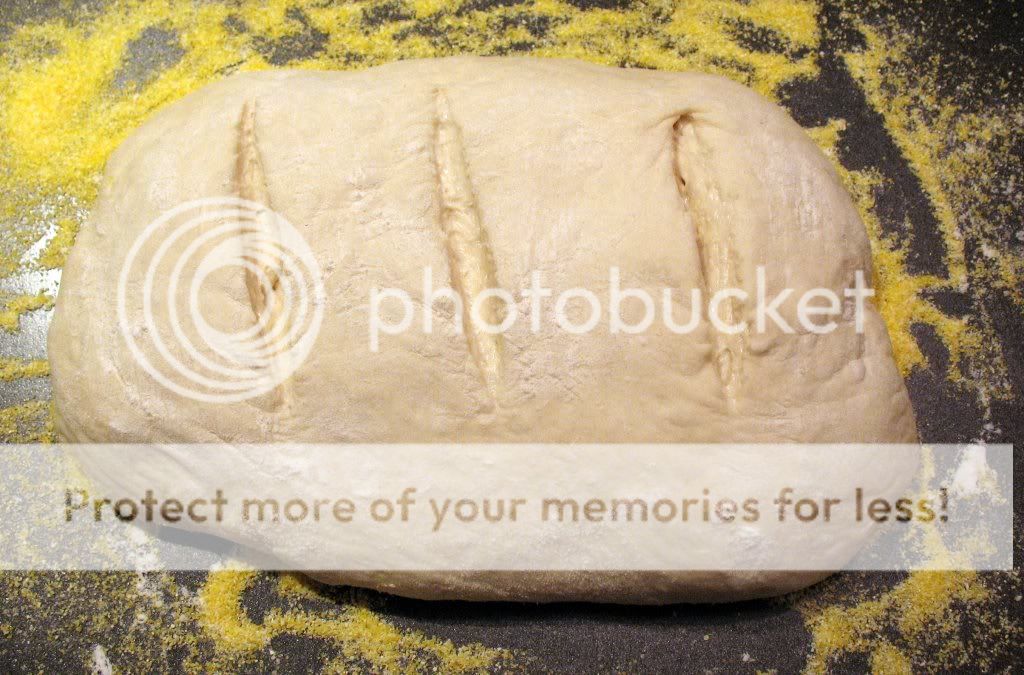
8. When the dough has rested for 40 minutes, dust the top liberally with flour, then use a serrated knife to slash a 1/4-inch-deep cross or tic-tac-toe pattern into the top.

9.Slide the loaf off the peel and onto the baking stone. Quickly but carefully pour 1 cup of hot water into the broiler tray and close the oven door.

10.Bake for about 30 minutes, or until the crust is nicely browned and firm to the touch. Allow the bread to cool completely, preferably on a wire cooling rack.

Black Bean and Corn Quesadillas

Thursday, November 20th, 2008

Since our evening was quite busy, my husband and I opted to have appetizers for dinner. We both love Mexican food. It’s tasty, fun to make and pairs perfectly with a yummy margarita. We decided that quesadillas would be a quick, filling appetizer-for-dinner.

I adapted this recipe from the “Black Bean Quesadilla” recipe in Favorite Brand Name Mexican. My husband bought this cookbook for my birthday, and I love it. Not only does it contain quite a variety of recipes, but it’s well-organized and chock full of lovely photos. I really like to see picture of what I’m making.

The original recipe does not include corn and only calls for 1/2 cup of black beans. Adding the corn and doubling the amount of beans makes for a very filling quesadilla. I also increased the amount of cheese by about 1/4 of a cup, because I like cheesy quesadillas. Extra cheese also helps to hold things together.

This is not a recipe that needs to be followed carefully. Have fun changing proportions and switching up ingredients to include your favorite mix of flavors!

Black Bean and Corn Quesadillas

Cooking spray
4 8-inch flour tortillas
1 cup shredded cheese (cheddar or Mexican blend are perfect)
1 cup canned black beans, rinsed and drained
1 cup corn (if using frozen, thaw first)
2 green onions with tops, sliced
1/2 tsp ground cumin
1 tbsp dried cilantro
salsa and sour cream for garnish

1. Preheat oven to 450 degrees. Spray large nonstick baking sheet with cooking spray. Place two tortillas on baking sheet.
2. Combine beans, corn, green onions, cumin and cilantro in a small bowl; mix lightly.
3. Spoon corn and bean mixture onto tortillas. Sprinkle cheese over mixture.
4. Top with remaining tortillas and coat tops with cooking spray.
5. Bake 10-12 minutes or until cheese is melted and tortillas are lightly browned.
6. Cut each quesadilla into 6 wedges. Top with salsa and sour cream, if desired.