Authors
Beth
Kathleen
Lisa
Contact
domesticpursuits [at] gmail.com
Categories

Archive for the ‘Baked Goods’ Category

Lemon Meringue Pie

Tuesday, May 1st, 2012

My Nana made the best Lemon Meringue pie.  Really, she made many delicious pies – standouts include apple and mincemeat – my favorite though was probably her lemon meringue variety.  The meringue was always so perfectly browned on the peaks, but yet so soft and springy - came out just right every time.   She was a great cook – even her Minute rice was somehow more delicious than any other Minute rice I ever tasted.  And her wax beans – now that was a tasty side dish.  Nana always kept us kids well fed – whether it was refrigerated Little Debbie cakes, fruit cups, or her favorite Jello, we loved going to Nana’s for a special treat.  She passed away at the age of 96 (almost 97!) last week, and although she had not been well enough to cook in a few years, I can remember her delicious lemon meringue pies like they were baked yesterday.

In honor of my lovely Nana, I wanted to post a recipe that will always make me smile and think of her.  Not sure I’ll ever quite be able to replicate it, as I’m pretty sure the reason it tasted so awesome was that it was made with love by my Nana…plus, as my cousin (the formally trained pastry chef) put it when she tried to learn how to make Nana’s apple pie – ‘that’s not a recipe!  That’s guessing!’   But, here’s my best effort.

I remember I tried this once ages ago back in college, and used instant lemon pudding which promptly melted all over my oven when I attempted to brown the meringue – a rookie mistake to be sure!  Now that I’m all grown up though – I decided to make my pie filling from scratch, using the miniature pie maker that my husband got me for Christmas (I swear, this is not a unitasker – I can make mini lemon meringue pie, apple pie, french meat pie, empanadas, pumpkin pie…you name it, I can make it in my mini-pie maker.)  I found a recipe aptly called ‘Grandma’s Lemon Meringue Pie‘ – It was actually surprisingly quick to make, and the meringue was spot-on.  I did feel the filling was a little on the runny side…but then again, I barely let it cool before digging in.  I think my Nana would be proud.

Lemon Meringue Pie – from Emilie S. via Allrecipes.com

Ingredients:

  • 1 cup white sugar
  • 2 tablespoons all-purpose flour
  • 3 tablespoons cornstarch
  • 1/4 teaspoon salt
  • 1 1/2 cups water
  • 2 lemons, juiced and zested
  • 2 tablespoons butter
  • 4 eggs, separated
  • One nine inch pie crust, baked – or if you prefer, 8-12 mini pie crusts, baked
  • 6 tablespoons white sugar

In a medium saucepan, combine 1 cup sugar, flour, cornstarch and salt with a whisk.  To the mixture, add water, lemon juice, and lemon zest.  Cook over medium heat until mixture begins to thicken and comes to a boil.  Add the butter.  Beat egg yolks.  Take 3-4 tablespoons of the hot mixture and add this to the egg yolks, stirring well (this tempers the mixture so you will not have lemony scrambled eggs in your pie.)  Add the egg yolks back to the saucepan and continue to cook, stirring constantly, until the mixture is thickened.  Remove from the heat and pour into the prepared pie crust.  Time now to make the meringue. First, preheat your oven to 375 degrees.   Take the egg whites and in a large very clean glass bowl (or in your trusty stand mixer) beat on high speed until foamy.  Add sugar gradually, sprinkling over the egg foam.  Continue to beat until the mixture appears glossy and starts to form stiff peaks.  Spread the meringue over the pie, sealing the meringue to the edge of the crust.  Bake at 375 degrees for 10 minutes, or until the meringue appears browned on top.  Cool completely, and enjoy!

Cheese Babka

Monday, April 16th, 2012

Alright, alright, we know.  It has been over 3 months since this blog was updated.  What can I say, life gets in the way sometimes!  To be honest, it’s just really hard for a working gal to take good food photos during the winter months.  Now that it stays light after 6pm, I’m good again.  Anyway, I’ve been cooking plenty – but this season on Domestic Pursuits, I plan to go with a fresh angle.  I tend to blog about healthy things to begin with, because I’m a pediatrician and as I’m sure everyone in the US probably knows by now, we are all battling an obesity epidemic. (Personally, I want to get back down to my pre-residency size – something about all those hours of overnight work makes you eat a whole lot of fried chicken fingers and midnight chocolate chip waffles!)

Anyway – just because we all should be careful to consider what we consume I wholeheartedly believe it does not mean we should have to eat icky things.  No rice cakes and Slim Fast over our house.  I’ve made it my goal to become more active and eat healthier this year, and this blog posting will be a good start…

…or not.  After all, I am going to start off my healthy kick by blogging about Cheese Babka.  Well, you’ve gotta eat something sweet sometime, or else you’ll fail at your goal!  So here you go, one more rich, delicious baked good posting before the healthy things begin.  This is an Easter treat with Eastern European roots that we enjoy at my in-laws every year, and as we were spending the holiday up north where there are less Eastern European bakeries to frequent, I decided I would whip some up myself.  Cheese is our preferred Babka – definitely no lesser Babka for our dinner!

Get the reference?

Making your own Babka is time consuming, but man is it worth the effort when you have checked every bakery in the area with no luck.  The perk is much of the time is unattended – ie, letting the dough rise and such.  Plus, this makes 3 loaves of Babka – so you can share with friends.  The recipe I found calls for a crumb topping – however, the Babka I usually enjoy does not have this so I simply omitted it.  Compared to other Babka recipes, this really is a healthier Babka – only 4oz butter, and I substituted one whole egg for 2 of the egg yolks.  Plus, I used light cream cheese.  It came out fantastic.

Cheese Babka – adapted from The Bakers Guide

Makes 3 loaves

Dough:

  • 2 packages or the equivalent instant dry yeast
  • 1/4 cup warm water
  • 1/2 cup sugar
  • 1 cup milk, hot but not boiling
  • 4oz butter, softened
  • 1/2 tsp salt
  • 1 egg, plus 1 egg yolk
  • 5 cups (22.5oz by weight) all purpose flour, plus more if needed
  • 1 egg white beaten with 1 tbsp water for egg wash

Filling:

  • 2 x 8oz packages of low-fat cream cheese at room temperature
  • 8oz by weight of sugar
  • 1/4 tsp salt
  • 1 egg yolk
  • 2 tablespoons flour

Stir yeast and warm water together and set aside for about 5 minutes, or until mixture appears frothy.  Grease 3 standard-size loaf pans.  In the bowl of your trusty stand mixer, add hot milk, butter, sugar and salt mixing well until butter is melted.  To the warm milk mixture, add egg, egg yolk, and yeast mixture.  Add flour gradually to the bowl as the machine kneads using the hook attachment.  Knead for several minutes, or until dough appears smooth and elastic.  (I had to add a little extra flour at this point, probably about 1/4 cup more).  Place ball of dough into a greased bowl, turning to coat complete.  Cover loosely with plastic wrap, and let rise in a warm place until doubled – about 2-3 hours.

When dough is nearly completely risen, prepare cheese filling by combining all ingredients and mixing well.  Set aside.

Divide dough into 3 equal portions.  On a lightly floured surface, roll one portion out to approximately 1/4 inch thickness.  Spread 1/3 of cheese filling onto the dough.  Fold ends inward and roll the dough up, placing it seam-side downwards into the prepared loaf pans.  Repeat with the other 2 portions of dough.  Brush dough with the egg wash.  Cover lightly with greased plastic wrap (so the bread doesn’t stick to it!)  Let loaves rise again in a warm place for an additional 2 hours or until they again appear doubled, peeking over the tops of the loaf pans.

Preheat oven to 350 degrees.  Place 3 loaf pans side-by-side on a rack placed in the middle of the oven.  Bake for about 45-50 minutes, or until a skewer comes out clean when inserted into the center of the loaf.  Cool in pan 5 minutes, then loosen the sides of the loaves.  Cool another 30 minutes.  Then remove loaves from the pans and let cool completely.  Enjoy!

Peppermint Brownie Cake Pops

Monday, January 2nd, 2012

Ok so I recently found the Peppermint Brownie Cake Pops at Starbucks and my life has not been the same since.  They are that delicious.  And somehow, under 200 calories…I’m guessing that’s because they are so small, but really this sweet treat is all I really need to get me through my day.  I also, however, realized that they are sadly seasonal items – so probably sometime this month they will be trickling out of stores near you.  Obviously, I could not let this happen without figuring out a reasonable knock-off recipe prior to the inevitable end of the holiday season.

I have to say, this recipe is a pretty passable version of the deliciousness that is the Peppermint Brownie Cake Pop.  I made it for Christmas this year, and it was a big hit to say the least.  It also is very easy, even if you’ve never tried cake pops before.  Basically Cake Pops are what you make if your cake comes out all crumbly and fall-apart-y.  You combine the cooked and crumbled cake with frosting and form into balls, about 1.5 inches in diameter, then freeze until semi-solid.  For the finishing touch, you put a stick into the ball of crumbled cake (since it’s frozen, it won’t fall apart) and then dip into your choice of coating, which for me was melted white chocolate.  Finally, sprinkle with whatever cute/tasty decoration you wish to use.

We sincerely enjoyed making these, and also eating them...although I do not recommend licking the candy coating off of a butter knife as my sous chef is.


I used a store-bought brownie mix, seeing as I was going to be crumbling it all up and mixing it with frosting to make it even moister and more delicious.  A tip for melting white chocolate here -if you add about 1-2 tsp of vegetable oil, the white chocolate melts much more smoothly, and is about a million times easier to work with.  I suggest using a double boiler for this recipe, (rather than my go-to chocolate melting strategy – the microwave) as it takes a while to dip all of the cake balls into the chocolate, and this will keep your white chocolate good to go the whole time.  Lastly, I would strongly recommend having a block of unused floral foam on hand, so that you can place the sticks into it and have the cake pops harden without a flat side.  Makes them much more pretty.

Peppermint Brownie Cake Pops – a la Starbucks

  • 1 boxed brownie mix, prepared according to package instructions and cooled
  • 4oz cream cheese, softened  **you may use frosting instead of cream cheese if you prefer a sweeter finished product
  • 1 package white chocolate chips
  • 1-2 tsp vegetable oil
  • 1 bag starlight mints or 1 box candy canes, crushed
  • Candy sticks, found in the candy-making section of your local craft store

Place prepared brownies into the bowl of your stand mixer and turn it on.  Add softened cream cheese, and mix until the brownie crumbs are moistened.  Form into 1.5 inch balls and place on a parchment-lined cookie sheet.  Freeze for at least 1 hour.  Remove from freezer and insert a candy stick into each ball.  Place your white chocolate chips and vegetable oil into the bowl of a double boiler and place over a small amount of boiling water.  When the chips start to become glossy-looking, stir until they melt completely and are smooth.  Dip each cake pop into the melted white chocolate.  Immediately dip the cake pop into the crushed peppermint.  Finally, place the cake ball sticks into a waiting block of unused floral foam, so that your cake pops end up perfectly round.  Enjoy!

National Cupcake Day

Thursday, December 15th, 2011

Happy National Cupcake Day!!! 

My new favorite holiday.


In honor of National Cupcake Day, I thought I’d post a few of our favorite cupcake recipes here on Domestic Pursuits. 

Happy Cupcaking!!


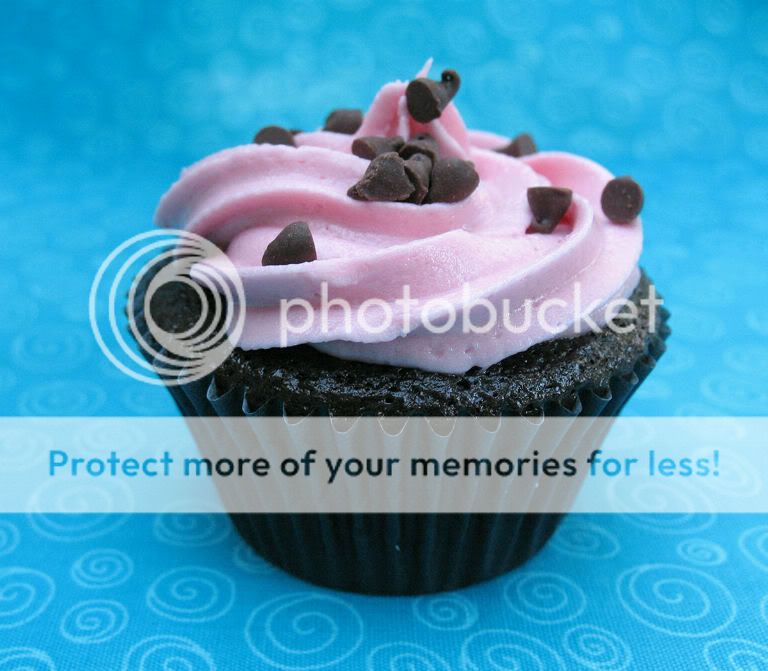
These Chocolate Peppermint Brownie Cupcakes would be absolutely wonderful this time of year.  They are minty and moist and fabulously rich – perfect to bring to a holiday party!  If you prefer a lighter chocolate cupcake with a minty touch, try these Chocolate Mint Cupcakes.


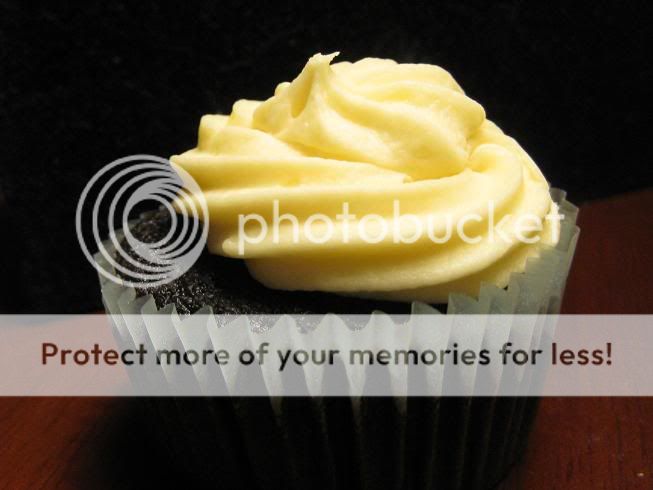
I personally love these Chocolate Whiskey Cupcakes, which involve my favorite Irish trio – Irish Whiskey, Irish Cream, and Guinness.  Enjoy them on St. Patty’s day, or really any day where you feel like embracing your Irish side.  Like National Cupcake Day.


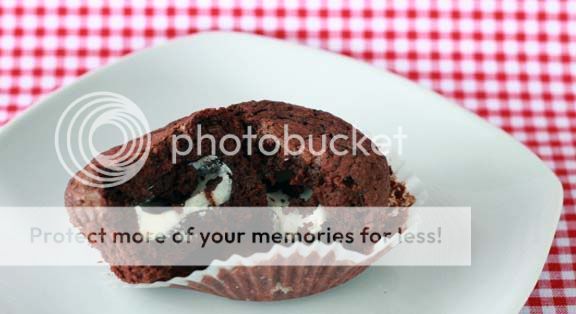
This is one of our favorite recipes here on Domestic Pursuits – Oreo Cupcakes - they are seriously delicious.  We both have a weakness for Oreos here on Domestic Pursuits and these cupcakes definitely indulge this fondness of ours.  I actually think it would be pretty neat to try them with the seasonally distributed mint Oreos one finds at the supermarkets this time of year – or with the similar product distributed at Trader Joe’s, which frankly I think I may like even better. 

Finally, I just purchased more vanilla beans so that I could go ahead and make these Vanilla Bean Cupcakes again.  (Among other soon-to-be-posted Vanilla-y treats….stay tuned for homemade marshmallows!!  And maybe some sea salt caramels too.)

Pumpkin Whoopie Pies

Friday, October 28th, 2011

Pumpkin Whoopie Pies

In addition to loving just about all things pumpkin, I am also posses an unabashed affection for whoopie pies.  While I have sample many varieties of this fun treat, I had yet to try pumpkin.  My search for the perfect pumpkin whoopie pie recipe led me to Two Fat Cats Bakery in Portland, Maine.   The state of Maine, and this bakery in particular, is know for its whoopie pies.

The filling recipe called for maple extract, which I was unable to find.  I substituted maple syrup and a little vanilla extract, which imparted a warmth and sweetness.

I can’t say enough good things about these pumpkin whoopie pies!  The cakes are soft, fluffy and tender.  The maple filling is surprisingly light in both texture and taste, but holds up very well as a filling. Paired together, the lightly sweet filling beautifully complements the warmly spiced cakes.  I’m happy to say that these pumpkin whoopie pies have earned a place in my regular fall baking rotation!

Pumpkin Whoopie Pies
Yields 18-23 Pies

For the Cakes
3 cups all purpose flour
2 tsp ground cinnamon
1 1/2 tsp baking powder
1 1/2 tsp baking soda
3/4 tsp salt
3/4 tsp ground nutmeg
3/4 tsp ground cloves
6 tbsp (3/4 stick) unsalted butter, room temperature
3/4 cup (packed) golden brown sugar
3/4 cup sugar
1/2 cup vegetable oil
3 large eggs
1 15-ounce can pure pumpkin puree
1/2 cup milk
Nonstick vegetable oil spray

For the Filling
1 cup powdered sugar, sifted
1 cup (2 sticks) unsalted butter, room temperature
1 7-ounce jar marshmallow creme
2 tbsp maple syrup
1/2 tsp vanilla extract

Cakes
1. Sift first 7 ingredients into large bowl.
2. In another large bowl, beat butter and sugars with an electric mixer until well blended.
3. Gradually beat in oil and then add eggs 1 at a time, scraping down bowl and beating to blend between additions. Beat in pumpkin.
4. Add half of the dry ingredients, followed by the milk and then the remainder of the dry ingredients. Between additiona, beat to blend and scrape down the sides of the bowl.
5. Cover and chill batter 1 hour.
6. Preheat oven to 350°F, arranging one rack in bottom third of oven and one rack in top third of oven. Line 2 baking sheets with parchment and spray lightly with nonstick spray.
7. Spoon batter onto baking sheet to form cakes (about 3 level tablespoons each), spacing apart. Let stand 10 minutes.
8 Bake cakes until tester inserted into centers comes out clean, about 20 minutes, rotating sheets halfway through baking.
9. Cool cakes completely on baking sheets on rack. Using metal spatula, remove cakes from parchment.
10. Line cooled baking sheets with clean parchment; spray with nonstick spray, and repeat baking with remaining batter.

Filling
1. In a large bowl, beat sugar and butter with an electric mixer until fluffy, about 2 minutes.
2. Add marshmallow creme and maple extract, beating until blended and smooth. Store at room temperature.

Assembly
1. Spoon about 2 tablespoons filling on flat side of 1 cake.
2. Top with another cake, flat side down.
3. Repeat with remaining cakes and filling.

Source: Two Fat Cats Bakery via Bon Appetite

Pumpkin Scones

Thursday, October 27th, 2011

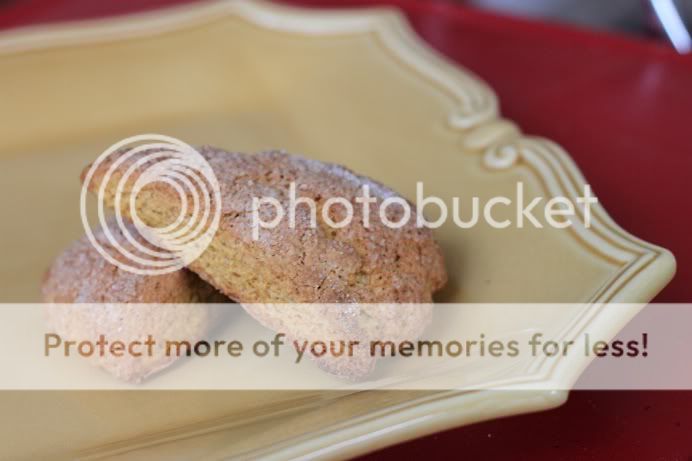
So I really love the Pumpkin Scones that are available this time of year at Starbucks – I do not however like the impact they have on my wallet.  A few bucks every time I pick up an afternoon coffee really starts to add up!  This year I set out to find a Pumpkin Scone recipe that would be delicious, yet not cause me to drop those extra few dollars every time I go for a coffee run this fall.  This recipe is a winner.  It’s quite easy and the scones come out light and fluffy.  I cannot vouch for healthiness – but really, doesn’t one mostly eat scones because they are good for the soul?  These ones are particularly good for enjoying with afternoon tea by a warm fire. 

The first time I made these, I assembled the dough entirely in my food processor – which worked quite well indeed, particularly for ensuring even butter distribution.  The second time just for kicks I tried making it in my stand mixer, which also came out quite well although I did have a few larger chunks of butter left over.  It didn’t seem to affect the scones in any way though.  I can honestly recommend both manners of constructing these scones.  I also will emphasize the importance of baking on parchment – this prevented the scones from caramelizing on the bottom. 

I really didn’t make any major substitutions the first time, except for leaving out cloves and ginger again (darn it, I really need to pick up ground ginger!), and also completely eliminating the glaze as I prefer my scones to be not quite so sugary.  I also added chocolate chips, because who does not like chocolate chips!  The second time, I realized I didn’t have any half and half, milk, or cream on hand – so I ended up using non-dairy flavored coffee creamer (this one happened to be caramel) which added a little extra something to the flavor.  The texture still was perfect.  Also, I was going for more of a breakfasty treat this time, so left out the chocolate chips.  Don’t be afraid to experiment!  We would love to hear about a modification you try to one of these recipes.

Pumpkin Scones – adapted from Sweet Pea’s Kitchen

For the Scones:

  • 2 cups all-purpose flour
  • 1/4 cup plus 3 tablespoons granulated sugar
  • 1 tablespoon baking powder
  • 1/2 teaspoon salt
  • 1/2 teaspoon ground cinnamon
  • 1/2 teaspoon ground nutmeg
  • 6 tablespoons cold butter, cut into 1-inch cubes
  • 1/2 cup pumpkin puree
  • 3 tablespoons milk/half and half/non-dairy coffee creamer (flavored is fine!)
  • 1 large egg
  • Additional milk and sugar for dusting

Preheat oven to 425 degrees F.  Mix dry ingredients (flour, sugar, baking powder, salt and spices) together the bowl of your stand mixer (or food processor – or really any large bowl if you would rather do this by hand!)   Mix dry ingredients well.  Add cubed cold butter to the dry ingredients and turn on your stand mixer/food processor (or use a pastry cutter to cut the butter into the dry ingrediends by hand) until the butter is broken into small pieces and the mixture resembles the texture of cornmeal.  In a separate bowl, whisk together pumpkin, egg, and milk (or whatever substitute you pick).  Gently fold the liquid ingredients into the dry ingredients. (The key to flaky light scones is not overworking the dough; I used the food processor for this step the first time and they came out fine, and I used the stand mixer on low for this step the second time.)  Turn the dough out onto a lightly floured surface and pat into a 2 x 6-8inch diameter circles of dough, about 1 inch thick.  Cut each circle of dough into 8 pieces.  Place on a parchment-lined baking sheet.  Brush each scone with a light coating of milk (or whatever substitute you pick) and sprinkle lightly with sugar.  Bake at 425 degrees F for about 12-14 minutes, or until the tops are lightly browned.  Enjoy!

Pumpkin Chocolate Chip Cookies

Wednesday, October 26th, 2011

Pumpkin Chocolate Chip Cookies

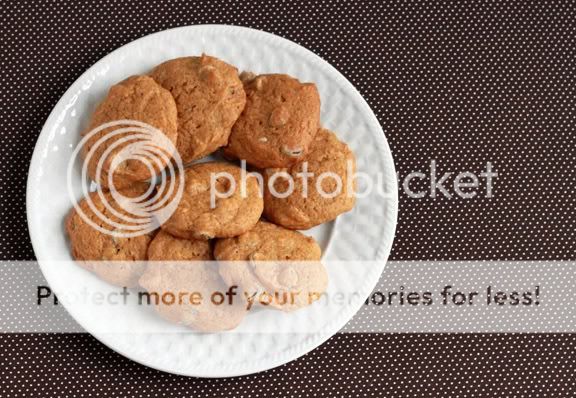
Pumpkin chocolate chip cookies have become a seasonal favorite in my house and featured among the first recipes that I blogged back in 2008.  Since the recipe is buried in the archives and accompanied by a terrible photograph, I figured I would dust it off and repost in order to share with my newer readers.

These cookies are amazing!   Pumpkin, cinnamon, nutmeg and chocolate chips – what’s not to love?  Over the years, I have managed to hook many of my friends on this wonderful cookie.  One of my friends from church professes that pumpkin chocolate chip cookies are his absolute favorite.  I’ve been told that the cookies that I give him rarely make it home, or even out of the church parking lot!

Because of the pumpkin puree, these cookies have less butter than a standard chocolate chip cookie.  This results in a cookie that is soft, tender and almost cake-like.  Don’t hesitate to add more pumpkin if the dough seems at all dry or not pumpkin-y enough for your liking.  I’ve easily added up to an additional 1/4 cup to a batch. Make sure you use pumpkin puree, not canned pumpkin pie filling.

Pumpkin Chocolate Chip Cookies
Yield about 3-4 dozen cookies

2 1/2 cups flour
1 teaspoon baking soda
1 teaspoon baking powder
1 1/2 teaspoon ground cinnamon
1 teaspoon ground nutmeg
1/2 teaspoon salt
1/2 cup (1 stick) butter, at room temperature
1 1/2 cups sugar
1 cup canned pumpkin puree (I add more if the batter seems dry)
1 egg, beaten
1 teaspoon vanilla extract
1 package (or a little less) semisweet chocolate chips or chunks

1. Set the oven to 350 degrees.
2. In a medium bowl, sift together the flour, baking soda, baking powder, cinnamon, nutmeg, and salt. Set aside.
3. In an electric mixer with the paddle attachment, cream the butter and sugar on medium speed until fluffy. Add the pumpkin, egg, and vanilla and beat just until blended.
4. Mix in the dry ingredients.
5. Remove the bowl from the mixer stand. With a rubber spatula, stir in the chocolate chips or chunks.
6. Drop the batter by heaping teaspoons 1 inch apart on the baking sheets.
7. Bake the cookies for 13 to 15 minutes or until lightly browned. Let the cookies cool on the sheets for a few minutes. Transfer to wire racks to cool completely.

Adapted from the Boston Globe

Pumpkin Spice Bread

Tuesday, October 25th, 2011

Pumpkin Spice Bread

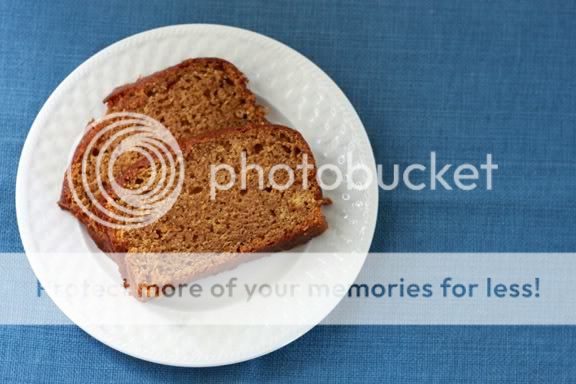
If you’re like me and you enjoy pumpkin, warm fall spices and baking, then you should make this bread.  Like most quick breads, it comes together quickly with minimal mess using pantry staples.  In a little more than one hour, you’ll have not one, but two loaves of perfectly spiced warm pumpkin bread.  It’s perfect for breakfast, an afternoon snack or even dessert

As written this recipe yields two 9×5 loaves.  While you probably don’t need two full loaves of pumpkin bread lying around, I’m sure you wouldn’t mind.   I baked up a 9×5 loaf and three mini loaves with the intention of freezing some, but  it didn’t last long enough to make it to the freezer.

Pumpkin Spice Bread

Pumpkin Spice Bread
Yields 2 9×5 loaves

3 cups sugar
1/2 cup vegetable oil
1/2 cup unsweetened applesauce (or oil)
4 eggs, lightly beaten
1 (16 ounce) can solid pack pumpkin
3 1/2 cups all-purpose flour
1 tsp baking soda
1 tsp salt
1 1/2 tsp ground cinnamon
1 tsp ground nutmeg
1/2 tsp baking powder
1/2 tsp ground cloves
1/2 tsp ground allspice
1/2 cup water

1. In a large bowl, combine sugar, oil, applesauce and eggs. Add pumpkin and mix well.
2. Add dry ingredients to a separate bowl and whisk to combine.
3. Add dry ingredients to the pumpkin mixture alternately with water.
4. Pour into two greased 9-in. x 5-in. x 3-in. loaf pans and bake at 350 degrees F for 60-65 minutes or until bread tests done.
5. Cool in pans 10 minutes before removing to a wire rack; cool completely.

Source: Allrecipes.com

Orange Chocolate Chip Scones

Thursday, July 14th, 2011

Orange Chocolate Scones

My 31st birthday is less than a week away and I haven’t made too much of a dent in my 30-While-30 list.  While there are a few things that I’ve made, but not photographed, the vast majority of items have remained untouched.  So, I haven’t tried my hand at homemade fondant or whipped up English muffins just for the heck of it, but I did leave my corporate job, take a handful of classes and start a company.  That has to count for something, right?  I still want to finish my list, but there’s no way it’s happening with less than a week to go.  I’ll come up with something. :)

But in the meantime, I want to share this recipe with my readers.  I added scones and shortbread (coming soon!) to my list because they pair beautifully with tea.  While I certainly enjoy a cup of tea on the go, selecting a tea from my growing collection, brewing a pot  and savoring it slowly with tasty treats has become a favorite past time.  I first made these scones for an afternoon tea party Lisa’s (my fellow blogger!) house.  We whiled away the afternoon in her dining room chatting, sipping icewine tea and nibbling on scones, shortbread, lemon bars, raspberry kuchen and tiny sandwiches.

Thanks to the dark chocolate, orange zest and heavy cream, these scones are soft and rich with warm orange undertones.  They’re delicious warm out of the oven or room temperature the next day.  Pair with a piping hot cup of tea for a sublime breakfast or afternoon snack.

Orange Chocolate Chip Scones

Yields 8 scones

1/4 cup granulated sugar
1 1/2 teaspoons orange zest
1 1/2 cups + 2 tablespoons all-purpose flour
2 tsp baking powder
Pinch of salt
1/2 – 3/4 cup dark or semi-sweet chocolate chips
1 cup heavy cream

1 tbsp unsalted butter, melted
Granulated sugar, for sprinkling

1. Preheat oven to 375 degrees F andline a baking sheet with parchment paper or a silicone baking mat.
2. Place the granulated sugar in a large bowl and add the orange zest and.  Using your fingers, rub the orange zest and the granulated sugar together until the sugar is uniformly moistened.
3. Add the flour, baking powder and salt, whisking to combine. Stir in the chocolate chips.
4. Pour in the cream and, using your fingers or a fork, stir together until combined.
5. Pour dough onto a lightly floured surface and lightly knead to bring dough together. Pat into an 8-inch circle and cut into 8 triangles.
6. Place triangles on prepared baking sheet, brush with the melted butter and sprinkle with the granulated sugar.
7. Bake for 15-20 minutes, or until the scones are just lightly browned. Transfer to a cooling rack to cool completely. Store at room temperature.

Source: Adapted from Brown Eyed Baker

Chocolate Chip Cookie Dough Cheesecake Bars

Sunday, June 26th, 2011

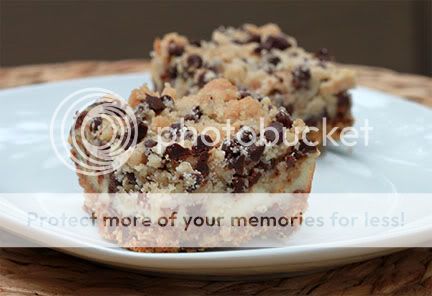
I know I’ve been gone for awhile, but I have a treat for you that may just make you forgive my lengthy absence from the blogging world:  chocolate chip cookie dough cheesecake bars!  Sound amazing?  They are!  How can you go wrong with a buttery chocolate-studded graham cracker crust, creamy layer of cheesecake and crumbly cookie dough topping?  In my book, you can’t.

While there are three different layers to whip up separately, each comes together quickly and easily.  The end result is amazing, and well worth the effort and array of dirty bowls!  Make sure you allow the bars to chill for awhile before slicing and eating.  They’re cool, creamy, sweet, tangy and rich.  A little goes a long way, but you’ll probably find yourself going back for seconds!

Chocolate Chip Cookie Dough Cheesecake Bars

1 1/2 cups graham cracker crumbs
4 tbsp butter, melted
1 tbsp sugar
2/3 cup mini chocolate chips

5 tbsp butter, melted
1/3 cup brown sugar
4 tbsp sugar
1/8 tsp  salt
1 tsp vanilla extract
3/4 cup flour
1 cup mini chocolate chips

8 oz. cream cheese, room temperature
1/4 cup sugar
1 egg
1 tsp vanilla extract

1. Preheat oven to 325.
2. Line an 8×8 pan with foil and coat with cooking spray.
3. Crush graham crackers into crumbs to make 1 1/2 cups. Mix with sugar. Stir in butter and then add chocolate chips.
4. Press crust mixture into bottom of pan of prepared pan. Bake for 6 minutes and then set on wire rack to cool.
5. In a medium bowl, stir together the butter, brown sugar, sugar, salt, and vanilla extract at until smooth. Fold in flour and mix until just incorporated. Stir in chocolate chips and set aside.
6. In a small bowl, stir cream cheese until soft. Add sugar, stirring until smooth. Add egg and vanilla extract, stirring just until blended.
7. Pour batter into cooled, baked crust. Drop cookie dough by teaspoonfuls over the top of the filling, sprinkling with extra mini chips. Gently press down.
8. Bake about 30 minutes, or until set. Transfer to wire rack to cool. Once completely cool, place in the refrigerator to chill several hours before serving.

Source: Bakingblonde’s Weblog

Subscribe
Email Registration  Email
  RSS
Recipe Sites
  • All Recipes
  • Cooking Light
  • Epicurious
  • Food Network
Archives
Sitemeter