Archive for the ‘Baked Goods’ Category

Rosemary & Olive Bread

Monday, April 19th, 2010

My husband and I just returned from a recent trip to the Waterworks restaurant in Philadelphia (which was fabulous, and I highly recommend.  Great views of the Schuylkill – both river and expressway) for our anniversary.  One of the most outstanding parts of the meal was the olive bread the restaurant served with dinner – now, I am normally not an olive-lover, but I gave it a try and it was fantastic!  When making bread this weekend to pair with some soup, I decided to go out on a limb and give baking my own olive bread a shot.  The rosemary balances very nicely with the olive flavor; it would be a great accompaniment to a special meal for company, but easy enough to make just for a night in with the family.  I based the recipe off of a bread recipe found in the Mark Bittman cookbook that we’re so fond of on Domestic Pursuits, making a few adjustments. 

Ingredients:

3 and 1/2 cups flour

2 tsp salt

1 tsp yeast

2 tsp chopped fresh rosemary

1/4 cup diced olives

1 and 1/2 scant cups of water

1 tablespoon olive oil

Instructions:

Mix the flour, salt and yeast in a bowl.  Add the rosemary and olives to the mixture.  Mix in the water and olive oil to form a dough.  If the dough is too dry (unlikely!) then add water 1 tablespoon at a time.  Let the dough rise in a warm place for 1-2 hrs, covered in a non-airtight container.  Knead the dough several times on a flour-dusted surface, folding so that the top is smooth.  Place the dough on a cornmeal dusted pizza peel and let rise for an additional hour.   In the meantime, place a pizza stone and a broiler pan in the oven.  About 20 minutes before the dough has finished rising, preheat oven to 450 degrees. Set aside a cup of warm water.   Just before baking, dust the dough with flour and slash the top of the dough with a very sharp knife.  Pour the water into the heated broiler pan, and quickly slide the dough onto the pizza peel.  Bake for 25-35 minutes, or until the crust is browned and the bread sounds hollow when tapped.  Enjoy!

Anisette Cookies

Tuesday, April 13th, 2010

My local grocery store’s bakery makes the most amazing Anisette Cookies – soft pillows of anisette goodness coated with a delicate sugar glaze.  They are especially tasty when consumed with a cup of piping hot Lady Grey tea.

On Sunday, I found myself planning a last-minute dinner with my parents and realized that I didn’t have anything to serve with tea after our meal.  With at 90 minutes to spare before our company arrived, I could have run to the store to pick up a pack of cookies, but I decided to bake my own.  A quick search on allrecipes.com yielded this fantastic recipe for Italian Anisette Cookies.

Since I didn’t want to have too many extra cookies lying around after dinner (if I bake them, I will eat them!), I halved the recipe and ended up with about 30 smaller cookies.  They were so easy to make – only 60 minutes elapsed from the time I started measuring my ingredients to when I dipped the last cookie.  I even had time to work on other food preparation while the cookies baked.

I followed the recipe exactly as written.  I did find that the icing required more water than noted in the recipe, so I just  kept adding a little at a time until I was able to achieve the desired consistency.    Some of the reviewer comments provided helpful information concerning how to tell that the cookies are done – it’s important to not let the cookies brown or even turn golden on the top.  I baked them for 8 minutes as directed and the resulting cookies were soft and fluffy, yet stable.

As expected, these cookies were delicious – the perfect complement to a relaxing cup of tea.  Some reviewers altered the recipe to use either almond extract or lemon extract in place of the anise… now I can’t wait to make tasty little lemon drops!


Anisette Cookies

Yields about 60 cookies

4 cups all-purpose flour
1 cup white sugar
1/2 cup milk
2 eggs
1 tbsp baking powder
3/4 cup vegetable oil
1 tbsp anise extract

1 cup confectioners’ sugar
2 tbsp hot water (at least)
1 tsp anise extract

1. Preheat oven to 375 degrees F.
2. In large bowl, whisk together flour, baking powder and white sugar.
3. Make a well in the center and add oil, milk, 1 tablespoon anise extract, and eggs. Mix together until dough is sticky.
4. Shape dough into 1-inch balls and place on a lightly greased cookie sheet, 1 inch apart. Flatten top slightly.
5. Bake for 8 minutes.
6. Dip cookies in icing while warm.

To Make Icing: Blend in 1 teaspoon anise extract and enough hot water to 1 cup confectioner’s sugar to form a smooth icing.

Tarte au Citron – Lemon Tart

Monday, April 5th, 2010

I spent most of last week trying to figure out what to bring to my in-laws’ for Easter dinner – and after days of deliberation concluded what better dessert than a lemony, buttery pastry topped with fresh berries to welcome spring!  Baking a tart always seemed very intimidating, but was always something I kept wanting to try!  Enter David Lebowitz, whose collection of pastry recipes look fabulous and yet quite possible – I figured this was the perfect scenario for giving his Tarte au Citron a try!  The prospect of making homemade lemon curd seemed like a tall order, but these days I’ve been up to the challenge!  Frankly making pastry crust was really much more intimidating - but the method Lebowitz uses was wonderful!  So much easier than working cold bits of butter into flour, and the crust came out light and flaky, just as it should!   I happened to have strawberries and blackberries on hand, so I used those as a garnish. 

For the crust:

6 tbsp unsalted butter, cut into pieces
1 tablespoon vegetable oil
3 tablespoons water
1 tablespoon sugar
1/8 teaspoon salt
1 cup flour

Preheat the oven to 410 degrees F.  Combine the butter, oil, water, sugar and salt in a Pyrex (or other ovenproof) bowl.  Place the bowl into the oven for 15 minutes – when the butter starts to brown at the edges.  Remove the bowl from the oven and carefully add the flour (it may splatter a bit!) to the bowl, mixing quickly until the dough forms a bowl and pulls away from the side.  Place the warm dough into the tart pan of your choice, and spread it slightly.  When the dough is cool enough to touch, press it into the pan and slightly up the sides.  Keep one small ball aside – about 1cm in diameter – for patching cracks.  I made a rectangular tart, 7 x 11 inches, and had just enough dough.  Pierce the tart with a fork, and then put the tart shell back in the oven for 15 minutes when it will be golden brown.  Remove from the oven.  To patch the cracks, take the reserved ball of dough and break it into small pieces; roll between your fingers to make a thin strip, and then press this into the cracks in the dough.  No need to bake further.  Cool completely before filling.

 For the lemon curd:

1/2 cup (125 ml) freshly-squeezed lemon juice
grated zest of one lemon, preferably unsprayed
1/2 cup (100 g) sugar
6 tablespoons (85 g) butter, salted or unsalted, cut into bits
2 large eggs
2 large egg yolks
Prebaked tart shell

Heat the lemon juice, lemon zest, sugar and butter in a sauce pan.  In a small bowl, beat together the eggs and yolks.  Take a small amount of the hot lemon juice mixture, and add to the egg yolks stirring constantly to warm them (but not scramble them!).  Add the egg yolk mixture back into the saucepan, stirring constantly over low heat until the mixture thickens and becomes slightly opaque.  Remove from heat, and force the liquid through a seive directly into the tart shell.  (This will remove all of the lemon zest and make it smooth.)  Place back in the oven for 5 minutes to set.  Let cool completely.  Garnish with fresh berries.

Chocolate Mint Cupcakes

Monday, April 5th, 2010

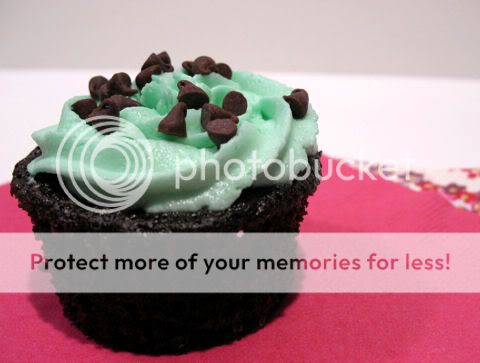
I have my husband to thank for this delicious confection.   While I was searching high and low for a fun, new dessert recipe that was guaranteed easy and tasty, he suggested I enhance my favorite cake and frosting recipe with some mint extract.   The chocolate mint cupcakes with mint frosting were born!

As I’ve said before, Hershey’s “Perfectly Chocolate” Chocolate Cake is my go-to recipe for chocolate cakes and cupcakes.   It’s so easy to make and work with; in fact, a fellow blogger suggested pouring the batter into a large Pyrex measuring cup and using that to fill muffin tins… genius!

The end-result is a perfectly rich and minty cupcake that reminded me of Keebler’s Grasshopper Cookies.   I’ve always had a weakness for this particular flavor combination, making it quite hard to eat just one cupcake at time!

Chocolate Mint Cupcakes

Yields 30 cupcakes

For the cupcakes:
2 cups sugar
1 3/4 cups all-purpose flour
3/4 cup HERSHEY’S Cocoa
1 1/2 tsp baking powder
1 1/2 tsp baking soda
1 tsp salt
2 eggs
1 cup milk
1/2 cup vegetable oil
2 tsp vanilla extract
1 tsp mint extract
1 cup boiling water

1. Heat oven to 350 degrees.   Grease muffin cups or line with paper liners.
2. Stir together flour, cocoa, baking powder, baking soda and salt in medium bowl.
3. In a large bowl, combine sugar, eggs, milk, oil, vanilla and mint extract. Stir until well blended.
4. Add flour mixture to large bowl and beat on medium speed of mixer 2 minutes.
5. Stir in boiling water (batter will be thin). Pour batter into prepared pans.
6. Fill muffin cups 3/4 full with batter (about 1/4 cup).
7. Bake 22 to 25 minutes. Cool completely

For the frosting:
2 1-lb packages of confectioner’s sugar
1 cup vegetable shortening
1/2 cup warm water
2 tsp vanilla extract
1 tsp mint extract

1.  Beat shortening and water together.
2.  Gradually beat in confectioner’s sugar and beat until creamy.
3.  Add vanilla and mint extracts and beat in well.
4.  If needed, add more water, 1 tbsp at a time, to attain desired consistency.
5.  If frosting will not be used right away, store in an airtight container.

Happy Easter!

Sunday, April 4th, 2010

Chocolate Mint Cupcake recipe can be found here.

Use Wilton tip 233 to make grass.

Hot Cross Buns

Sunday, March 28th, 2010

Every time I see Hot Cross Buns at the grocery store this time of year, I almost always buy them out of a sense of seasonal propriety.  (In the event you are unfamiliar, these pastries are served on Good Friday.  There is much folklore surrounding them – whether they will heal the sick, prevent fires, or help me bake perfect bread year round remains to be seen.)  However, despite the tasty appearance of the little pastry with the frosting cross piped on top, they inevitably contain candied fruit peel - and if there is one thing I can do without in life, it is candied fruit peel.  And cauliflower.  But, I digress.  This year instead of buying buns I would end up not liking, I decided to undertake baking my own Hot Cross Buns, so I could include whatever fruits I wanted.  I opted to make a traditional currant bun – in the end, all my grocery store carried were Zante Currants, which as it turns out, are just miniature raisins that cost extra.  After a world wide web search, I followed this recipe for the actual dough as it seemed fairly straightforward.  The hardest part was all the waiting as the smell of baking raisin bread filled the house, but it was worth it in the end!  I used a plain vanilla/confectionary sugar frosting from another recipe to pipe on the crosses in the end rather than the orange frosting suggested on the original recipe site.  They were particularly tasty with a cup of tea.  Lastly, I highly suggest baking them before you take your next sea voyage, as they are supposed to ward off shipwrecks!

Ingredients

  • 4 cups all-purpose flour
  • 1/3 cup sugar
  • 1 (.25 ounce) package active dry yeast
  • 1 1/4 teaspoons ground cinnamon
  • 1/2 teaspoon salt
  • 1 cup fat-free milk
  • 1/4 cup butter or stick margarine
  • 2 eggs
  • 3/4 cup raisins
  • 1 egg
  • 2 tablespoons cold water
  • For the frosting:

  • 1/2 cup confectioners’ sugar
  • 1/4 teaspoon vanilla extract
  • 2 teaspoons milk
  •  

    Instructions:  Mix 2 cups of the flour with the sugar, yeast, cinnamon and salt in a large bowl.  Heat the milk and butter together to about 120-130 degrees F (this took me about 2 minutes on 50% power in the microwave).  Mix the milk/butter into the dry ingredients just until all is moistened.  Beat in the eggs until smooth.  Add the remaining 2 cups of flour to form a soft dough.  Turn the dough out onto a floured surface, and knead about 8 times.  Take the dough and place into a bowl coated with non-stick spray.  Cover and let rise for 1 hr.  Divide the dough into 18 balls and place into 2 round cake pans.  Cover again and let rise for an additional 30 minutes.  Beat the final egg and water together, and brush onto the buns.  Bake for 18-22 minutes or until golden.  Cool completely and pipe on a frosting cross onto each bun.

Most Amazing Cinnamon Buns

Saturday, February 20th, 2010

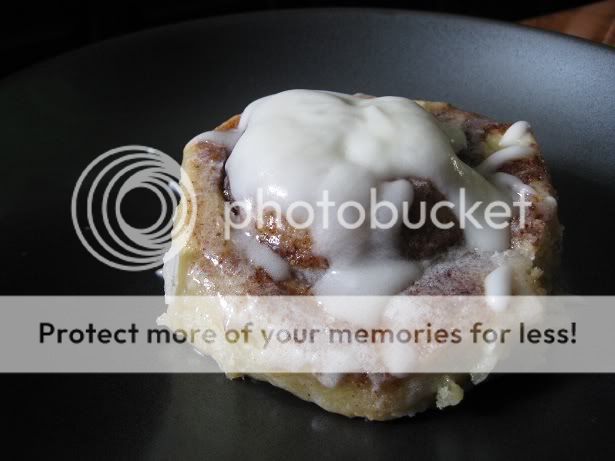
One fine winter morning, I decided I would spend my day lazing about the house reading Northanger Abbey while the smell of baking cinnamon buns wafted through the living room.  Sadly (or not so sadly, in the end) I did not have any pre-fab cinnamon buns in a cardboard tube lying around, so I had to make a choice – make cinnamon buns from scratch, or put up with imitation cinnamon bun scent from my favorite Yankee Candle.  I opted for the former, and boy am I glad – these were the most amazing cinnamon buns I’ve ever had.  I found this recipe initially in my Food Network Magazine several months ago and had stuck a post-it on it reminding myself to come back and try it out.  It is supposed to be an imitation of some national cinnamon bun store’s product, but frankly there is nothing like a handmade cinnamon bun coming out of ones’ own oven – far and away better than any commercially available roll.  I changed a few things out of necessity (not having whole milk or cream on hand, I used skim milk, and also reduced the butter in the filling, as I simply couldn’t figure out how to get a whopping 12 tablespoons of butter onto a 12×14 rectangle of dough) and they came out as rich and ooey-gooey as you could want.  Try them, you will not regret it.

Best Cinnamon Buns Ever

For the Dough:

  • 1 cup skim milk
  • 1 1/4-ounce packet active dry yeast
  • 1/4 cup plus 1/4 teaspoon granulated sugar
  • 4 tablespoons unsalted butter, melted, plus more for the bowl
  • 1 large egg yolk
  • 1 1/2 teaspoons vanilla extract
  • 2 3/4 cups all-purpose flour, plus more if needed
  • 3/4 teaspoon salt
  • 1/2 teaspoon freshly grated nutmeg
  • Warm the milk in the microwave for 45-60 seconds until it reaches approximately 100 degrees F.  Add the yeast and 1/4 teaspoon sugar (do not stir!) and let sit until foamy, or about 5 minutes.  In the meantime, whisk together the flour, the remainder of the sugar, the salt and nutmeg in the bowl of your stand mixer. (or a regular bowl if you are without a stand-mixer – just remember to eat your wheaties if you’re mixing this by hand, the dough gets very thick!)  To the foamy yeast mixture, whisk in the melted butter, the egg yolk, and the vanilla.  Make a well in the center of your dry ingredients, and pour in the yeast mixture.  Mix on low speed on your stand mixer with the dough hook (or arm mixer) until the dough appears very wet and sticky.  Then turn up the speed to medium and let knead for about 5 minutes, until the dough gathers around the hook.  You may need to add a little extra flour (I did – probably about 3 tablespoons) to get the dough to this point.  Take the dough out of the mixing bowl and form a ball with it.  Before putting the dough back in the bowl, coat your mixing bowl with butter.  Put the dough back in the bowl and roll the ball around so it is coated in butter.  Cover with saran wrap and let rise for 1 hr, or until doubled in size.

    For the filling:

  • All-purpose flour, for dusting
  • 4-6 tablespoons unsalted butter, softened, plus more for the pan
  • 1/2 cup granulated sugar
  • 3 tablespoons ground cinnamon
  •  Mix the cinnamon and sugar together before rolling out the dough.  Butter a 9×13 inch baking dish.  Turn the risen dough out onto a lightly floured surface.  Flour the top of the dough so it doesn’t stick to your rolling pin!  Roll the dough out into an approximately 12×14 inch rectangle (I had an oddly shaped ellipse), with the long side facing you.  Spread the butter all over the dough except for about 1/2 an inch on the far side of the dough - the original recipe called for 12 tablespoons of butter, but my dough was well covered with only 4-6 tablespoons.  Sprinkle the cinnamon/sugar mix over the dough sparing the 1/2 inch bare edge.  Coat this edge with water.  Roll the dough away from you forming a tight roll.  Slice into 1 1/2 inch thick slices using a serrated bread knife with very little pressure so as to not squish the roll!  Place the slices into the baking dish, cut side down, with space in between as they will expand!  Let rise for 20-30 minutes.  Preheat oven to 325 and bake for 30-35 minutes, or until golden brown.

    For the glaze:

  • 2 cups confectioners’ sugar
  • 1/3 cup skim milk 
  • 4 tablespoons unsalted butter, melted
  • Sift the sugar into a bowl and whisk in the wet ingredients until smooth.  Pour over buns after they have cooled in the pan for 15 minutes or so.  (If you can wait 15 minutes for the buns to cool in the pan by all means go ahead – my husband and I couldn’t, so we just poured the glaze right on straight out of the oven.  This made the glaze very warm and melty, increasing the gooey-ness factor by a lot – but if you wait longer it will probably be prettier! )

Snowed In!!!

Sunday, December 20th, 2009

Well, we got 24 inches of snow in our neck of the woods this weekend – since my husband and I had no place to go, we stayed in and “let it snow!” While everyone else in the city stocked up on bread, milk and eggs (presumably to make french toast?) I opted for butter, flour, sugar and other baking implements – I figured we can always live off of cookies for a few days! I made four different varieties yesterday, and one more today!! Here are the first couple – the rest will follow soon!

Batch #1 – Gingerbread Cookies

I just love these little ginger-colored treats with frosting-piped faces. Although in my typical fashion I wanted a “healthier” cookie recipe if possible, these came out very moist and delicious – my husband didn’t even realize they were from Cooking Light. They were surprisingly easy to cut and the dough didn’t crumble on me like the last few batches of gingerbread cookies I made.

Cookies:

  • 10.1 ounces all-purpose flour (about 2 1/4 cups)
  • 1 teaspoon ground ginger
  • 1 teaspoon ground cinnamon
  • 1/2 teaspoon baking powder
  • 1/4 teaspoon baking soda
  • 1/4 teaspoon salt
  • 1/4 teaspoon ground nutmeg
  • 1/2 cup packed brown sugar
  • 1/2 cup butter, softened
  • 3 tablespoons molasses
  • 1 large egg
  • Cooking spray
  • Icing:

  • 1 cup sifted powdered sugar
  • 1 tablespoon water
  • Combine flour, ginger, cinnamon, baking powder, baking soda, salt, & nutmeg with a whisk. In a separate bowl, combine the brown sugar, butter, & molasses and beat for 2 minutes. Add the egg and beat well to combine. Add the flour mixture to the wet ingredients – I used a heavy duty stand mixer as the dough became quite thick and sticky. Divide the dough in half, flattening each half into a disc and wrapping tightly in plastic wrap. Chill the dough for at least 90 minutes. Preheat oven to 350 degrees. Roll out the dough to 1/8 – 1/4 inch thickness and cut with the desired cookie cutter. Place 1 inch apart on a parchment-lined baking sheet. Bake at 350 degrees for 8 minutes and then cool completely on a wire rack.

    For decorating: Mix powdered sugar and water – if too thick, add drops of water – I ended up using closer to 1.5 tablespoons in the end. Spoon the icing into a plastic bag with a tiny hole cut in the corner and decorate away!

    Batch #2 – Chocolate Peanut Butter Pinwheels

    My husband loves anything that combines chocolate and peanut butter – so in my baking extravaganza I wanted to make sure I included some cookies he would really enjoy! This recipe I found was great, although I made a couple minor substitutions – I didn’t have baking chocolate on hand, and as there was a blizzard outside I opted to substitute in some cocoa powder. They came out great – although the dough softened very fast when out of the fridge. Cut them speedily!

    Ingredients:

    1/2 cup sugar

    1 stick of butter (softened)

    1 egg

    1 tsp vanilla

    1 1/2 cups flour

    1/2 tsp baking powder

    1/4 tsp salt

    3 tbsp cocoa powder

    1 tbsp vegetable oil

    1/4 cup creamy peanut butter

    Beat sugar, butter, egg and vanilla together in a large bowl – scrape the bowl often to make sure everything is well mixed! Add flour, baking powder and salt and mix together well. Divide dough into two even portions. To the first portion, add the cocoa powder and the vegetable oil and mix well. To the second portion, add the peanut butter and mix well. Shape the two doughs into rectangles and wrap tightly in saran wrap. Refrigerate for at least 1 hr. Roll each dough out between 2 pieces of floured wax paper – Make sure the doughs are approximately the same size! Then peel away one sheet of wax paper from each dough. Press the two doughs together, and roll (jelly-roll style) into a log. Wrap the log in saran wrap and place the dough into the freezer for 20 minutes. Preheat oven to 375 degrees. Remove dough and quickly slice into 1/4 inch thick discs. Place 1 inch apart on a parchment-lined cookie pan and bake at 375 degrees for 8 minutes.

A Domestic Pursuits Celebration

Thursday, November 19th, 2009

Dark Chocolate Brownie

This is a very special post. No, not because it contains the recipe for an amazing dark chocolate brownie. It marks both the 100th post and the first anniversary of Domestic Pursuits. I’ve enjoyed sharing my cooking adventures and look forward to working my way through many more interesting recipes and domestic activities in the coming year. Happy Anniversary to us!

Now onto the delicious part…

After picking up a container of Edy’s Slow Churned Pumpkin ice cream last night, I decided that I needed brownies to go with it. Pumpkin and chocolate is my new favorite flavor combination and you just can’t go wrong with brownies a la mode!

I love this recipe for mint brownie cups and decided to eliminate the mint extract to yield traditional brownies. As I started baking, I realized that I didn’t have the right balance of chocolate, so these brownies contain more bittersweet chocolate than the originals. Since I eliminated the mint extract, I decided to add some amaretto to further emphasize the richness of the chocolate. These changes yielded a decadent brownie with a smooth, dark chocolate flavor.

Dark Chocolate Brownie Cups
Yields 14-16 brownies

6 tbsp butter
6 oz bittersweet chocolate (chopped)
2 oz. semi-sweet chocolate (chopped)
1 cup sugar
2 eggs
1/2 tsp amaretto
1/4 tsp vanilla
3/4 cup all-purpose flour
1/4 teaspoon baking powder
1/4 teaspoon salt
1/2 cup semi-sweet chocolate chips

1. Preheat oven to 350 degrees.
2 Line a muffin tin with paper liners. Lightly spray liners with cooking spray.
3. In a heat-proof bowl, melt together butter and chocolate in the microwave in 30 second intervals stirring after each interval until smooth. Allow to cool for 5 minutes.
4. In a large bowl, whisk together flour, baking powder, and salt in a medium bowl; set aside.
5. Whisk or beat the sugar into the chocolate mixture.
6. Add eggs, amaretto and vanilla extract to the chocolate mixture and mix until well combined and smooth.
7. Add flour mixture and mix until combined.
8. Gently fold in the 1/2 cup chocolate chips.
9. Pour batter into prepared muffin cups. Each cup should be about 2/3 full.
10. Bake for 18-23 minutes or until a cake tester comes out with a few crumbs.
11. Allow brownies to cool before removing from muffin pan.

Pumpkin Cupcakes

Tuesday, November 10th, 2009

When I make something new, I don’t want just a recipe, I want the perfect recipe! My desire for a tried and true favorite helps explain why I often prefer to get my recipes from blogs and community-oriented cooking websites as opposed to magazine and cookbooks.

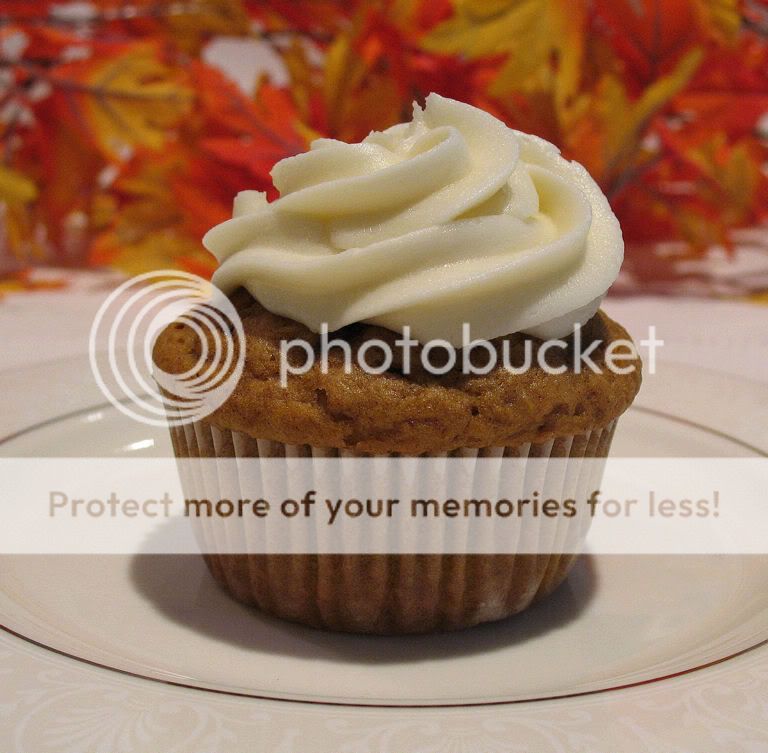
A pumpkin cupcake comparison from The Way the Cookie Crumbles popped up in my Google Reader a few weeks ago. In this post, Bridget details her experiences with three different pumpkin cupcake recipes. This recipe found on Smitten Kitchen was her favorite, and I have now fallen in love with it as well! This clearly is the perfect pumpkin cupcake recipe.

While I couldn’t justify making these for just me and my husband, a dinner at a friend’s house presented the perfect opportunity to whip up this fun fall treat. Pumpkin, cinnamon, nutmeg, cloves, maple syrup… you can’t get much more fall-ish than this! The cupcakes have a light, airy texture and a flavor reminiscent of spice cake with a pop of pumpkin. Instead of using the original maple cream cheese frosting, I opted to use a maple butter cream frosting recipe from Annie’s Eats. It’s the perfect companion to the pumpkin cupcakes: smooth and sweet and fall-inspired.

Pumpkin Cupcakes
(From David Leite via Smitten Kitchen)
Yields 18 cupcakes

1 stick unsalted butter, room temperature
1 cup firmly packed dark-brown sugar (I used light brown)
? cup granulated sugar
2 cups cake flour
2 tsp baking powder
1 tsp baking soda
1 tsp ground cinnamon
1 tsp ground ginger
? tsp ground nutmeg
? tsp ground cloves
? tsp salt
? tsp freshly ground black pepper (I omitted)
2 large eggs
? cup buttermilk mixed with 1 tsp vanilla
1? cups canned solid-pack pumpkin (not pumpkin pie filling)

1. Preheat the oven to 350? and line cupcake pans with 18 liners.
2. Using a stand mixer, beat the butter, granulated sugar and brown sugar on medium speed until fluffy, about 5 minutes.
3. In a separate bowl, sift the flour, baking powder, baking soda, cinnamon, ginger, nutmeg, cloves, salt, and pepper into a medium bowl.
4. Add the eggs 1 at a time to the mixer, blending well and scraping down the sides after each addition. 5. Alternate adding the flour and milk mixtures, beginning and ending with the flour.
5. Add the pumpkin and beat pumpkin until smooth.
6. Divide the batter equally between the cups. (They?ll be about ? full.) Rap the filled pans once on the counter to release any air bubbles.
7. Bake the cakes until a toothpick inserted into the center comes out clean, about 20 to 25 minutes. Cool the cupcakes on racks completely.

Maple Buttercream Frosting
(Annie’s Eats)

1/2 cup unsalted butter, at room temperature
2 cups powdered sugar, sifted
2 tbsp. maple syrup
1-2 tbsp. milk

1. In the bowl of an electric mixer fitted with the paddle attachment, cream the butter on medium-high speed until smooth.
2. Scrape down the sides of the bowl and add the powdered sugar. Beat on medium speed until well combined, then increase speed and beat until smooth.
3. Scrape down the sides of the bowl again and add the maple syrup. Mix until incorporated.
4. If the frosting is too thick, add 1-2 tablespoons of milk and beat until smooth and desired consistency is achieved.