Archive for the ‘Baked Goods’ Category

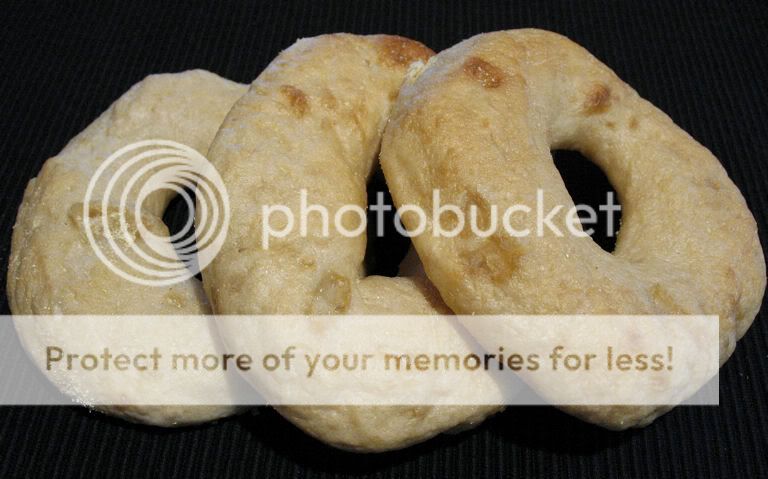
Plain Bagels

Sunday, November 8th, 2009

I love to bake. In recent years, I conquered my fear of yeast and have found the process of transforming basic ingredients like flour, water, yeast and salt into beautiful, flavorful breads to be quite enjoyable. I did less baking during the summer, but I’ve been anxious to try new recipes as the cool fall weather has rolled in. I’ve had my eye on a few varieties of bagels that Brown Eyed Baker has made during the past several months.

When I told one of my friends that my husband I and I had made our own bagels, she asked me “Are they hard to make?” As with most homemade items, they’re not hard to make, but they do take some time and a little planning. Each step is not difficult, but there are several steps that must be followed over the course of at least two days. You need to prepare the sponge, prepare the dough, divide the dough and allow it to rise, shape the bagels and let them rise, throw them in the refrigerator to rise slowly, boil them and finally bake them. See? No single step is overly complicated.

I must admit that while I was boiling my bagels two at a time, I thought “This had better be worth it!” Then, as the bagels baked my house became filled with the warm, yeasty aroma of fresh-baked bread. When I finally bit into a warm bagel, I saw the light! Store-bought plain bagels are good, but these are amazing! I don’t know what it is, but they’re soft (not too doughy) and far more flavorful then their mass-produced plain counterparts.

It’s true that it takes a bit of time to make bagels at home – certainly more time than it takes to grab a bag of bagels at the grocery store. After my first foray into the world of homemade bages, I can attest that the extra time and effort is well worth it!

You’ll find the full recipe below the break.

(more…)

Chocolate Peanut Butter Cupcakes

Wednesday, September 30th, 2009

I am a relatively new member of the chocolate peanut butter fan club, and these cupcakes had something to do with it. My husband and a number of my friends have always been passionate lovers of all things chocolate and peanut butter, while my feelings were ambivalent.

When I first spotted these cupcakes on Proceed with Caution, I knew I had to make something like them for the chocolate peanut butter aficionados in my life. I used my go-to chocolate cake recipe (Hershey?s Perfectly Chocolate Cake), incorporated peanut butter into my grandmother?s frosting and made the peanut butter balls as written.

The resulting cupcake is heavenly! As I bit into my first one I thought ?Now I know what all the fuss is about!? If the creamy peanut butter frosting doesn?t provide a peanut-y enough kick for you, there?s a sweet peanut butter ball nestled inside the cupcake. Topped with half of a miniature Reese?s Peanut Butter Cup, these cupcakes should satisfy the most demanding chocolate peanut butter lover in your life.

Sadly, I don?t have many photos of these delectable cupcakes because the batch was quickly demolished by my peanut butter and chocolate loving friends!

Chocolate Peanut Butter Cupcakes
Yields 30

For the Filling:
2/3 cup confectioners’ sugar
1/2 cup creamy peanut butter
2 tbsp butter
1/4 tsp vanilla

For the cupcakes:
2 cups sugar
1 3/4 cups all-purpose flour
3/4 cup Cocoa
1 1/2 tsp baking powder
1 1/2 tsp baking soda
1 tsp salt
2 eggs
1 cup milk
1/2 cup vegetable oil
2 tsp vanilla extract
1 cup boiling water

1. Using a mixer on medium speed, beat together confectioners’ sugar, peanut butter, 2 butter, and 1/4 teaspoon vanilla until blended. Shape mixture into 24 balls using heaping measuring teaspoons. The balls will be sticky and don’t need to be perfectly shaped. Place shaped balls on waxed paper-lined cookie sheet and set aside.
2. Heat oven to 350?F. Line muffin pans with paper liners.
3. Stir together sugar, flour, cocoa, baking powder, baking soda and salt in medium bowl.
4. In a large bowl, combine eggs, milk, oil and vanilla. Stir until well blended.
5. Add flour mixture to large bowl and beat on medium speed of mixer 2 minutes.
6. Stir in boiling water (batter will be thin).
7. Spoon 1 heaping measuring tablespoon batter into each muffin-pan cup. Drop 1 peanut butter ball in center of each cup and top off muffin cup with batter (should be 3/4 full)
8. Bake 22 to 25 minutes. Cool completely

For the frosting:
2 1-lb packages of confectioner?s sugar
1/2 cup vegetable shortening
1/2 cup creamy peanut butter
1/2 cup warm water
2 tsp vanilla extract

1. Beat shortening and peanut butter together until creamy and then beat in water.
2. Gradually beat in confectioner?s sugar and beat until creamy.
3. Add vanilla and beat in well.
4. If needed, add more water, 1 tbsp at a time, to attain desired consistency.
5. If frosting will not be used right away, store in an airtight container.

Margarita Cupcakes

Tuesday, August 25th, 2009

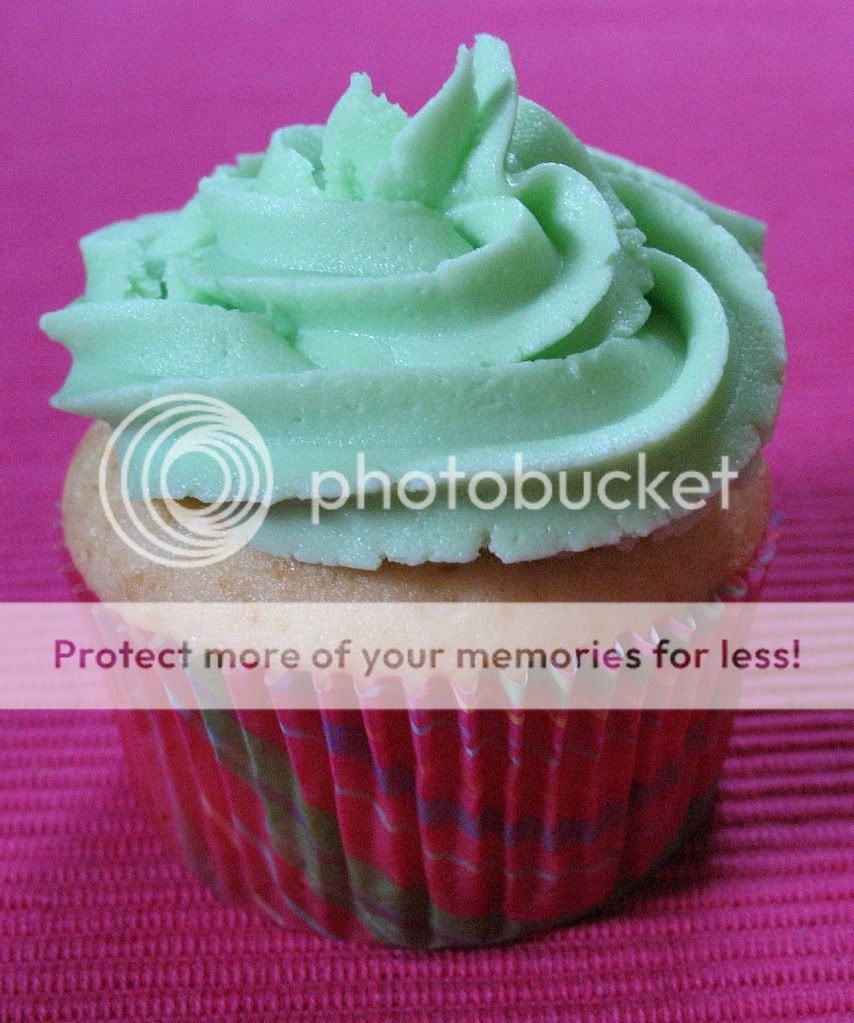
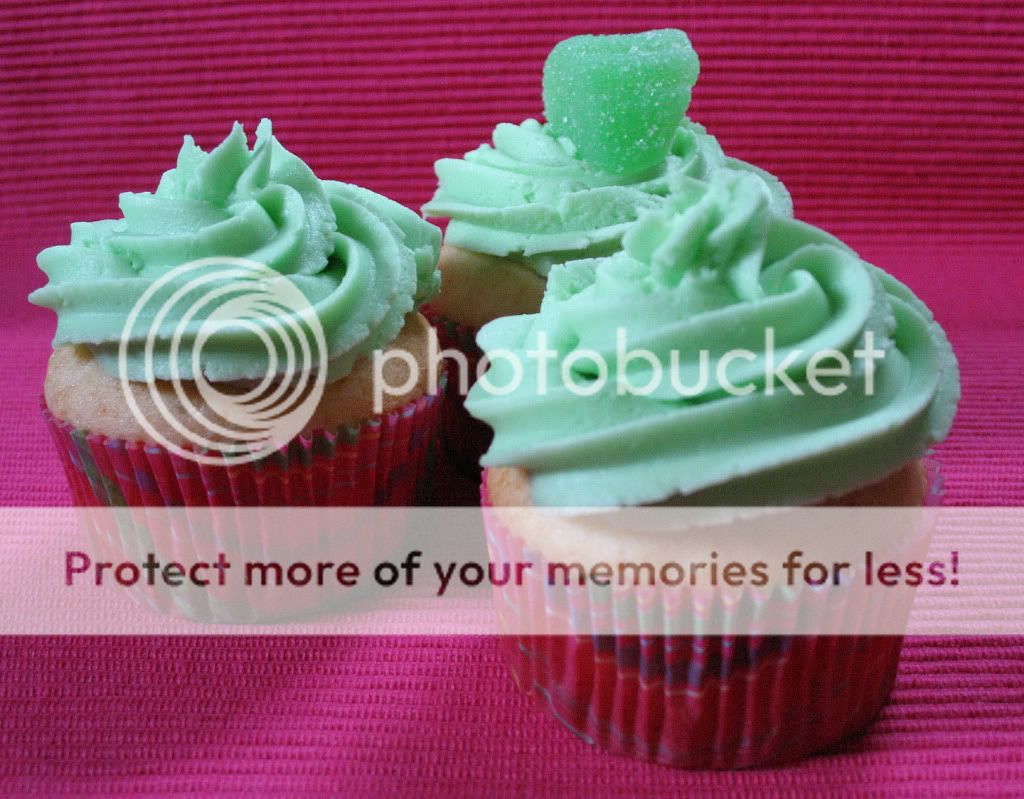
In keeping with our apparent theme of alcohol in unexpected places, I present to you: Margarita Cupcakes! I stumbled upon this recipe on Confections of a Foodie Bride a few years ago. They’re a fun alternative to standard chocolate or vanilla-based cupcakes. The margarita and lime zest impart a recognizable, refreshing tang to the cupcakes. They serve as a perfect dessert for a Mexican-inspired meal or summer barbecue.

Since these cupcakes are a creatively doctored white cake mix, there’s far less measuring than a typical made-from-scratch cake would require. Most of the measuring is related to mixing the actual margarita, and who can complain about that? More importantly, a mini-rita remains after 1 1/4 cups of the mix is used in the cupcake batter. It’s the perfect excuse for a small, refreshing drink at any time of day. On one occasion, I may or may not have baked these cupcakes at ten o’clock in the morning. ;)

Since I think my husband makes the best margaritas (a sentiment shared by many of our dinner guests), I adjusted the margarita proportions to reflect his drink recipe. I also used my Grandmother’s frosting recipe, changing the original liquid measurements to include a touch of lime.

Margarita Cupcakes

Yields 24 cupcakes

8 oz margarita mix
3 oz tequila (Jose Cuervo is my fav!)
1 oz triple sec
White cake mix
3 egg whites,beaten
2 Tbsp vegetable oil
1 Tbsp lime zest (you’ll use the lime juice in the frosting)

1. Mix together the margarita mix, tequila, and triple sec in a large glass or spouted bowl. You will use 1 1/4 cup of this in the cupcake mix. Pour the leftovers over ice and enjoy!
2. In a large mixing bowl, combine the cake mix, egg whites, vegetable oil, lime zest and 1 1/4 of margarita mixture.
3. Using a hand mixer (or stand mixer), beat on low speed for about 30 seconds to combine ingredients. Increase to medium speed and beat for two minutes.
4. Spoon the batter into muffin tins, filling each cup about 2/3 – 3/4 full.
5. Bake at 350 for about 25 minutes, or until a toothpick inserted in the center of a cupcake comes out clean.
6. Allow to cool for at least 5 minutes before transferring to a wire rack to cool completely.
7. Cool completely before decorating.

Lime Frosting

Yields enough for 24 cupcakes

1 package confectioner’s sugar
1/2 cup shortening
2 tbsp warm water
2 tbsp lime juice

1. Beat shortening, water and lime juice together.
2. Gradually beat in confectioner’s sugar and beat until creamy.
3. You may need to add more water (1 tbsp at a time) to achieve desired consistency. If you prefer your frosting much sweeter, you can add more lime juice. Beware – too much lime juice can make the frosting painfully sweet!

Margarita Cupcakes

Chocolate Whiskey Cupcakes

Tuesday, August 18th, 2009

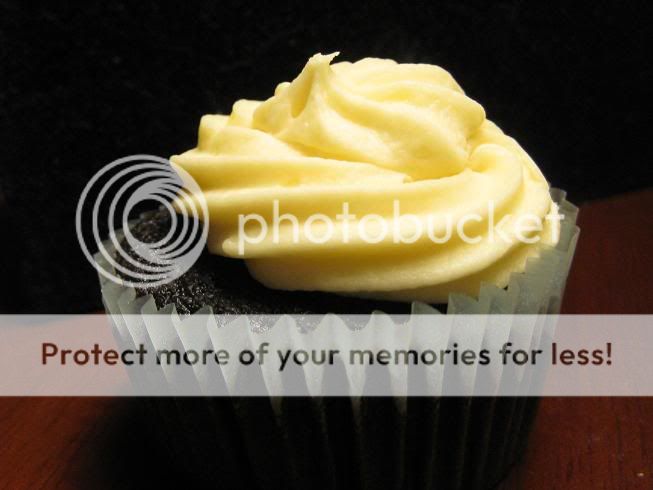
I made these cupcakes for my husband’s birthday at the beginning of the month – mostly because he loves cake, frosting, Guinness, whiskey, and all other things Irish. After a bit of searching, I found this recipe that uses not one but three kinds of Irish alcohol! What better way to celebrate. They came out incredible! The frosting was particularly amazing, but the beer and whiskey really adds a great depth to the chocolate flavor.

Chocolate Whiskey Cupcakes

Cake:

1 cup stout (such as Guinness)
1 cup (2 sticks) unsalted butter
3/4 cup unsweetened cocoa powder
2 cups flour
2 cups sugar
1 1/2 teaspoons baking soda
3/4 teaspoon salt
2 large eggs
2/3 cup sour cream

Filling:

8 ounces bittersweet chocolate (I used chocolate chips)
2/3 cup heavy cream
2 tablespoons butter, room temperature
2 teaspoons Irish whiskey

Frosting:

3 to 4 cups confections sugar
1 stick (1/2 cup or 4 ounces) unsalted butter, at room temperatue
3 to 4 tablespoons Baileys (or milk, or heavy cream, or a combination thereof)

For the cake:

Preheat oven to 350. Bring stout and butter to a simmer over medium heat. Whisk in the cocoa powder and cool slightly. Mix dry ingredients in a separate bowl, whisking to combine. Beat eggs and sour cream together in another bowl. Add stout/butter mixture to the egg mixture slowly (so you don’t scramble the eggs accidentally!) Add the flour mixture to the wet ingredients and mix briefly on slow speed. Portion batter into lined cupcake tins; it should fill 24 cups approximately 2/3 of the way. Bake for 17-20 minutes or until cake tester comes out clean. Cool completely.

For the ganache:

Melt the chocolate. Heat the cream until it is simmering and then pour over the chocolate. Let sit for about a minute and then stir until smooth. Add butter and whiskey stirring to combine. Let cool until it starts to thicken. You can use an apple corer to cut out a hole in the cupcakes, but I chose instead to use a piping bag, poked a hole in the cupcake and filled them. The cupcake will swell a little, but I did not have any crumble on me.

For the frosting:

Whip the butter until fluffy. Slowly add the confectioners sugar, several tablespoons at a time. When the frosting begins to look thickened, add the Bailey’s – if it becomes too thin, add some more sugar. This was more than enough to frost my 24 cupcakes.

S’Mores Cupcakes

Thursday, July 2nd, 2009

There are some things that just say “summer” to me: cookouts in my parents’ backyard, competitive games of bocce, cold glasses of iced tea with fresh lemons, large slices of watermelon, strawberry shortcake and s’mores.

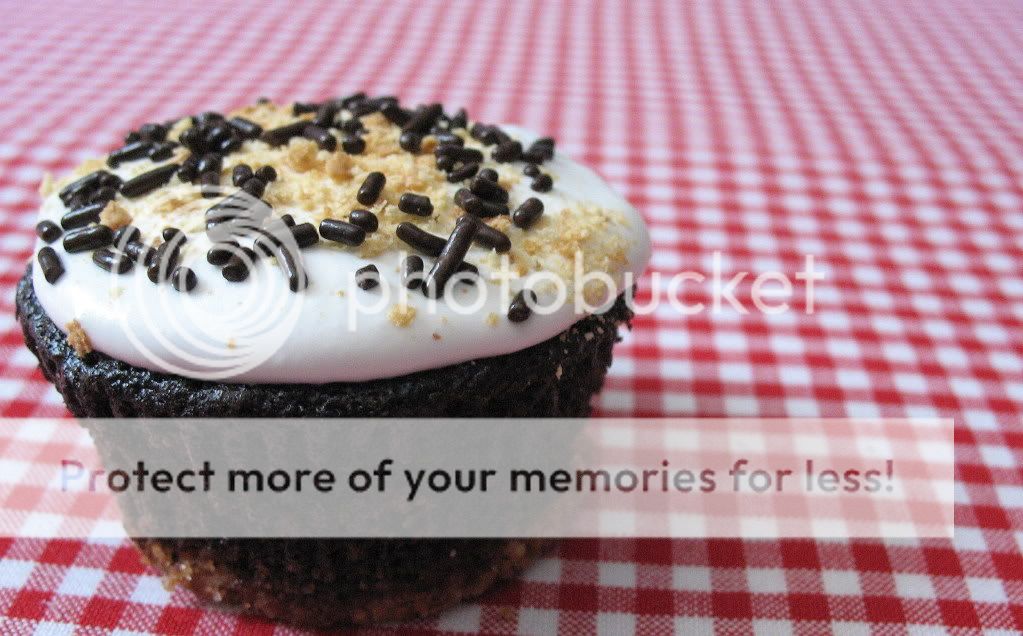
These cupcakes are the perfect addition to a summer cookout. Martha Stewart’s cupcakes inspired my assembly method, but I used my go-to chocolate cake recipe, Hershey’s “Perfectly Chocolate” Chocolate Cake and created my own marshmallow frosting recipe. The frosting is soft and sticky, much like a melted marshmallow. The buttery graham cracker base, coupled with bittersweet chocolate, a rich chocolate cake and the marshmallow frosting imparts that quintessential summer flavor of s’mores in a portable cupcake… no campfire required!

S’mores Cupcakes
Yields 30 cupcakes

For the graham crust:
1/4 cup sugar
1 1/2 cups graham cracker crumbs (from about 20 squares)
1/3 cup unsalted butter, melted
1/2 – 1 cup bittersweet chocolate chips

For the cupcakes:
2 cups sugar
1 3/4 cups all-purpose flour
3/4 cup HERSHEY’S Cocoa
1 1/2 tsp baking powder
1 1/2 tsp baking soda
1 tsp salt
2 eggs
1 cup milk
1/2 cup vegetable oil
2 tsp vanilla extract
1 cup boiling water

For the topping:

Marshmallow Frosting (recipe below)
Finely crushed graham cracker crumbs
Chocolate sprinkles (jimmies, for those of us from New England!)

1. Heat oven to 350?F. Grease muffin cups or line with paper liners.
2. Combine 1/4 cup sugar,graham cracker crumbs and melted butter in a small bowl.
3. Spoon 1 tablespoon of graham crakcer mix into the bottom of each muffin cup. Press crumbs firmly, using the bottom of a small glass. Save the remaining mixture for topping.
4. Top graham cracker mix with several bittersweet chocolate chips.
5. Bake graham mixture for about five minutes, or until the edges are golden brown. Remove from oven and set aside.
6. Stir together sugar, flour, cocoa, baking powder, baking soda and salt in medium bowl.
7. In a large bowl, combine eggs, milk, oil and vanilla. Stir until well blended.
8. Add flour mixture to large bowl and beat on medium speed of mixer 2 minutes.
9. Stir in boiling water (batter will be thin). Pour batter into prepared pans.
10. Fill prepared muffin cups 3/4 full with batter (about 1/4 cup).
11. Sprinkle batter with small amount of remaining graham cracker mixture.
12. Bake 22 to 25 minutes. Cool completely

Marshmallow Frosting
Yields enough frosting for 30 cupcakes

2 1/4 cups marshmallow creme (about 8 oz.)
1/2 cup shortening
1/4 cup water
2 1/2 cups powdered sugar

1. Cream together shortening and marshmallow creme.
2. Beat in about 1/2 of the water, followed by half of the powdered sugar.
3. Add the remaining powdered sugar and enough water to bring the frosting to a smooth, spreadable consistency.

Assembling the cupcakes:

1. Spoon a small amount of frosting onto the center of the cupcake and spread towards the edges with a knife. This frosting is very soft and will run down the edges of the cupcake if too much is applied.
2. Sprinkle frosted cupcakes with crushed graham cracker crumbs and chocolate sprinkles.

Toll House Cookies

Tuesday, June 9th, 2009

I love having a well-stocked freezer. A double batch of vegetarian black bean chili and multiple portions of Mexican rice have saved the day on multiple occasions. I freeze leftover sauce, broth, black beans and shredded chicken to prevent leftovers from spoiling and to save for future use. However, the most enjoyable part of my freezer stash has to be cookie dough.

Freezing cookie dough serves multiple purposes: 1) It prevents my husband and I from eating too many cookies in a short period of time. Sometimes you just want a few cookies, and it’s not always easy to figure out what to do with the remaining four dozen! 2) It allows me to whip up freshly-baked cookies with no mess in a very short amount of time!

Pumpkin Chocolate Chip cookies were my bite-sized dessert of choice for most of the fall, but the classic Toll House cookie became my go-to dessert during the latter part of the winter and into the spring. There are countless variations of the classic chocolate chip cookie, but this is my favorite. They come out chewy on the inside with a hint of crunch on the outside.

I made a few minor changes to the original recipe, based upon recommendations from a friend. I use half butter and have shortening, and I adjusted the amounts of brown sugar and granulated sugar.

If you want to freeze your cookie dough and bake at a later date, drop the cookie dough onto a cookie sheet lined with parchment or wax paper (for easy clean up) and place the sheet in the freezer for about a half hour. Remove the firm balls of dough from the sheet and place in a freezer bag, removing as much air as possible. When you want to bake the frozen dough, there’s no need to defrost! Preheat the oven to 375 and place the frozen balls of dough on a cookie sheet. You’ll probably need to bake the cookies 2-3 minutes longer than usual, but keep and eye on them so that they don’t burn.

Toll House Cookies

Yields 60 cookies

2 1/4 cups all-purpose flour
1 teaspoon baking soda
1 teaspoon salt
1/2 cup butter, softened
1/2 cup vegetable shortening
1/2 cup granulated sugar
1 cup packed brown sugar
1 teaspoon vanilla extract
2 large eggs
2 cups (12-oz. pkg.) semi-sweet chocolate chips

1. Whisk together flour, baking soda and salt in a small bowl.
2. In a large mixing bowl, beat butter, granulated sugar and brown sugar until creamy.
3. Add eggs, one at a time, beating well. Beat in vanilla extract.
4. Beat in flour mixture gradually.
5. Stir in chocolate chips.
6. Drop dough by rounded tablespoon onto ungreased cookie sheets.
7. Bake for 9-11 minutes or until golden brown.
8. Cool on cookie sheets for at least two minutes, then remove to a wire rack to cool completely.

BAKE at 375 for 9 to 11 minutes or until golden brown. Cool on baking sheets for 2 minutes; remove to wire racks to cool completely.

Irish Scones

Tuesday, June 9th, 2009

Sorry for the long long hiatus in between my posts – between hectic work schedules and fabulous vacations to Ireland, I’ve barely had time to do any cooking! Anyway, I have returned and am ready to blog again. After a week of fabulous Irish breakfasts, I was inspired to make some homemade scones. Every morning at our B&B’s, my husband and I were greeted with a huge breakfast ? rashers, bangers, eggs, puddings, and of course soda bread and scones. Irish scones are amazing; they’re not too sweet ? they’re just right to set off all the salty meats they serve you in Ireland. They also go fabulously with coffee on a rainy morning. I found this recipe long before my trip, and have only modified it very slightly ? I added a tiny bit more sugar than the original recipe called for, and also I add a bit more buttermilk to make them slightly moister. As it turns out, they taste quite authentic! The recipe calls for brandy to soak the raisins in – I did this the first time I made them, but the second time I passed it up and they tasted wonderful all the same.

Ingredients:

3 cups flour

1/2 teaspoon baking soda

2 teaspoons cream of tartar

1/2 cup butter (1 stick), softened

4 tablespoons sugar

3/4 – 1 cup buttermilk

1 cup raisins

1/4 cup brandy or cognac (optional)

1 egg, beaten with 1 tablespoon of water

Sugar for sanding

Directions:

The night before you want your scones, mix the brandy with the raisins and let this soak overnight – it can be done for a few hours instead, but the longer the better (optional step).

Preheat oven to 400? F. Sift flour, baking soda, and cream of tartar into a large bowl. Add softened butter and sugar, mixing well. Stir in 3/4 cup milk and raisins (or other fruit), with brandy liquid drained. If mixture is dry, add a bit more milk. Dough should resemble pie pastry, pressing together forms a dough. Tear off pieces of dough, shape into triangles, and place on a baking sheet. Brush scones with egg wash for shine, and sprinkle with sanding sugar. Bake for 15-20 minutes or until golden brown. Enjoy!

Hershey’s Chocolate Frosting

Monday, May 11th, 2009

Gold cake with chocolate frosting is mother’s favorite cake combination. I’ve had my eye on Hershey’s “Perfectly Chocolate” Chocolate Frosting for awhile now, and Mother’s Day seemed like the perfect opportunity to try it out.

I had really hoped that it would be delicious, because I really wanted her to enjoy her Mother’s Day dessert. This recipe did not disappoint! The frosting is rich and chocolate-y with a fudge-like flavor. It’s a snap to make and spreads quite easily on the cake.

The recipe makes enoug frosting to frost and decorate a 9-inch round layer cake with some to spare. The extra frosting is fantastic by the spoonful. :)

Hershey’s “Perfectly Chocolate” Chocolate Frosting

Yields about 2 cups of frosting

1/2 cup (1 stick) butter
2/3 cup HERSHEY’S Cocoa
3 cups powdered sugar
1/3 cup milk
1 teaspoon vanilla extract

1. Melt butter.
2. Beat in cocoa.
3. Alternately add powdered sugar and milk, beating to spreading consistency. Add small amount additional milk, if needed.
4. Beat in vanilla.

Strawberry Banana Muffins

Monday, May 11th, 2009

These Strawberry Banana Muffins were a last-minute addition to my Mother’s Day Brunch line-up. They were so last minute that I had my husband run to the store to pick up more strawberries about an hour before our company was due to arrive!

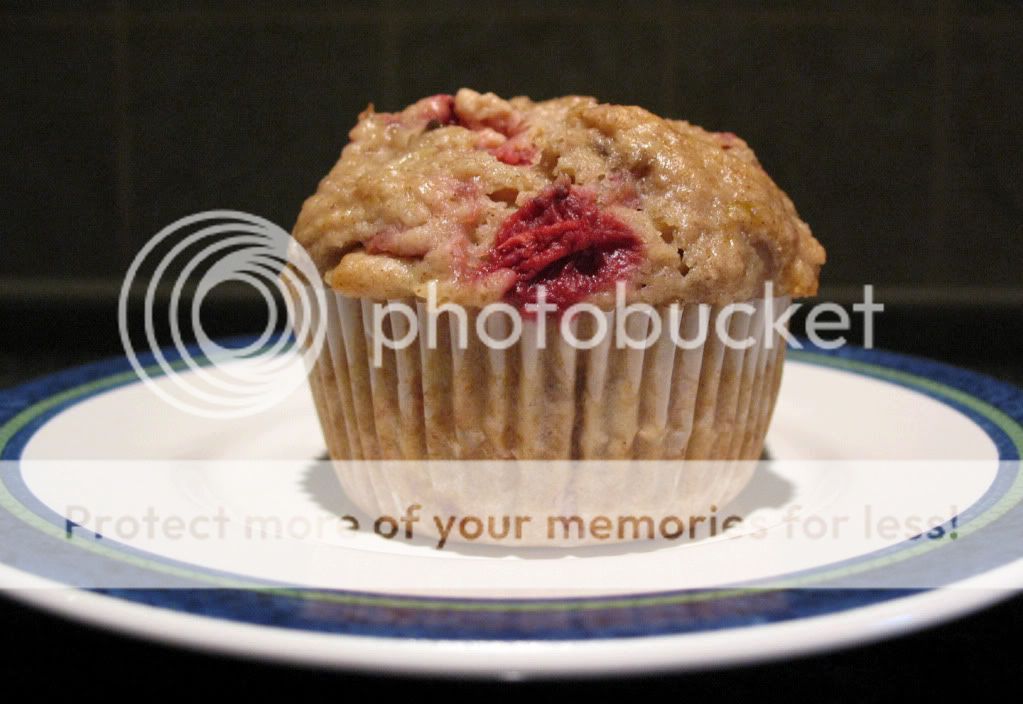
I spotted this recipe on Just2Good and followed it to a tee. Due to a limited produce selection, I ended up using frozen strawberries. Due to overzealous muffin-tin filling, I ended up with only 14 muffins instead of the suggested 18. I needed to bake them a bit longer, but they turned out beautifully! It’s worth noting that the muffin tops don’t brown when they are done, but they will spring back when lightly pressed.

The strawberry banana combination is delicious – something I had never thought to put in a muffin. The bananas lend a subtle sweetness and great moist consistancy to the muffin, while the strawberries provide bright bursts of flavor.

Strawberry Banana Muffins

Yields 18 muffins

2 1/4 Cup of flour
1/4 tsp baking soda
1 1/2 tsp baking powder
1/2 tsp salt
1 1/2 tsp cinnamon
1 1/2 Cup fresh strawberries, diced
3/4 Cup brown sugar
2 eggs
1 stick of butter, melted
2 large ripe bananas, mashed
1 tsp vanilla

1. Preheat oven to 350 degrees. Line muffin pan with 18 paper liners.
2. In a large bowl combine the flour, baking soda, baking powder, salt, and cinnamon.
3. After mixing, gently fold in the strawberries, making sure to coat them with flour.
4. In another bowl, combine the brown sugar, eggs, butter, bananas, and vanilla until mixed thoroughly.
5. Slowly combine the wet mixture with the dry mixture and stir until just combined. Overmixing will result in tough, dense muffins.
6. Divide batter evenly among the 18 muffin cups.
7. Bake for 22-25 minutes or until a toothpick inserted in the center of a muffin comes out clean.
8. Transfer to a wire rack to cool.

Oreo Cupcakes

Tuesday, April 21st, 2009

I have a major weakness for Oreos. I can easily demolish an entire bag in a few sittings, so I try to avoid buying them. I saw these Oreo cupcakes on the blog Proceed With Caution, and have been waiting for the right opportunity to make them.

The right opportunity presented itself in the form of dinner and 24 with our friends Carolyn and Rob. I had originally planned to make something simple and easy to eat neatly, since we would be eating dessert in front of the television. That plan didn’t last very long. :)

I used a Hershey’s recipe for ‘”Perfectly Chocolate” Chocolate Cake and was amazed at the number of cupcakes it produced. The recipe called for filling muffin cups 2/3 with batter, resulting in 30 cupcakes. I figured I could whittle that number down to 24 if I was generous in my batter allotment. Nope! I ended up with 31 Oreo cupcakes. I frosted half of them and will be freezing the rest for another occasion. It’s worth noting that the large number of cupcakes did cause a bit of a baking problem. I only have two muffin tins, so I had to bake 24 cupcakes first and then bake the remaining ones separately. The last 7 cupcakes did not rise as well as the first batch and ended up with a slightly concave appearance. However, they taste just fine!

I used a double batch of my grandmother’s frosting recipe and augmented it with crushed Oreos for the cookies and cream icing. The Oreos must be finely ground so that the frosting will spread easily.

Be careful when splitting the cookies to top these delicious Oreo cupcakes, as the Oreos tend to crumble quite easily. I followed suggestions found on Proceed With Caution and split the Oreos by placing the blade of my knife evenly across the cookie and pressing straight down. With a few exceptions, this method worked quite well. I certainly didn’t mind eating the Oreos that didn’t look pretty enough!

I am thrilled with the way that these came out. The Perfectly Chocolate cupcake is rich, but not too sweet. They complement the sweet cookies and cream icing quite nicely. Not only are these oreo cupcakes delicious, but I think they’re really cute! The frosting and Oreo garnish are fun and festive. This was the first time that I piped my cupcakes using a decorator bag, and I was happy to see that it’s not too hard. I’m looking forward to sharing my latest creation with friends and family!

Oreo Cupcakes

Yields 30 cupcakes

For the cupcakes:
30 Oreos, 1 side twisted off and reserved for frosting *
2 cups sugar
1 3/4 cups all-purpose flour
3/4 cup HERSHEY’S Cocoa
1 1/2 tsp baking powder
1 1/2 tsp baking soda
1 tsp salt
2 eggs
1 cup milk
1/2 cup vegetable oil
2 tsp vanilla extract
1 cup boiling water

1. Heat oven to 350?F. Line muffin pans with paper liners and place 1 Oreo (cream side up) in each liner.
2. Stir together  flour, cocoa, baking powder, baking soda and salt in medium bowl.
3. In a large bowl, combine sugar, eggs, milk, oil and vanilla. Stir until well blended.
4. Add flour mixture to large bowl and beat on medium speed of mixer 2 minutes.
5. Stir in boiling water (batter will be thin). Pour batter into prepared pans.
6. Fill muffin cups 3/4 full with batter (about 1/4 cup).
7. Bake 22 to 25 minutes. Cool completely

For the frosting:
2 1-lb packages of confectioner’s sugar
1 cup vegetable shortening
1/2 cup warm water
2 tsp vanilla extract
1 cup Oreo crumbs, made from reserved sides (used above) and additional cookies

1. Beat shortening and water together.
2. Gradually beat in confectioner’s sugar and beat until creamy.
3. Add vanilla and beat in well.
4. If needed, add more water, 1 tbsp at a time, to attain desired consistency.
5. Beat in Oreo crumbs.
6. If frosting will not be used right away, store in an airtight container.

Optional Garnish:
15 Oreos, split in half and placed atop the frosted cupcakes

* You’ll probably need more than 1 bag for the cupcakes, frosting and garnish