Archive for the ‘Baked Goods’ Category

Lemon Bars

Tuesday, April 14th, 2009

I’ve always been a fan of lemon-flavored treats. When I was growing up, my family would often pick up doughnuts at the local Honey Dew Donuts after Sunday mass. My favorites changed from year to year, but I always loved the lemon filled powdered sugar doughnut. Since powdered sugar + lemon filling = delicious, it certainly makes sense that I would love lemon bars!

I finally took the plunge and made my own bars this past weekend. They were the perfect Easter dessert – sweet, fruity and light-tasting. With the flaky crust and light, tart filling, it’s easy to forget that these bars aren’t exactly good for you. :)

I searched high and low for the perfect recipe, and ended up using one from my classic Better Homes and Gardens cookbook. The crust and filling were quite easy to make. Since I like my lemon bars to taste quite lemony, I doubled the amount of lemon zest. This recipe also gave me the opportunity to try out my nifty new Wilton pastry blender. I made the mistake of sifting powdered sugar over the bars several hours before serving them. The sugar pretty much melted away, and I had to re-sift right before dessert.

These bars were a hit, both at Easter dessert and at my husband’s office. The bars disappeared quickly and garnered rave reviews.


Lemon Bars

Yields 24 bars

2 cups all-purpose flour
1/2 cup powdered sugar
2 tbsp cornstarch
1/4 tsp salt
3/4 cup butter
4 eggs, lightly beaten
1 1/2 cups granulated sugar
3 tbsp all-purpose flour
1-2 tsp lemon zest
3/4 cup lemon juice
1/4 cup half and half, light cream or milk
powdered sugar

1. Preheat oven to 350. Grease a 13×9x2 baking pan and set aside.
2. In a medium bowl, whisk together 2 cups of flour, 1/2 cup powdered sugar, 2 tbsp cornstarch and salt.
3. Using a pastry blender, cut in butter until mixture resembles coarse crumbs.
4. Press mixture into baking pan and bake 18-20 minutes, or until edges are golden.
5. Meanwhile, whisk together egss, granulated sugar, 3 tbsp flour, zest, lemon juice and half and half.
6. Pour filling over hot crust and bake for 15-20 minutes more, or until center is set.
7. Cool completely in pan on wire rack.
8. Sift with powdered sugar and cut into bars.
9. Cover and store in the refrigerator.
Banana Chip Biscotti

Friday, April 10th, 2009

I spotted this recipe for Banana Nut Biscotti on the blog Gaga In the Kitchen (originally from Cooking Light). I’ve been meaning to try my hand at biscotti for a while, and this recipe looked like a fun departure from the usual biscotti flavors. I absolutely love banana bread, but since I am not a fan of nuts, I decided to use mini chocolate chips instead.

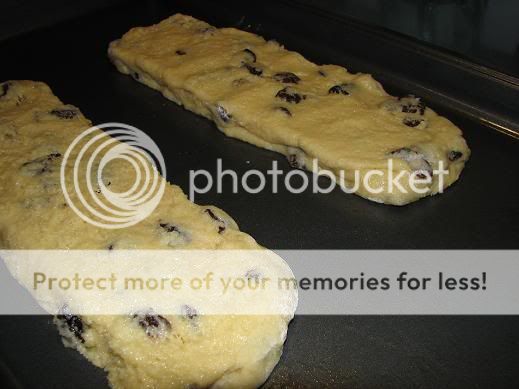
This was my first attempt at biscotti, so I don’t know exactly how the dough is supposed to feel. When I combined the wet and dry ingredients, the resulting dough was quite crumbly and did not hold together well. Since I may not have added enough mashed banana, I threw in an additional tablespoon of canola oil and a little more mashed banana. After these additions, the dough was soft, moist and workable.

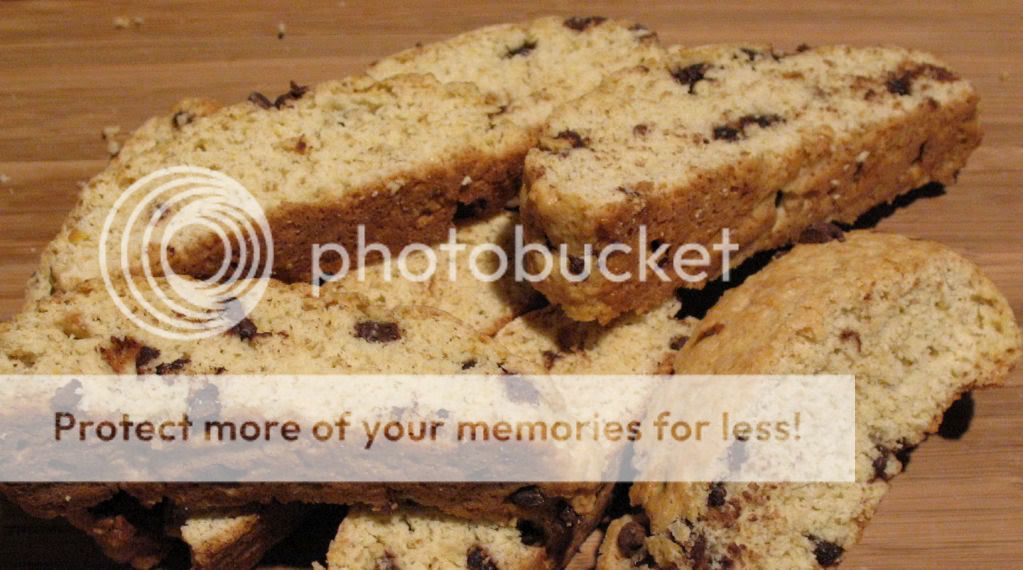
I was quite happy to find that making biscotti is very easy, and the resulting cookies are delicious! These biscotti have a nice subtle banana flavor, and the chocolate chips work well. I will be making these again, and look forward to trying other biscotti recipes. Any recommendations on what I should try next?

Banana Chip Biscotti

Yields 24 cookies

1 3/4 cups all-purpose flour
1/2 cup sugar
1 tsp baking powder
1/4 tsp salt
1/3 cup mashed very ripe banana (about 1 banana)
1 tbsp vegetable oil
1 tsp vanilla extract
1 large egg
1/3 cup chopped pecans, toasted
Cooking spray

1. Preheat oven to 350?.
2. In a small bowl, combine the flour, sugar, baking powder, and salt.
3. In a medium bowl, combine banana, oil, vanilla, and egg.
4. Stir in flour mixture. The dough should be sticky. If it is not moist enough, add additional mashed banana or vegetable oil.
5. Stir in chocolate chips.
6. Turn dough out onto a lightly floured surface. With floured hands, shape dough into 2 (8-inch-long) rolls.
7. Coat baking sheet with cooking spray or parchment paper.
8. Place rolls on prepared baking sheet and flatten to 1/2-inch thickness.
9. Bake for 23-25 minutes or until tops are golden and firm.
10. Remove rolls from baking sheet and cool 10 minutes on a wire rack.
11. Cut both rolls diagonally into 1/2 inch slices. You should get 12 slices per roll.
12. Place slices, cut side down, on baking sheet.
13. Reduce oven temperature to 250 and bake for 15 minutes.
14. Turn the cookies over and bake for an additional 15 minutes.
15. Remove the cookies from the baking sheet and cool completely on a wire rack. The cookie centers may be slightly soft, but will harden as they cool.

No-Knead French Baguette

Thursday, April 2nd, 2009

I love thumbing through cookbooks at bookstores and libraries. While the internet is a fantastic resource for recipes and cooking information, there’s something about the actual act of reading a book that I find enjoyable. During my last trip to the library, Suzanne Dunaway’s No Need to Knead caught my eye. The idea behind this book is that it’s possible to make bakery-style bread at home with simple ingredients, basic kitchen equipment and minimal time commitment.

I decided to give the French Baguette a whirl. Since the original recipe produces two full-size baguettes, I opted to halve the recipe and make two smaller baguettes. I have included the full recipe below. I use my stand mixer to speed up the process, despite the fact that this bread can easily be prepared by hand. Most recipes, including this one, have both same-day and overnight methods. Which one you use depends on how quickly you want to bake the bread and how much time you want to dedicate to preparation. I have tried both methods and was equally pleased with each one.

Using the overnight method required minimal hands-on time. I mixed the dough on Saturday night, threw it in the refrigerator and pulled it out the following morning. A few hours later I shaped and baked the loaves. The same-day method requires more intervention, but it’s minimal. The dough is easy to handle, and it only takes a few seconds to fold the dough over on itself.

The bread is delicious! It has a slight tang to it, but isn’t as strong as sourdough. The crust is crisp and crackled, while the crumb is soft and moist. Stored in a paper bag, it keeps well for a few days.

This is my new favorite bread recipe and will be making it on a regular basis. I couldn’t believe how easy it was to make an absolutely amazing French baguette.

No-Knead French Baguettes

Yields 2 full-size loaves, or 3-4 small loaves

2 cups lukewarm water
2 tbsp active dry yeast
5 cups all=purpose or unbleached bread flour
2-3 tsp salt

Mix the Dough
1. Pour water into large bowl.
2. Sprinkle yeast onto water and stir until dissolved,
3. Add two cups of flour and stir until smooth, about two minutes.
4. Add the remaining 3 cups of flour and salt. Stir until the dough pulls away from the bowl and the flour is completely incorporated – about five minutes. If the dough is too wet, stir in an additional 1/4 to 1/2 cup of flour.

Same-Day Method
1. Cover the bowl with plastic wrap and let the dough rise until doubled in volume – about 30-40 minutes.
2. Fold the dough over on itself 3 or 4 times and let the dough rise a second time until doubled in volume.
3. Fold the dough over on itself 3 or 4 times and let the dough rise a third time until doubled in volume.
4. Proceed with the shaping instructions

Overnight Method
1. Cover bowl and refrigerate over night.
2. Remove the bowl from the refrigerator at least two hours prior to shaping. Leave it covered and allow it to rise for the second time.
3. Proceed with the shaping instructions.

Shape the Baguettes
1. Preheat the oven to 450. Place a broiler pan or baking pan on the bottom rack of the oven. Cover baking sheet with parchement paper or spray with cooking spray.
2. Turn the dough onto a lightly floured surface.
3. Divide the dough into multiple 2-4 pieces (depends how many loaves you want to make) and let it rest for 15 minutes.
4. With the palms of your hand, roll each piece into a long cylinder and place it on the baking sheet.
5. Let the loaves rise until doubled in volume – about 30 minutes.
6. Use a sharp serrated knife to cut several slashes in each loaf. Spritz with water (or smooth on with hands)
7. Place bread in preheated oven and turn temperature down to 400. Pour 1 cup of warm water into broiler pan before quickly shutting oven.
8. Bake for 30-35 minutes or until the baguettes are nicely browned.
9. Cool on wire rack before serving.

Orange Blueberry Muffins

Sunday, March 29th, 2009

I had wanted to make blueberry muffins for quite awhile. About a month ago, my grocery store advertised what seemed to be an excellent sale on fresh blueberries, blackberries and strawberries. I was thrilled about the prospect of making luscious blueberry muffins, but disappointed when I laid eyes upon the tiniest carton of fresh berries I had ever seen! Since the quantity didn’t seem worth the price, I walked away. After finishing up at the grocery store, I hit the Target next door to complete my grocery shopping. While wandering the frozen food section, I saw that frozen berries were on sale. On a whim, I picked up a bag of blueberries… and promptly forgot about it.

I finally used the frozen berries when my mother joined me for tea on a recent afternoon. I wanted a something freshly-baked to serve with our Lady Grey tea, so I scoured my Google Reader for a fun recipe. I initially saw these muffins on Dinner & Dessert, but found the actual recipe text here. This recipe comes from Dorie Greenspan’s Baking: From My Home to Yours. I’m looking forward to checking out other recipes from this cookbook.

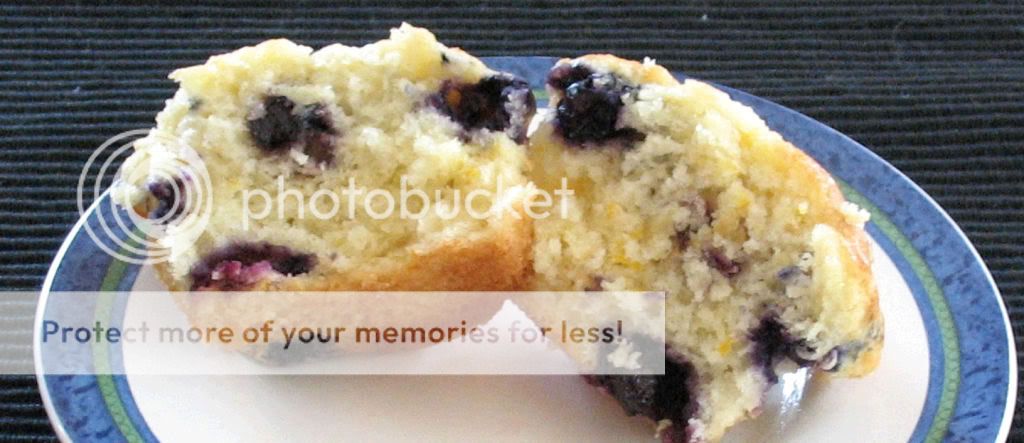
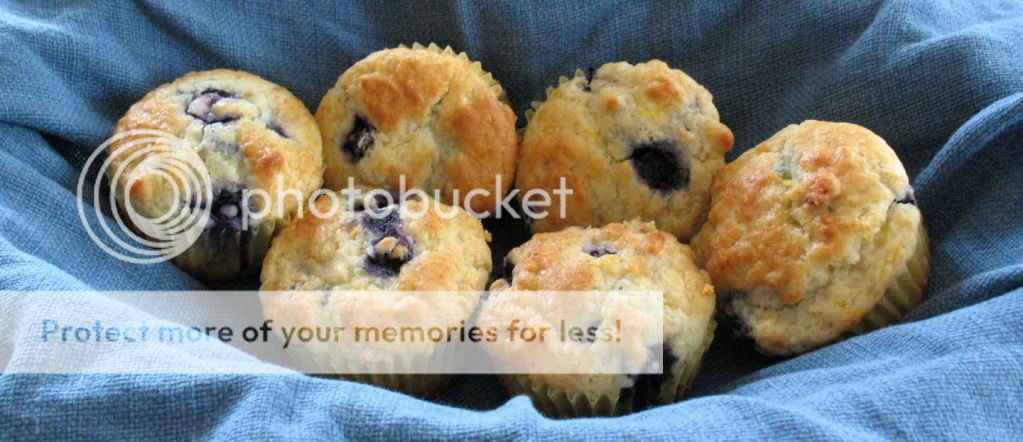
I made the recipes during my lunch break (on of the benefits of working from home!) and was pleased at how quickly they came together. Since the butter had to cool after being heated, I melted it before I started working on juicing and zesting the orange. The juice and zest add a lovely citrus punch. It’s a fun change from your typical blueberry muffin. The muffins themselves are soft, buttery and moist.

Apparently, my husband really liked these muffins! :) First thing Saturday morning, Mike I had a conversation that went like this:

Mike: So, what’s for breakfast today?

Beth: Toast…eggs…something like that. The usual.

Mike: We’re not having those orange blueberry muffins? I thought you said you were making them.

Beth: <puzzled look>

Mike: Oh, I must have dreamed that.

Here’s the muffin that’s good enough to dream about:

Orange Blueberry Muffins

Yields 12 muffins

Grated zest and juice of 1 orange
About 3/4 cup buttermilk*
2 large eggs
3 tablespoons honey
1 stick (8 tablespoons) unsalted butter, melted and cooled
1/3 cup sugar
2 cups all-purpose flour
2 1/2 teaspoons baking powder
1/4 teaspoon baking soda
1/4 teaspoon salt
1 cup blueberries – fresh, preferably, or frozen (not thawed)

Decorating sugar, for topping (optional)

Center a rack in the oven and preheat the oven to 400 degrees F. Butter or spray the 12 molds in a regular-size muffin pan or fit the molds with paper muffin cups. Alternatively, use a silicone muffin pan, which needs neither greasing nor paper cups. Place the muffin pan on a baking sheet.

Pour the orange juice into a large glass measuring cup or a bowl and pour in enough buttermilk to make 1 cup. Whisk in the eggs, honey and melted butter.

In a large bowl, rub the sugar and orange zest together with your fingertips until the sugar is moist and the fragrance of orange strong. Whisk in the flour, baking powder, baking soda and salt. Pour the liquid ingredients over the dry ingredients and, with the whisk or a rubber spatula, gently but quickly stir to blend. Don?t worry about being thorough – the batter will be lumpy and bubbly, and that?s just the way it should be. Stir in the blueberries. Divide the batter evenly among the muffin cups.

Bake for 22 to 25 minutes. If you want to top the muffins with decorating sugar, sprinkle on the sugar after the muffins have baked for 10 minutes. When fully baked, the tops of the muffins will be golden and springy to the touch and a thin knife inserted into the center of the muffins will come out clean. Transfer the pan to a rack and cool for 5 minutes before carefully removing each muffin from its mold.

*I did 1 tbsp vinegar then fill up to the 1 cup line with milk. Then I used this mixture for the required buttermilk.

St. Patrick’s Day Feast

Tuesday, March 17th, 2009

As a tribute to my Irish heritage, I decided to post some St. Patrick’s day recipes – well, they may not be Irish per se, but at least they have Guinness in them! My husband and I have been on a big Irish food kick for the past couple weeks in preparation for a big trip to Ireland we’re planning for May, so I’ve been on the prowl for Ireland-inspired Guinness recipes for several weeks now.

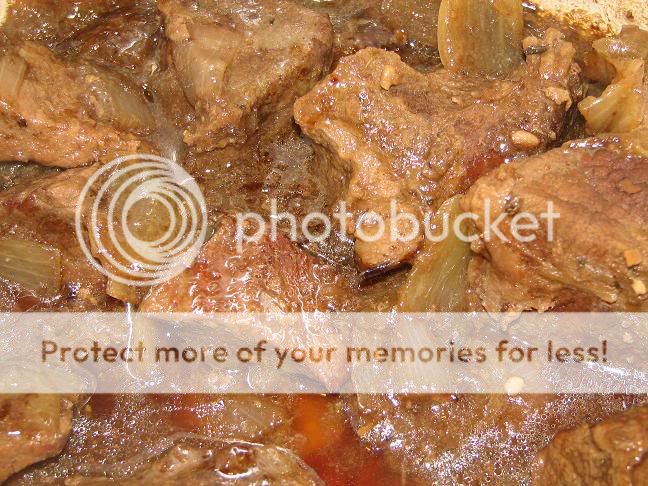
First, I made a traditionally Belgian dish, Beef Carbonnade, Irish by using Guinness instead of a belgian ale – this recipe was modified from How to Cook Everything, by Mark Bittmann (which was actually a book Beth gave me for my engagement! ) Anyway, I highly recommend the book – it really does teach you how to cook everything.

Irish Beef Carbonnade

1-2 tablespoons of canola or vegetable oil

2lbs beef stew meat

1 clove garlic, peeled & crushed

2 large or 3 medium onions, cut into eighths

1 1/2 cups of Guinness

Salt and Pepper to taste

1/2 teaspoon dried thyme leaves

1 Bay Leaf

Instructions:

Heat a large casserole dish (or deep skillet) over medium-high heat for 2-3 minutes. Add the oil and the crushed garlic. Cook, stirring, for about 1 minute. Remove the garlic from the pan.

Add the beef to the skillet, browning on all sides. Season with salt and pepper lightly while it sautes.

When the meat is browned, remove it from the pan. Add the onions. Cook, stirring for about 10 minutes. Then add the Guinness and add back the beef. Bring to a boil, then reduce heat to low and cook undisturbed for about 60 minutes, or until you’re happy with the consistency of the stew.

Serve over warm buttered egg noodles, or boiled potatoes.

Guinness Chocolate Cake with Cream Cheese Frosting

My second dish is a chocolate cake (yum!), also made with Guinness. I found this recipe a while back and thought it looked fabulous, and I’ve been saving it for St. Patrick’s day – I made it for a family celebration last weekend, and it went over very well! It’s not too sweet, very moist, and the Guinness adds a complexity to the chocolate flavor I really appreciated. I think the cream cheese frosting complimented the flavor well – although I did have to add much more confectioner’s sugar than it called for – my measurements are what I included below. In the end, though, the consistency was lovely. I decorated the cake with a shamrock, in the spirit of a finely poured pint in Ireland.

Ingredients
Cake
1 cup Guinness
1 stick unsalted butter, sliced
? cup unsweetened cocoa powder
2 cups granulated sugar
? cup sour cream
2 eggs
1 tablespoon vanilla extract
2 cups all-purpose flour
2 ? teaspoons baking soda

Icing
8 ounce cream cheese
2 cups confectioners’ sugar
2 tbsp heavy cream

Method
Preheat oven to 350 degrees. Butter a 9-inch springform pan and line bottom with parchment paper.

Pour Guinness into a large saucepan, add butter and heat until melted. Whisk in cocoa powder and sugar. In a small bowl, beat sour cream with eggs and vanilla and then pour into brown, buttery, beery mixture and finally whisk in flour and baking soda.

Pour cake batter into greased and line pan and bake for 45 minutes to an hour (Check at 45 minutes for doneness, poking a skewer in center.). Leave to cool completely in the pan on a cooling rack, as it is quite a damp cake.

When cake is cold, gently peel off parchment paper and transfer to a platter or cake stand.

Place cream cheese and confectioners’ sugar in a mixing bowl, and whip with an electric beater, until smooth (You may also do this with a food processor.).

Add cream and beat again until you have a spreadable consistency. Frost the cake, beginning in the middle and fanning outward (like foam might, on a real pint!).

Irish Brown Soda Bread

Tuesday, March 17th, 2009

Since soup is always better when accompanied by bread, I made Irish Brown Soda Bread using a recipe from the Boston Globe. I was amazed at how easy it was to throw together this yeast-free bread. The resulting bread was moist and flavorful – perfect with a pat of butter or a slice of tart Dubliner cheese.

As written, the recipe produces two moderately-sized loaves of bread. We had enough bread for a Sunday family dinner and two nights of leftovers. If I was cooking for on me and my husband, I would probably halve the recipe and make a single loaf.

Irish Brown Soda Bread

Yields 2 loaves

2 3/4 cups whole-wheat flour
2 cups all-purpose flour
1 1/2 teaspoons baking soda
1/4 cup sugar
1 1/2 teaspoons salt
1/3 cup canola oil
2 cups buttermilk
Extra whole-wheat flour (for sprinkling)
1. Set the oven at 375 degrees. Line a baking sheet with parchment paper.

2. In a bowl, combine the whole-wheat and all-purpose flours, baking soda, sugar, and salt. With a wooden spoon, mix the dry ingredients until they are blended.

3. In another bowl, combine the oil and buttermilk. Use the spoon to stir the liquids into the flour mixture until they comes together to form a dough.

4. Turn the dough out onto a lightly floured counter and knead it gently several times until smooth. Divide the dough in half and shape each into a ball. Pinch the edges into the center and turn the balls over so the tops are smooth. Set them, smooth sides up, on the baking sheet, leaving at least 4 inches between them.

5. With a paring knife, mark a 3/4-inch-deep cross on the top of each round. Bake the breads for 25 to 30 minutes or until they are puffed and browned and sound hollow when tapped on the bottom.

6. Cool on a wire rack. Cut into thick slices for serving.

Flourless Chocolate Torte

Wednesday, March 11th, 2009

First, sorry for the long break in posting! My husband and I were refinishing our guest room. 2 buckets of spackle, a roll of fiberglass tape, and a few buckets of paint later…we are tired but done.

In tastier news, my mother-in-law gave me this recipe for a Flourless Chocolate Torte – she first made it for my mother, who follows a gluten-free diet, at a family function a few years ago. The cake was an instant hit – it’s very rich and chocolatey, almost fudgey. Even the non-gluten-free folks in the room thought it was incredible! Unlike a lot of gluten-free cakes, it is incredibly moist and has a lovely texture. This recipe is now legend in our circle – friends and family alike have procured this recipe and make it for special occasions – I made one this week in preparation for a weekend celebration and can’t wait until Saturday to try it!

This recipe does require a fair amount of work – not something to try when you’re looking for something quick to whip up, but the results are very tasty and worth the time and effort.

Jan’s Flourless Chocolate Torte

Ingredients:

12 oz semi-sweet chocolate (I used chocolate chips)

1 oz (by weight) unsweetened cocoa powder

1 and 1/2 sticks of salted butter (sliced into tablespoon sized pieces)

8 eggs

1 tsp vanilla

1/8 tsp salt

2/3 cup brown sugar

Preheat oven to 350 degrees.

Melt the chocolate chips, cocoa powder, and butter in a double boiler (or a Pyrex bowl over a saucepan of hot water). Meanwhile, butter a springform pan (mine was 12 inches) and line the bottom with parchment paper. Cover the outside with a piece of aluminum foil – this cooks in a water bath, and using the foil keeps the water from seeping in!

Separate the 8 eggs. Add the vanilla to the egg yolk bowl and mix.

When the chocolate mixture has finished melting, remove it from the heat so it has the chance to cool a little. Take 1-2 tablespoons of the melted chocolate mixture and add it to the egg yolks, mixing well (this will gradually increase the yolk temperature so the eggs don’t cook!) Then add the egg yolk mixture back into the bowl with the rest of the melted chocolate mixture.

With the egg whites – add the salt and begin to whip the eggs in a bowl, gradually adding the brown sugar as you go. When all the sugar is incorporated beat on high until peaks begin to foam.

Stir about one half of the egg white mixture into the chocolate and egg yolk mixture until they are well mixed. Then gently fold in the rest of the egg white mixture, preserving the fluffiness of the egg whites as much as you can.

Pour the mixture into the prepared springform pan. Place the springform pan in a roasting pan and fill to about 1 inch depth with warm/hot water. Bake for 40-50 minutes; the cake is done when a good crust has formed.

Mint Brownie Cups

Wednesday, March 4th, 2009

I picked up a bag of Andes Creme de Menthe baking chips at Target shortly after Christmas. I had thought that they’d be the perfect addition to some chocolate chocolate-chip cookies or basic brownies, as they’re essentially crushed Andes mints. After my holiday baking frenzy wound down, I promptly forgot about them.

As I was perusing older recipes from some of my favorite blogs, I found the perfect recipe in which to use my crushed Andes mints: the Peppermint Brownie Cups on Baking Blonde’s Weblog. The recipe looked like the perfect combination of mint and chocolate, and I liked that the brownies were pre-portioned using a muffin tin. I always say that I’m going to freeze most of the brownies that I make, but within a matter of days my husband and I have consumed every last one. Once the pan is out of the oven, my self-discipline goes out the window!

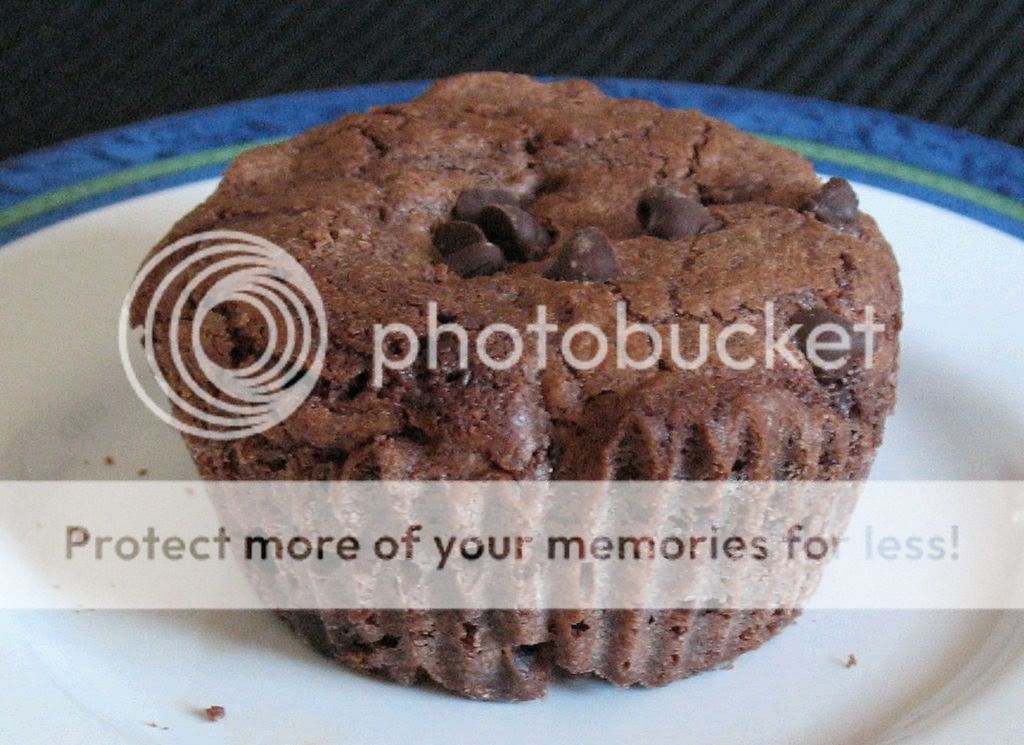
This was only my second time making brownies from scratch, and they’re just perfect! The brownies have a rich, chocolate flavor and a consistency that’s dense and chewy, but not too heavy. I followed the recipe quite closely, deviating only to use my Creme de Menthe Chips in place of the Peppermint Crunch Chips, and to top the brownies with mini chocolate chips.

After enjoying several of the brownies, I stashed the rest in the freezer. When a chocolate craving hits, these perfectly-portioned brownies will be ready in an instant!

Peppermint Brownie Cups

Yields 14-16 brownies
6 TBS butter
6 oz semisweet chocolate (chopped)
2 oz. bittersweet chocolate (chopped)
1 cup sugar
2 eggs
1/4 tsp peppermint extract
1/4 tsp vanilla
3/4 cup all-purpose flour
1/4 teaspoon baking powder
1/4 teaspoon salt
1/2 cup Milk Chocolate Chips
2 cups Andes Creme de Menthe Chips or Andes Peppermint Crunch Baking Chips

Preheat oven to 350 degrees.

Line a muffin tin with paper liners. Lightly spray liners with cooking spray.

In a heat-proof bowl, melt together butter and chocolate in the microwave in 30 second intervals stirring after each interval until smooth. Allow to cool for 5 minutes.

In a large bowl, whisk together flour, baking powder, and salt in a medium bowl; set aside.

Whisk or beat the sugar into the chocolate mixture. Add eggs and peppermint extract mixing until combined and smooth. Add flour mixture and mix until combined. Gently fold in the 1/2 cup chocolate chips and 1/2 cup Andes Peppermint Crunch Baking Chips.

Carefully pour batter to prepared each muffin liner filling about 2/3 full. Sprinkle a few Andes Peppermint chips over the top of each individual brownie. . Bake for 18-23 minutes or until a cake tester comes out with a few crumbs.

*Baking time will depend on your oven, watch carefully so you don?t overbake! Mine were done in 20 minutes.

Allow to cool before removing from muffin pan.
Keep brownies in cupcake liners until ready to serve to help prevent them from drying out.


Cream-Filled Cupcakes (Lulu’s Cupcakes)

Monday, February 16th, 2009

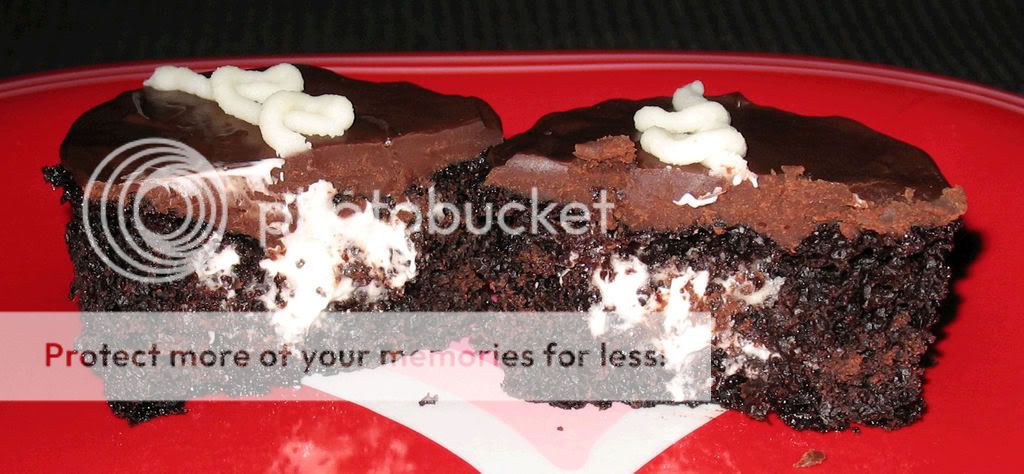
I spotted these Hostess cupcake look-alikes in the February/March edition of the Food Network Magazine. The recipe is provided by Sally Russo, the owner of Lulu’s Bake Shoppe in Boston. With their shiny, smooth ganache topping, these cupcakes looked mouth-wateringly good. I’ve wanted to try making them since I bought the magazine a month ago, but figured they were worth saving for a special occasion. Since my husband and I did not out on Valentine’s Day, these were the perfect treat for our night in.

Since I filled the muffin cups a little more than I should have, I ended up with 21 cupcakes, and not a full 2 dozen. Despite the fact that the cupcakes baked through perfectly, the centers of most of them did not rise completely. Filling the cupcakes was easier then I thought, but I had a hard time following the “do not overfill” direction. I only used about half of the filling. I’m not sure if this is because my dimpled cupcakes had less room for filling, or because it’s a generous recipe.

I ran into a little bit of trouble with the ganache topping. I think I let is cool a little too long, so it started to set up as I was still working on the cupcakes. Because of this, the ganache went on thickly and only a few of the cupcakes have a really glossy finish. The finished product still looked and tasted great.

This cream-filled cupcake recipe was pretty time-consuming to work through, simply because there were so many components. None of the steps are complicated, but you need to prepare the cupcakes, cream filling, ganache topping and decorator frosting. It’s a lot of work for one baking session. Next time, I will plan to bake and fill the cupcakes one day, and then top them with ganache and frosting the following day.

These cream-filled cupcakes were well worth the time I invested. The cupcake itself has a rich chocolate flavor, and a dense, moist consistency. The cream filling is a fun, sweet surprise and the bittersweet ganache topping is rich and smooth. I will be definitely be making these again!

Lulu’s Cream Filled Cupcakes

Yields 24 cupcakes

FOR THE CUPCAKES
1 1/4 cups all-purpose flour
2 tsp baking soda
2 tsp baking powder
1/4 tsp salt
1 1/4 cups granulated sugar
4 oz unsweetened chocolate, chopped
1 stick butter, cut into pieces
2 tsp vanilla extract
2 large eggs, lightly beaten

FOR THE FILLING
4 tbsp butter, at room temperature
1 cup confectioner’s sugar
2 tsp vanilla extract
3 tbsp heavy cream
1 cup marshmallow creme

FOR THE GANACHE AND ICING
6 oz bittersweet chocolate, chopped
1/2 cup heavy cream
1 stick, plus 1 tbsp butter
2 1/4 tsp vanilla extract
1 tbsp milk
2 cups confectioner’s sugar

1. Position a rack in the center of the oven and preheat to 350. Place paper liners in two 12-cup muffin pans.

2. Prepare the cupcakes. Sift together the flour, baking soda, baking powder and salt in a bowl.

Bring the sugar and 1 cup of water to a boil in a saucepan, stirring until the sugar dissolves, about three minutes. Pour into a large bowl; add the chocolate and butter and let sit, stirring occasionally, until the chocolate is melted and the mixture has cooled slightly. Stir in the vanilla.

Using a mixer, beat in the eggs, then mix in the dry ingredients.

3. Divide the batter evenly between the prepared pans (about 1/4 cup batter per cupcake) and bake until a toothpick inserted in teh center comes out clean, about 25 minutes. Cool in the pans for about 25 minutes, then transfer cupcakes to rack to cool completely.

4. Meanwhile, prepare the filling: Using a mizer, cream the butter until light and fluffy. Beat in 1/2 cup confectioners sugar. Add the vanilla and 1 tbsp heavy cream; beat until smooth. Beat in the remaining 1/2 cup confectioners sugar and 2 tbsp heavy cream in batches, alternating after each addition. Beat in the marshmallow creme; set aside.

5. Prepare the ganache: Place the chocolate in a stainless-steel bowl. Heat the cream and 1 tbsp butter until just boiling, then pour over the chocolate; let stand for 5 minutes. Whisk until smooth. Add 2 tsp vanilla; let stand until cool but still glossy and liquid.

6. Spoon the filling into a pastry bag wit a medium tip. Insert the tip into the center of each cupcake top; fill until the cupcake is heavier (do not overfill). Dip the cupcake tops in the ganache. Chill for at least 15 minutes.

7. Meanwhile, prepare the icing: using a mixer, beat the remaining 1 stick butter, 1/4 tsp vanilsl, the milk and confectioners sugar until smooth. Spoon into a pastry bag with a small tip; pipe onto the cupcakes to decorate.

Cherry Lemonade Biscotti

Monday, February 9th, 2009

I started making Biscotti over the holidays because I found a recipe I liked, and I really love a tasty cookie along with my coffee in the morning. Between all the holiday parties and family functions we attended, I’ve tried a bunch of different recipes since – I find that this one has a great taste and texture without huge amounts of fat. It is modified from a Cooking Light recipe for plain lemon biscotti - my main modification includes adding dried cherries, which I personally like the best, but I have tried this recipe using chocolate chips, dried cranberries, and toasted walnuts as well. They supposedly freeze well (after baking but before the glazing step!) but I’ve never had enough left to try to freeze them.

Ingredients

  • 2 3/4 cups all-purpose flour
  • 1 cup sugar
  • 2 teaspoons baking powder
  • 1 tablespoon grated lemon rind
  • 2 tablespoons fresh lemon juice, divided
  • 1 tablespoon lemon extract
  • 1 tablespoon vegetable oil
  • 3 large eggs
  • 3/4 cup dried cherries (or cranberries, walnuts, chocolate chips)
  • Cooking spray
  • 2/3 cup powdered sugar

Preparation

Preheat oven to 350?.

Lightly spoon flour into dry measuring cups; level with a knife. Combine flour, sugar, and baking powder in a large bowl. Combine rind, 1 tablespoon lemon juice, extract, oil, and eggs, and add to flour mixture, stirring until well-blended (dough will be dry and crumbly). Mix cherries into the dough until well incorporated. Turn dough out onto a lightly floured surface; knead lightly 7 to 8 times. Divide dough in half. Shape each portion into an 8-inch-long roll. Place rolls 6 inches apart on a baking sheet coated with cooking spray; flatten each roll to 1-inch thickness.

Bake at 350? for 30 minutes. Remove the rolls from baking sheet; cool for 10 minutes on a wire rack. Cut each roll diagonally into 15 (1/2-inch) slices with a serrated knife using very little pressure so the cookies don’t crumble!

Place the slices, cut sides down, on baking sheet. Reduce oven temperature to 325?; bake for 10 minutes. Turn cookies over; bake an additional 10 minutes (the cookies will be slightly soft in center but will harden as they cool). Remove from baking sheet, and cool completely on wire rack.

Combine 1 tablespoon lemon juice and powdered sugar, and drizzle over the biscotti.