Archive for the ‘Baked Goods’ Category

Low-Fat Oatmeal Raisin Cookies

Friday, February 6th, 2009

Thanks for the kind introduction Beth!

I first made these cookies a few years ago when I was in the middle of a health-kick and wanted something sweet after dinner. I found the recipe for low-fat oatmeal raisin cookies on allrecipes.com - they contain no oil and no eggs, but the addition of applesauce keeps them moist all the same! They come out a little more cakey than traditional oatmeal-raisin cookies, and make a very hearty snack while still keeping fat to a minimum. In the past, I’ve made them larger and called them Oatmeal Raisin Breakfast Bars – a great grab-and-go breakfast. The original recipe calls for plain applesauce, but I usually use cinnamon applesauce because that’s what we usually have on hand. If you choose to add walnuts, I suggest toasting them first – 10 minutes in the oven at 350 degrees will bring out some extra nutty taste.

Low-Fat Oatmeal Raisin Cookies

INGREDIENTS
1/4 cup packed brown sugar
1/4 cup granulated sugar
3/4 cup cinnamon applesauce
1 cup all-purpose flour
1 teaspoon baking powder
1/2 teaspoon salt
1/2 teaspoon ground cinnamon
1 cup rolled oats
1/2 cup raisins
1/2 cup chopped walnuts (optional)

DIRECTIONS
Preheat oven to 350 degrees F ( 175 degrees C ). Grease a cookie sheet.
In a medium bowl, stir together the brown sugar, white sugar, and applesauce. Sift together the flour, baking powder, salt, and cinnamon; stir into the applesauce mixture. Add the rolled oats, raisins and chopped nuts (if desired); stir until combined.
Drop by rounded teaspoonfuls onto the prepared cookie sheet. Bake for 10 minutes in the preheated oven. Allow cookies to cool slightly before removing from the baking sheet.

Whoopie Pies

Wednesday, February 4th, 2009

This past full, I stumbled across a Martha Stewart recipe for Mini Pumpkin Whoopie Pies. I love whoopie pies and was interested in trying to make them, but I wasn’t interested in her pumpkin filling. After searching several sites, I decided to use Martha Stewart’s recipe for the cookie and a traditional filling recipe from Epicurious.

I was so anxious to try these that I started preparing them at 9:30 on a weeknight. My husband was two hours into what was supposed to be a 20 minute conference call and I was bored, so baking seemed like the perfect remedy. My efforts were rewarded with a fun, delicious dessert.

For the cookie part, I barely diverted from the published recipe. I only make the cookies a little larger than proscribed size. The original recipe results in 20 mini whoopie pies (40 individual cookies), while I usually end up with 12 moderately sized whoopie pies (24 individual cookies).

This time, I made my cookies a little too large and ended up with 18 individual cookies. The dough didn’t spread well and the tops of the cookies crackled quite a bit. This usually doesn’t happen. Despite the cracked appearance, they tasted great!

My filling differs slightly from the original recipe at Epicurious, in that I use a little bit more butter than called for.

The resulting whoopie pies are delicious! The cookies are have a rich cocoa flavor and a springy, cake-like texture. The filling is sweet and smooth. On it’s own (you have to lick the beaters when you’re done!) it can seem a little too sweet, but it’s just right when paired with the cocoa cookies.

I would imagine that these cookies would freeze well, but they’ve never lasted long enough for me to test that theory! Enjoy!

Whoopie Pies

Yields 24 cookies (enough for 12 pies)

For the cookies:
1 3/4 cups all-purpose flour
3/4 cup unsweetened cocoa powder (not Dutch-process)
1 1/2 tsp baking soda
1/2 tsp coarse salt
1 tbsp butter, softened
1/4 cup vegetable shortening
1/2 cup granulated sugar
1/2 cup packed dark-brown sugar
1 large egg
1 cup milk
1 teaspoon pure vanilla extract

For the filling:
5 tbsp butter, softened
1/4 cup vegetable shortening
1 1/4 cups confectioners sugar
2 cups marshmallow cream such as Marshmallow Fluff
1 teaspoon vanilla

1. Preheat oven to 375 degrees.
2. Sift together flour, cocoa powder, baking soda, and salt into a medium bowl; set aside.
3. Place butter, shortening, and sugars into the bowl of an electric mixer fitted with the paddle attachment. Mix on high speed until smooth, about 3 minutes.
4. Add egg; mix until pale and fluffy, about 2 minutes.
5. Mix in half the flour mixture, then the milk and vanilla.
6. Mix in remaining flour mixture.
7. Drop about 1 tablespoon of dough onto baking sheets lined with parchment paper, spacing 2 inches apart.
8. Bake until cookies spring back when lightly touched, 12 to 14 minutes.
9. Transfer baking sheets to wire racks and let cool 10 minutes. Remove cookies from baking sheets and transfer to wire racks using a spatula; let cool completely.
10. Make the filling: Beat together butter, confectioners sugar, marshmallow, and vanilla in a bowl with electric mixer at medium speed until smooth, about 3 minutes.
11. Once cookies have completely cooled, spread filling on flat side of one cookie and top with a second cookie.

Parmesan Bread

Sunday, February 1st, 2009

I’ve been making the basic boule from Artisan Bread in Five Minutes a Day for nearly a year now. My husband spotted this Sun-Dried Tomato and Parmesan Bread recipe while thumbing through the book the other day. Since we had company coming for dinner on Saturday night, I decided to give it a try.

The central idea behind Artisan Bread in Five Minutes a Day is that “Pre-mixed, pre-risen, high moisture dough keeps well in the refrigerator.” Initially mixing the dough takes about 10 minutes or less and shaping/baking a loaf only requires 5 minutes of attended preparation time. Additionally, this dough can be mixed using only a spoon and a mixing bowl. No kneading is required.

The book contains a number of base dough recipes that can be modified, resulting in dozens of different kinds of bread and bread products.

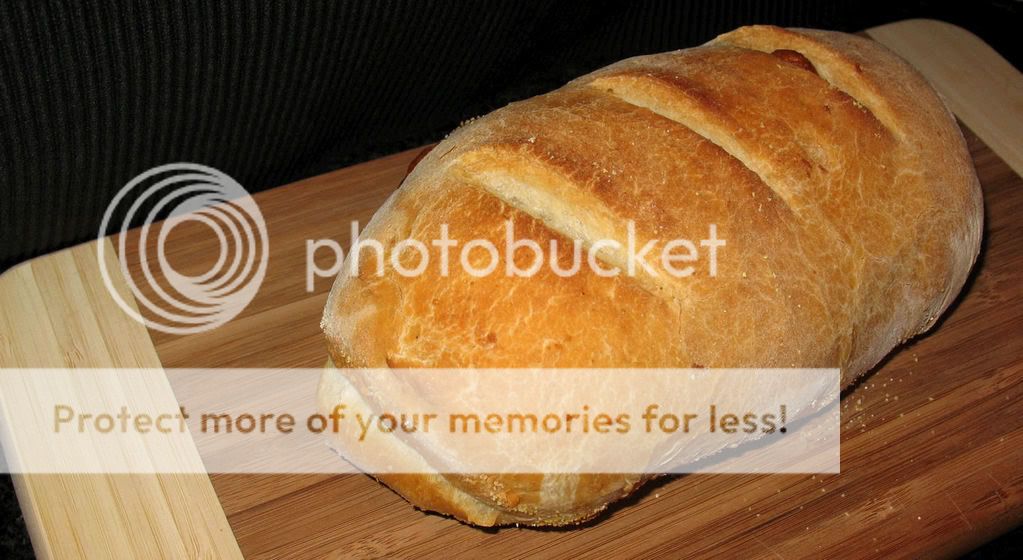
This recipe uses 1 pound of the Master Bread recipe, which I’ve detailed in a previous post. I omitted the sun-dried tomatoes, making this a Parmesan bread. The cheese added a nice tang to the bread and brushing the crust with olive oil resulted in a nicely browned, crisp crust.

Parmesan Bread

Yields a single 1-pound loaf

1 pound (grapefruit-sized portion) of dough
Olive oil for brushing the loaf
1/2 cup grated Parmesan cheese (or other Italian-style grating cheese)
Cornmeal pizza peel

1. Dust the surface of the refrigerated dough with flour and cut off a 1-pound piece. Dust the piece with more flour and quickly shape it into a ball by stretching the surface of the dough around the bottom on all four sides, rotating the ball a quarter turn as you go.

2. Roll out the ball into a 1/4-inch-thick rectangle. As you roll out the dough, use enough flour to prevent it from sticking to the work surface, but not so much as to make the dough dry.

3. Brush the dough with olive oil and sprinkle with cheese. Starting from the short end, roll the dough into a log and gently tuck the ends under to form an oval loaf. Allow to rest and rise on a cornmeal-covered pizza peel for 1 hour (or just 40 minutes if you’re using fresh, unrefrigerated dough).

4. Twenty minutes before baking tiem, preheat the oven to 450, with baking stone placed on the middle rack. Place an empty broiler tray on any other shelf that won’t interfere with the rising bread.

5. Brush the top of the dough lightly with olive oil and slash parallel cuts across the loaf, using a serrated bread knife.

6. Slide the loaf directly onto the hot stone. Pour 1 cup of tap water into the broiler tray, and quickly close the oven door. Bake for 30 to 35 minutes, or until deeply browned and firm.

7. Allow to cool before slicing and eating.

Oatmeal Chocolate Chip Cookies

Saturday, January 24th, 2009

I haven’t baked in nearly a month. After my Christmas baking extravaganza, I decided that I needed to take break from sweets and embarked upon a one month baking moratorium. Entertaining or bringing goodies to a friends home were the only exceptions to my rule. We had company tonight, so I could bake with a clear conscience. :)

I wanted something sweet, but not too heavy. With the cold temperatures expected this weekend, I figured that I wanted something that would go well with a warm cup of tea. Oatmeal chocolate chip cookies seemed to fit the bill, so I thumbed through my cookbook collection in search of a recipe.

Both Betty Crocker and Better Homes and Gardens had recipes that looked simple and tasty. Betty Crocker won me over by offering a low-fat version of the recipe. Using unsweetened applesauce in place of shortening and Eggbeaters instead of eggs cut the fat and calories quite a bit. Since the texture of oatmeal cookies can vary widely and still taste wonderful, I figured it was worth a shot.

Since I forgot to purchase Eggbeaters, I used regular eggs and only substituted applesauce for shortening. The substitution did not cause any problems in consistency or taste, and I would happily try Eggbeaters next time.

When I first removed the cookies from the oven and transferred them to my wire racks, they seemed very soft and I was concerned that they wouldn’t hold together well. The cookies were soft and chewy – a little softer than I expected – but delicious. As they cooled completely, the cookies took on more firmness. They’re still moist, soft and chewy, but the cookies hold their shape and don’t crumble as easily. The applesauce did not change the flavor of the oatmeal cookies much. If anything, it added an extra hint of sweetness.

I enjoyed a few cookies with a piping hot cup of Lady Grey tea tonight. I’m happy with the recipe selection and will certainly be making these oatmeal chocolate chip cookies again.

Oatmeal Chocolate Chip Cookies
from Betty Crocker’s Cookbook
Yields about 48 cookies

2/3 cup granulated sugar
2/3 cup packed brown sugar
1/2 cup butter, softened
1/2 cup unsweetened applesauce
2 large eggs
1 1/2 tsp vanilla
1 1/2 tsp ground cinnamon
1 tsp baking soda
1/2 tsp baking powder
1/2 tsp salt
1 cup flour
3 cups quick-cooking or old-fashioned oats
1 cup semi-sweet chocolate chips

1. Preheat oven to 375.
2. In a medium bowl, whisk together cinnamon, baking soda, baking powder, salt and flour.
2. In a separate bowl, cream together butter and sugars.
3. Add applesauce, eggs and vanilla to the butter and sugar. Mix well.
4. Mix in the dry ingredients (flour mixture and oats).
5. Stir in chocolate chips
6. Drop dough by heaping teaspoonfuls about 2 inches apart on an ungreased cookie sheet.
7. Bake 9 to 11 minutes or until lightly browned along edges. Immediate remove from cookie sheet and cool on wire rack.

* 1/2 cup of shortening may be used in place of applesauce. If shortening is used, reduce vanilla and cinnamon to 1 tsp each.

* 1/2 cup of Eggbeaters may be used in place of 2 eggs.

Peppermint Bark

Sunday, December 28th, 2008

Peppermint bark is tasty, festive addition to your holiday treats. Pre-made peppermint bark can be purchased at many retailers, but it’s typically pretty pricey. With two bags of chips, 8 candy canes and less than an hour of your time, you can make this fun holiday treat at home.

Even though Christmas Day has come and gone, I’m still reveling in the Christmas season and will be preparing peppermint bark for a party this week. It’s not too late to give it a try!

If you melt the chocolate in the microwave, go low and slow so it doesn’t seize or scorch. White chocolate is particularly fussy. It’s always good to have an extra bag on hand, just in case. I usually start heating for 1 minute at 50% power and then heat at 30 second intervals, stirring in between, until it’s sufficiently melted.

Peppermint Bark

1 12 oz. bag white chocolate chips
1 12 oz. bag of milk or dark chocolate chips
8 candy canes
1/4 tsp peppermint extract (optional)

1) Line cookie sheet with wax paper.
2) Unwrap candy canes, place in zip-top bag and crush. Smaller pieces mix more easily and are less likely to fall off of the bark.
3) Melt milk chocolate in double-boiler or microwave.
4) If desired, mix 1/4 tsp. peppermint extract into melted milk chocolate.
5 Spread milk chocolate evenly over entire cookie sheet.
6) Place cookie sheet in freezer for approx. 20 minutes.
7) Once the milk chocolate has hardened, melt white chocolate.
8) Mix 1/2 of the crushed candy cane into the white chocolate.
9) Quickly spread melted white chocolate over the hardened milk chocolate.
10) Sprinkle remaining crushed candy canes on white chocolate, pressing lightly.
11) Return cookie sheet to freezer for at least 30 minutes. When chocolate has hardened, break up peppermint bark.

Chocolate Crinkles

Friday, December 19th, 2008

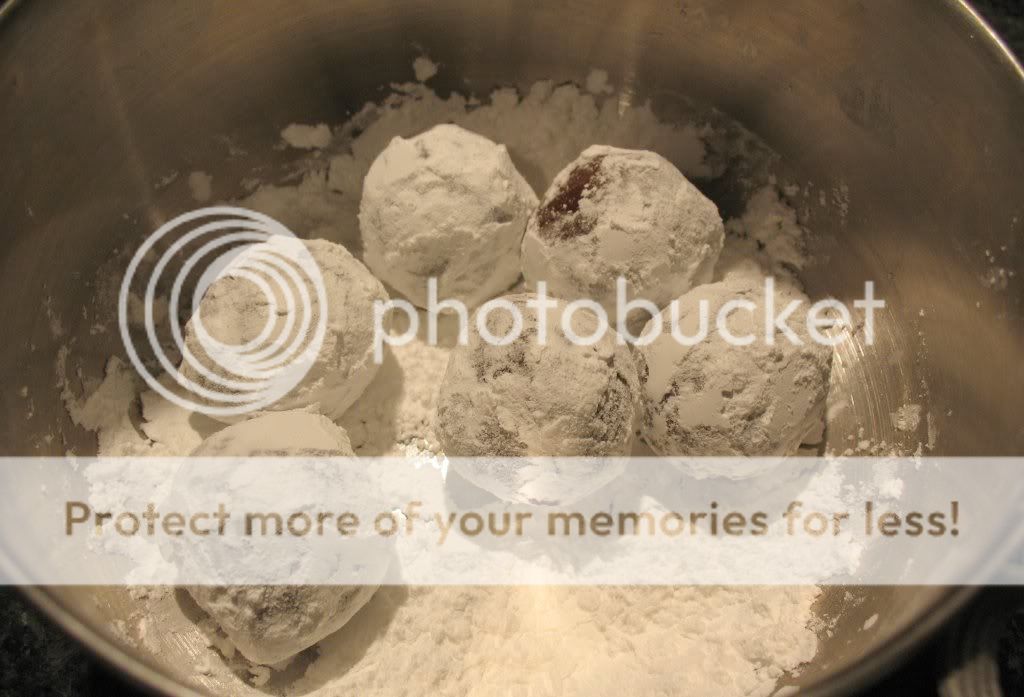
These cookies are a fun alternative to your standard chocolate cookie recipe. The chocolate crinkles are soft with a somewhat cake-like consistency. They have a nice cocoa flavor without being too rich or too heavy, while the confectioners sugar gives the cookies a pretty, snow-dusted appearance.

Chocolate Crinkles
from Family Fun Magazine

Yields 40 cookies

3/4 cup butter, melted
1/2 cup unsweetened cocoa powder
1 cup sugar
2 large eggs
2 tsp. vanilla extract
2 cups all-purpose flour
1 tsp. baking powder
1 tsp. baking soda
1/2 tsp. salt
1 6-oz. bag semisweet chocolate chips
3/4 cup confectioners’ sugar
1. In a large bowl, mix the melted butter, cocoa powder and sugar; beat in the eggs and vanilla extract.

2. In a medium-sized bowl, stir the flour, baking powder, baking soda and salt. Slowly mix in the wet ingredients, then stir in the chips. Refrigerate for 2 hours or overnight.

3. Preheat the oven to 350 degrees. Form the dough into 1-inch balls and roll in confectioners’ sugar. Bake on an ungreased baking sheet for 12 minutes.

Sugar Cookies

Wednesday, December 17th, 2008

It’s not Christmas without decorated sugar cookies. I’ve made these cookies with my Mom for as long as I can remember. When I was growing up, we’d make seasonally themed sugar cookies: hearts, strawberries, ice cream cones, fall leaves, mushrooms, snowmen, stars and Christmas trees – Mom had a cookie cutter for every occasion.

Whenever we’d make the sugar cookies, she’d pull out her Betty Crocker cookbook and get to work. A few months after I got married, I excitedly pulled out my new Betty Crocker cookbook as I set out to make a fall batch of cookies in my new home. I discovered with dismay that the recipe had been altered over the years, and I didn’t have access to the recipe that I had grown up with. A phone call to my Mom and some hastily scribbled notes solved that problem!

It’s crucial to chill the dough thoroughly. Otherwise, the dough will stick horribly to everything. I usually work with the dough in batches, leaving it in the refrigerator until I need it. It’s also important to use a light hand when rolling out the dough and to handle it as little as possible. Rough rolling and excessive handling compresses to dough and results in dense cookies.

These sugar cookies are airy, crisp, crumbly and have a light, buttery sweet flavor.

Betty Crocker’s Classic Sugar Cookies

Yields 48 3″ cookies

1/2 cup shortening
1/4 cup butter, softened
1 cup sugar
2 eggs
1 tsp vanilla extract
2 1/2 cups flour
1 tsp baking powder
1 tsp salt

1) Thouroughly mix the shortening, butter, sugar, eggs and vanilla.
2) Blend in flour, baking powder and salt.
3) Cover dough and chill for at least 1 hour.
4) Heat oven to 400.
5) On a lightly floured surface, roll dough 1/8″ thick.
6) Cut out cookies and place on an ungreased cookie sheet. Decorate as desired.
7) Bake for 6-8 minutes, until cookies are very lighly browned along the edges

Artisan Bread

Thursday, December 11th, 2008

I love bread.

Despite my love of bread, I did not try making it until I found this recipe. There was something intimidating about working with yeast (silly, I know) and I didn’t want to deal with hand-kneading bread for several minutes. Last winter, I stumbled upon a review for Artisan Bread in Five Minutes a Day by Jeff Hertzberg and Zoe Francois in the Boston Globe. Easily creating crusty no-knead artisan bread at home with a bowl and spoon? I was sold!

The central idea behind Artisan Bread in Five Minutes a Day is that “Pre-mixed, pre-risen, high moisture dough keeps well in the refrigerator.” Initially mixing the dough takes about 10 minutes or less and shaping/baking a loaf only requires 5 minutes of attended preparation time.

The book contains several dough recipes, and each of these recipes can be shaped into different kinds of loaves or enhanced with additional flavors. So far, I have only used the Master Recipe to make a basic boule. The loaves I have baked have a nicely crackled crust and an airy, moist interior.

I follow the Master Recipe quite closely. While the recipe calls for unbleached flour, I often use bleached flour because that is what I usually have on hand. It’s worth noting that book suggests using the scoop and sweep method to measure flour: gently scoop the flour and level with a knife or spatula – don’t press down. I also shape my dough into an oblong loaf, as opposed to a boule.

The Master Recipe makes enough dough for 4 1 pound loaves of artisan bread. The book claims that the dough can be refrigerated for up to two weeks, but it hasn’t lasted that long for me. For this reason, I usually halve the recipe and only make 2 loaves.

I’ve found that the dough is lighter and airier if you allow it to rise for 3-4 hours. It’s much easier to work with the dough if you refrigerate it for several hours before shaping a loaf. Regardless of when you handle the dough, it is sticky. I make sure to remove my rings and sometime spray some cooking spray on my hands.

The recipe suggests using a pizza peel coated in corn meal to move the dough into the oven. I have found that a rimless cookie sheet coated with a generous coating of flour works fine. Corn meal does make the transfer easier, but I’ve just started using it recently. While the recipe suggests working dough by hand, it’s also possible to mix it using a stand mixer.

The master recipe from Artisan Bread in Five Minutes a Day is available online, but the book goes into much more detail and provides a number of other recipes. I highly recommend it!

Artisan Bread in Five Minutes A Day: Master Recipe

Makes four 1-pound loaves

3 cups lukewarm water (about 100? F)
1 1/2 tablespoons granulated yeast (1/2 tablespoon = 1 1/2 teaspoons)
1 1/2 tablespoons kosher or other coarse salt
6 1/2 cups unsifted, unbleached all-purpose white flour
Cornmeal for the pizza peel

1.In a 5-quart bowl, mix the yeast, water and salt. Add all the flour, then use a wooden spoon to mix until all ingredients are uniformly moist. It is not necessary to knead or continue mixing once the ingredients are uniformly moist. This will produce a loose and very wet dough.

2.Cover with a lid (not airtight). Allow the mixture to rise at room temperature until it begins to collapse, about 2 hours, but no more than 5 hours.

3. After rising, the dough can be baked immediately, or covered (non completely airtight) and refrigerated up to 14 days. The dough will be easier to work with after at least 3 hours refrigeration.

4. On baking day, prepare a pizza peel by sprinkling it liberally with cornmeal to prevent the bread from sticking when you transfer it to the oven. Uncover the dough and sprinkle the surface with flour. Pull up and cut off a 1-pound (grapefruit-size) piece of dough (serrated knives are best). Store the remaining dough in the bowl and refrigerate for baking at another time.

5. Hold the mass of dough in your hands and add a little more flour as needed so it won’t stick. Create a smooth ball of dough by gently pulling the sides down around to the bottom, rotating the ball a quarter-turn as you go. While shaping, most of the dusting flour will fall off. The bottom of the loaf may appear to be a collection of bunched ends, but it will flatten out during resting and baking. Shaping the loaf this way should take no more than 1 minute.

6.Place the dough on the pizza peel. Allow the loaf to rest for about 40 minutes. It does not need to be covered. The bread may not rise much during this time.

7. Twenty minutes before baking, place a pizza stone on the center rack of the oven. If you don’t have a baking stone, use another baking sheet. Remove any upper racks. Place a broiler pan on a rack below the pizza stone or on the floor of the oven. Preheat oven to 450 F.
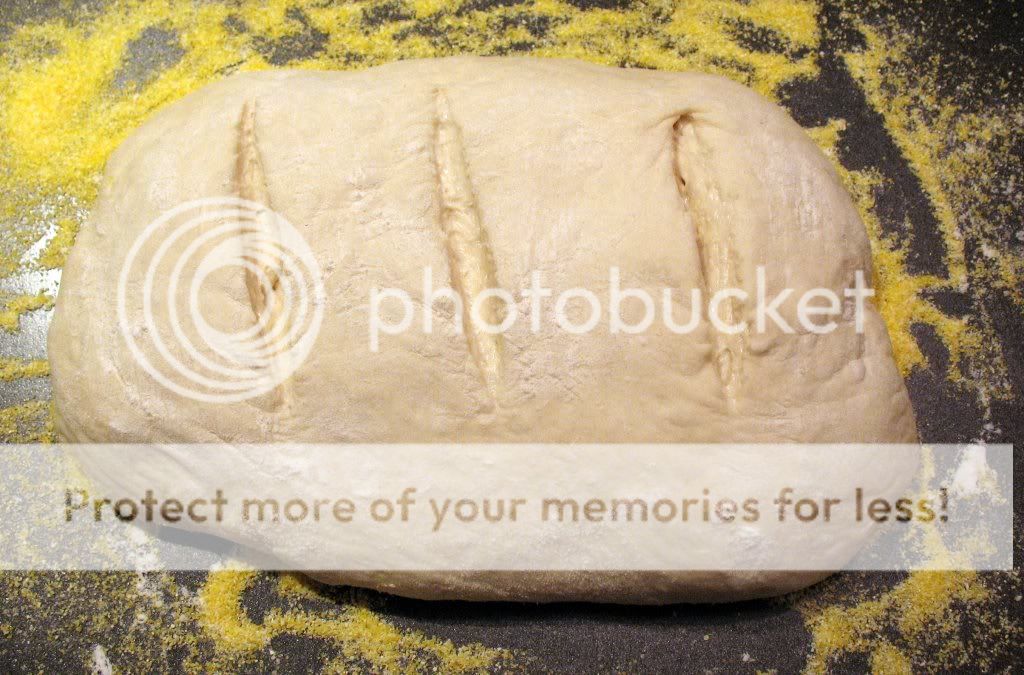
8. When the dough has rested for 40 minutes, dust the top liberally with flour, then use a serrated knife to slash a 1/4-inch-deep cross or tic-tac-toe pattern into the top.

9.Slide the loaf off the peel and onto the baking stone. Quickly but carefully pour 1 cup of hot water into the broiler tray and close the oven door.

10.Bake for about 30 minutes, or until the crust is nicely browned and firm to the touch. Allow the bread to cool completely, preferably on a wire cooling rack.

Ginger Cookies

Sunday, November 30th, 2008

With Christmas approaching, I have been searching for a good ginger cookie recipe. Gingerbread is an essential element of Christmas baking, and I wanted to find a cookie that embodies that flavor. My friend Carolyn provided me with this delicious ginger cookie recipe that I will now be adding to my holiday baking rotation.

These ginger cookies are quite easy to make. When I first dropped the balls of dough on the cookie sheet, I wondered how they could possibly end up flat. Since the cookies flatten out quite a bit during baking, it’s good to leave about 2 inches between the balls of dough. The cookies are quite soft when they first come out of the oven, so it helps to leave them on the cookie sheet to cool for a few minutes before transferring to a wire rack to cool completely.

The consistency of the resulting cookie is perfect. It’s crisp, but not crunchy. The top of the cookie is beautifully crackled, but the inside is still somewhat soft.

Ginger Cookies

Yields 4 dozen cookies

1 cup sugar
3/4 cup shortening
1 egg
1/2 tsp vanilla extract
1/4 cup molasses
2 cups flour
2 tsp baking soda
1/2 tsp salt
1/2 tsp ground ginger
1/2 tsp ground cloves
1/2 tsp cinnamon

1. Preheat the oven to 350 degrees.
2. In a medium bowl, whisk together the flour, baking soda, salt and spices. Set aside.
3. In an electric mixer with the paddle attachment, cream the sugar and shortening on medium speed until fluffy. Beat in the egg and molasses and vanilla.
4. Mix in the dry ingredients.
5. Roll dough into tsp-sized round balls.
6. Roll dough balls in sugar.
7. Place dough balls on cookie sheet and bake for 10-12 minutes.

Mint Chocolate Fudge Brownies

Wednesday, November 19th, 2008

As much as I love to make things from scratch, I?m usually a brownies-from-a-box kind of girl. Grab a box of Betty Crocker mix, throw some sort of chocolate chips on top, and you have a warm, chocolate-y dessert with minimal effort in less than 45 minutes.

I was swayed to attempt making brownies from scratch after my friend Meg brought these amazing chocolate mint brownies for dessert. These brownies require more effort then their boxed counterparts, but resulting dessert is certainly worth it. Since we?ll be visiting with friends for dinner tonight, I opted to make a special dessert treat.

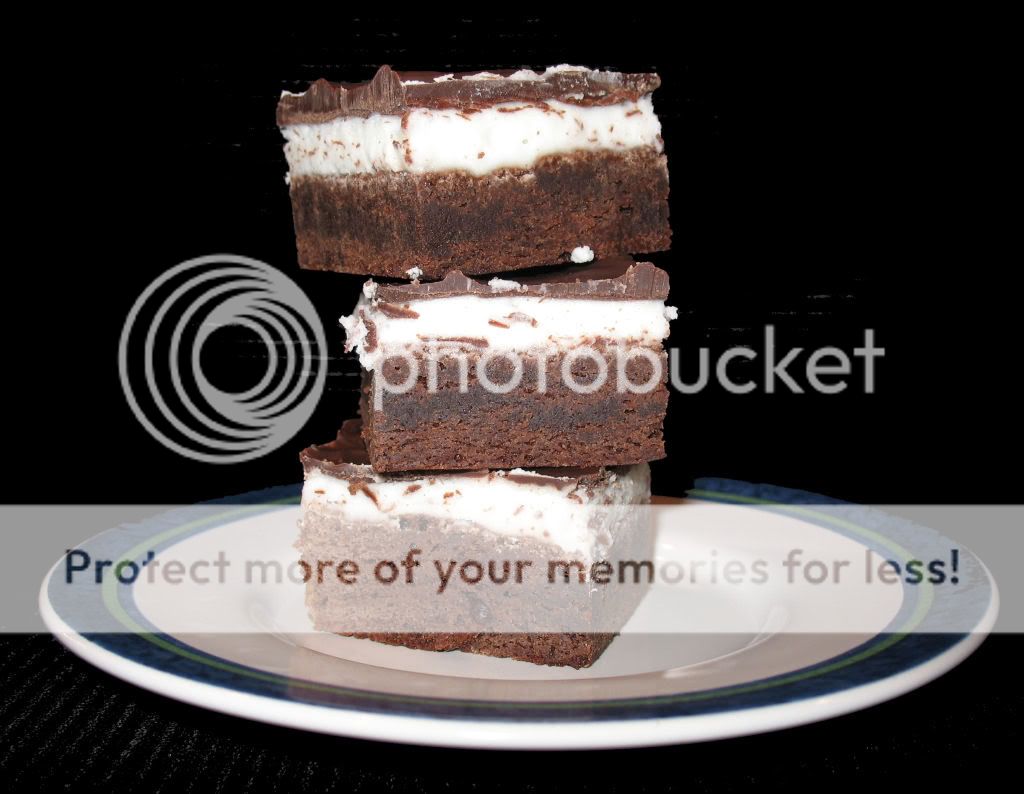
The dense fudge-like brownie is covered with a sweet peppermint frosting and topped with a layer of hardened chocolate. The resulting dessert is more like a piece of candy than a typical brownie. While the final dessert product doesn?t need to be refrigerated, I prefer to store the brownies in the refrigerator and serve them cold. Served straight out of the fridge, these brownies have the taste and consistency of a decadent slice of fudge.

When I received a copy of this chocolate mint brownie recipe from my friend, she had made a few alterations to the original. I have found that her modified measurements (more milk in the frosting, and more chips and butter in the topping) result in smooth, spreadable frosting and enough chocolate topping to easily cover the entire 9×9 surface. Without the changes, I would imagine that the frosting would be too stiff to spread easily and there wouldn?t be enough chocolate topping to cover the brownies. Besides, is it ever possible to have too much chocolate? :)

Mint Chocolate Fudge Brownies

Adapted from familyfun.go.com

Yields about 2 dozen brownies

Brownies
1/2 cup butter
4 ounces unsweetened chocolate
1 1/2 cups sugar
3 eggs
1 1/2 teaspoons vanilla extract
1 cup all-purpose flour
1/2 teaspoon salt

Mint Frosting
1/4 cup softened butter
2 1/2 cups confectioners’ sugar
4 to 5 tablespoons milk
1/2 teaspoon peppermint extract

Chocolate Topping
1 cup semisweet chocolate chips
4 tablespoons butter

Brownies
1. Heat the oven to 350? and grease a 9-inch square baking pan. (lining with foil and coating the foil in cooking spray works well too)
2. For the brownies, place the butter and chocolate in a microwave-safe bowl. Microwave on high for 1 minute, stir, and microwave for 1 minute more. Stir until smooth.
3. In a separate bowl, whisk together the sugar and eggs.
4. Stir in the chocolate and the vanilla extract.
5. Stir in the flour and salt until thoroughly combined. Pour into the prepared pan, then bake for 25 minutes or until a knife inserted in the middle comes out clean. Cool for at least 1 hour.

Mint Frosting
1. Cream the butter and confectioners’ sugar.
2. Add the milk 1 tablespoon at a time, beating until it is smooth and spreadable.
3. Beat in the peppermint extract.
4. Frost the cooled brownies, cover, and chill in refrigerator for at least1 hour.

Chocolate Topping
1. Pour the chips into a microwave-safe bowl, add the butter, and microwave on high for 1 1/2 minutes or until the chocolate melts.
2. Stir until smooth.
3. Pour the chocolate over the brownies and smooth it with a knife. Refrigerate for 45 minutes or until the coating hardens.

Once the coating has hardened, cut the brownies into 24 pieces. When packaging brownies, place wax paper between layers of brownies to prevent sticking.