Archive for the ‘Entrees’ Category

Tequila Lime Chicken

Thursday, May 14th, 2009

The last time we grilled, I wanted to do something other than the usual BBQ sauce. A Mexican inspired marinade sounded good: tequila, lime, cilantro… something along those lines. A quick search of allrecipes.com produced this recipe for Tequila Lime Chicken.

The original recipe includes instructions for baking the chicken, and for an accompanying Mexi-Ranch dressing. I was only interested in the marinade. Based upon recommendations of reviewers and my personal tastes, I changed a few of the proportions. Since it is Tequila Lime Chicken, I increased the amount of tequila to 1 teaspoon, and will probably add more next time. The recipe produced an ample amount of marinade and would easily work for more than the suggested four chicken breast halves.

The chicken was delicious and tender! It had a tangy, smokey flavor that went very well with the cilantro lime rice I made that night. The leftover chicken was delicious on it’s own and on grilled pizza. This marinade will be added to our regular grilling rotation this summer!

Tequila Lime Chicken

1 cup water
1/3 cup Teriyaki sauce
2 tbsp lime juice (juice of 1 lime)
2 garlic cloves, minced
1/4 tsp liquid smoke flavoring
1/4 tsp salt
1/4 tsp ground ginger
1 tsp tequila
4 skinless, boneless chicken breast halves

1. Combine all ingredients, except chicken, in non-reactive bowl. Mix well.
2. Add chicken and turn to coat.
3. Cover and refrigerate for 2 to 3 hours.
4. Grill chicken.

Crustless Quiche

Monday, May 11th, 2009

I made my first quiche last November based upon this recipe for Easy Broccoli Quiche. Since I first made the quiche, I have changed the filling a bit and eliminated the crust.

I’m not a huge fan of pie crust, and removing the crust cut the calorie count in half. The filling in this new version is puffier, thanks to an additional egg and more milk. I probably add more than 1 cup of chopped broccoli, as broccoli, eggs and cheese has become one of my new favorite food combination. While it may sound fancy and indulgent, this is a healthy, filling meal.

We frequently have breakfast for dinner. Served with a slice of whole grain toast and some fruit, this quiche makes a delicious, filling meal. It also reheats well – perfect for a quick, mess-free breakfast or dinner leftovers the following night.

Crustless Broccoli Quiche

Yields 4 servings

1 tbsp olive oil
1/2 medium onion, finely chopped
1 garlic clove, minced
1 cup chopped broccoli (fresh or frozen)
1 cup shredded Cheddar Jack Cheese or Mozzarella Cheese
4 eggs, well beaten
1 cup skim milk
1 tsp salt
1/4 tsp black pepper

1. Preheat oven to 350 degrees F.
2. If using frozen broccoli, thaw before chopping.
3. Heat oil in large saute pan over medium-low heat.
4. Add onions, garlic and broccoli. Cook slowly, stirring occasionally until the vegetables are soft.
5. Whisk together beaten eggs and milk. Season with salt and pepper. Stir in vegetable mixture and cheese.
6. Spray 9-inch pie pan lightly with cooking spray.
7. Pour egg mixture into pie pan, and bake in preheated oven for 40-45 minutes, or until center has set.

Gourmet Burgers

Thursday, April 30th, 2009

Monday night marked our first grilled meal of the year! My husband was quite excited to pull the cover off and fire up the grill. With the unseasonable warm weather we’ve been having, it felt just like summer!

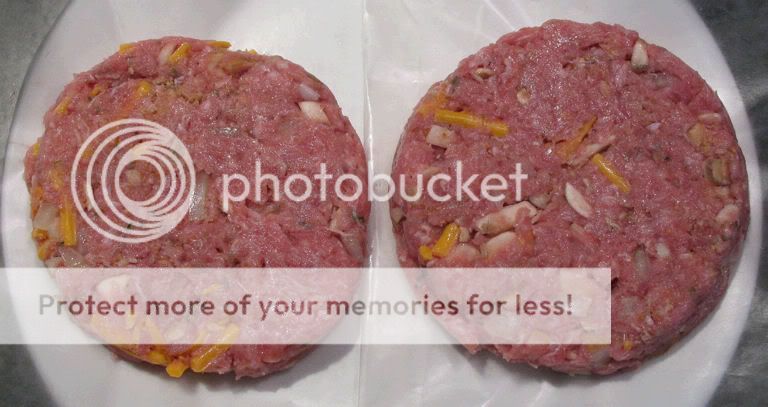
A local grocery store chain sells gourmet burger patties during the summer months. These consist of a relatively lean ground beef combine with various mix-ins. Standard burgers include ones with Italian spices, pepper, mushrooms and cheese? the list goes on. My husband and I planned to serve these for a birthday celebration last summer, but my jaw dropped when I saw the price. I figured that they couldn’t be too hard to make.

Since I hadn’t had much luck forming burgers by hand (mine crumbled too easily), I scoured local stores in search of a burger press. After striking out there, I sprung for a pricey one from Amazon, and still came out ahead. That thing paid for itself in one weekend! If you?re looking for a burger press, I am really happy with this one. I haven?t had any of the problems that other viewers refer to. I like that the press is non-stick (lined with silicone) and can be easily disassembled and thrown in the dishwasher for easy cleaning.

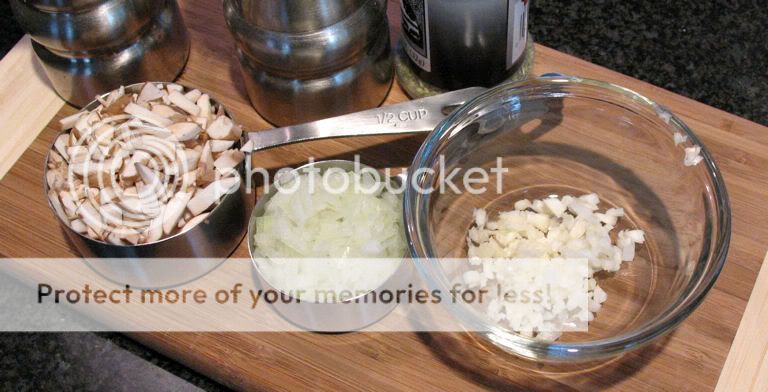
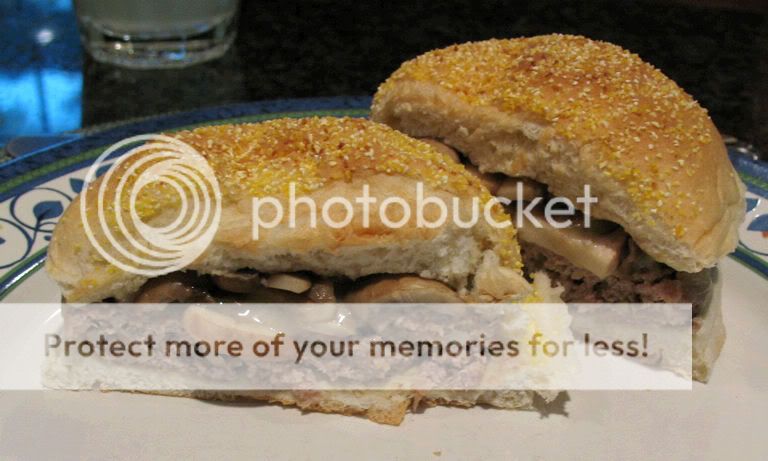
Mixing vegetables, spices and cheese into burgers add a fun kick to this summer staple. I use ground turkey and ground beef interchangeably, although this time I used 93% lean ground turkey. I typically just eyeball the mix-in ingredients, but I measured this time so that I could provide details here. In the past I have used garlic powder, but I found that the freshly minced garlic made quite a difference. I served these burgers topped with sharp cheddar cheese and sauteed mushrooms.

Making these burgers also gave me the opportunity to use my newest kitchen gadget: a digital food scale. While it?s not a necessity (I made burgers for a year without one), it does make it easier to divide the meat into uniform portions.

Since burger making is rather messy, I frequently make a large batch using two packages or meat and then freeze the extras. When freezing the burgers, I separate them with slices of wax paper, wrap in plastic wrap and place in a freezer bag

Gourmet Burgers

1 package (1.25-1.33 lbs) ground turkey – I used 93% lean
1/2 cup finely chopped mushrooms
1/4 cup finely chopped onion
2 garlic cloves, minced
1 tsp. dried oregano
2 tbsp bread crumbs
1/4 cup shredded sharp cheddar cheese
Salt
Freshly ground black pepper

1. Combine all ingredients in a medium bowl.
2. Mix well to combine.
3. Divide into 5-6 equal portions and shape into burger patties.
4. Grill or freeze.

Chicken Cordon Bleu

Friday, April 3rd, 2009

When I think of classic chicken dishes, Chicken Cordon Bleu usually comes to mind – although I remember the one my mother used to make being dried out, and the ones I get in restaurants being very greasy. I found this chicken cordon bleu recipe a while back and decided to give it a whirl because it came out of one of my favorite cooking publications (Cooking Light) and because I was trying to shake up my recipe roster a bit. It was really great – the center stayed moist and tender, and much like any other Cooking Light recipe it’s not (that) bad for you. It’s fancy enough to serve to company, and easy enough to make for dinner just because it’s Tuesday. Plus, my husband loved it – what guy wouldn’t love meat wrapped in meat?! The only modification I made was to use pre-seasoned bread crumbs, because that’s what I happened to have on hand.

Ingredients

  • 1/4 cup fat-free, less-sodium chicken broth
  • 5 teaspoons butter, melted
  • 1 large garlic clove, minced
  • 1/2 cup dry Italian seasoned breadcrumbs
  • 1 tablespoon grated fresh Parmigiano-Reggiano cheese
  • 1 teaspoon paprika
  • 4 (6-ounce) skinless, boneless chicken breast halves
  • 1/4 teaspoon salt
  • 1/4 teaspoon dried oregano
  • 1/4 teaspoon freshly ground black pepper
  • 4 thin slices prosciutto (about 2 ounces)
  • 1/4 cup (1 ounce) shredded part-skim mozzarella cheese
  • Cooking spray

Preparation

Preheat oven to 350?.

Place broth in a small microwave-safe bowl; microwave at high 15 seconds or until warm. Stir in butter and garlic. Combine breadcrumbs, Parmigiano-Reggiano, and paprika in a medium shallow bowl; set aside.

Place each chicken breast half between 2 sheets of heavy-duty plastic wrap, and pound each to 1/4-inch thickness using a meat mallet or rolling pin. Sprinkle both sides of chicken with salt, oregano, and pepper. Top each breast half with 1 slice of prosciutto and 1 tablespoon mozzarella. Roll up each breast half jelly-roll fashion. Dip each roll in chicken broth mixture; dredge in breadcrumb mixture. Place rolls, seam side down, in an 8-inch square baking dish coated with cooking spray. Pour remaining broth mixture over chicken. Bake at 350? for 28 minutes or until juices run clear and tops are golden.

Homemade Vegetable Stock

Tuesday, March 24th, 2009

I usually don’t use vegetable stock. Chicken broth is an excellent substitute, and it usually costs much less. For some reason, our grocery stores don’t carry generic or reduced-sodium vegetable stock. Now that it’s Lent, I have needed vegetable stock for several recipes. It seemed foolish to pay $1 or more for vegetable-flavored water, when I could just make it myself. Really, how hard could it be?

I did a little searching online and found that it’s just as easy as I thought it would be. Over the course of about two weeks, I stashed bits of vegetables in a zip-top bag in my freezer. Once it looked like I had enough vegetable scraps, I followed the instructions on this website. Most vegetables can be used in stock, but cabbage, broccoli, cauliflower, asparagus and tomato can be overwhelming.

Among other things, I accumulated bits of onion and zucchini, scraps and ribs of peppers and green leek tops. For good measure, I added a little bit of frozen corn, 2 bay leaves, whole peppercorn, a chopped up garlic clove and a several shakes of dried spices. Some cilantro was starting to look wilted, so I threw a small amount of that in too.

While the site listed above recommends a 1:1 ratio of solids to liquid, I found other sites that went with a 2:1 solid to liquid ratio. Wanting to get more bang for my buck, I tried the latter. The vegetable scraps filled about 6 cups, so I added 12 cups of water. After simmering for nearly and hour and straining out the solids, I was left with 8 cups of dark, flavorful vegetable stock. Not only did I save a few dollars, but I think my homemade stock tastes better than the store-bought variety and is sodium-free.

Low-fat Chicken Parmesan

Saturday, March 21st, 2009

My husband LOVES chicken parm. I always used to like the taste too – but the fat content usually discouraged me from making it at home and ordering it when we’re out. A few months ago I came across this recipe, from Ellie Krieger (who is a dietitian and shares my passion for tasty healthy food) and I made it one night for dinner – it was a huge success. The technique of using cooking spray and then baking the chicken keeps the outside crispy while minimizing fat by avoiding frying. I know it sounds complicated to make your own bread crumbs, but it really is VERY easy and I think it adds a lot to this recipe – the crumbs just tasted so crispy and fresh when cooked.

We served this with whole wheat pasta and a tasty ceasar salad – a wonderful way to enjoy some great Italian food without all the guilt.

Ingredients

  • 4 slices whole-wheat bread (1-ounce each)
  • 1 teaspoon dried oregano
  • 1/2 teaspoon garlic powder
  • 2 teaspoons paprika
  • 1/2 teaspoon salt
  • 1/2 teaspoon black pepper
  • 2 egg whites
  • 1/2 cup skim milk
  • 1/2 cup all-purpose flour
  • 4 (6 ounce) skinless boneless chicken breast halves, pounded to 1/2-inch thickness
  • Olive oil cooking spray
  • 1 jar good-quality marinara sauce (about 3 1/2 cups)
  • 3/4 cup (3 ounces) shredded part-skim mozzarella cheese
  • 2 tablespoons (1/2-ounce) shredded Parmesan

Directions

Preheat the oven to 350 degrees F.

Place the bread in the bowl of a food processor and process until fine crumbs are formed, about 25 to 30 seconds. Put the crumbs on a baking sheet and bake for 12 minutes, until golden. (You will wind up with about 1 1/3 cups toasted crumbs.)

In a medium bowl, toss the crumbs with oregano, garlic powder, paprika, 1/4 teaspoon salt and 1/4 teaspoon pepper. In another bowl, whisk the egg whites and milk together. In a third bowl stir together the flour, and the remaining 1/4 teaspoon salt and 1/4 teaspoon black pepper. Dip each piece of chicken, 1 piece at a time, in flour, shaking off excess, then egg, then bread crumbs, shaking off excess.

Increase oven temperature to 400 degrees. Place breaded breasts in a glass baking dish and spray on each side with cooking spray, about 5 seconds total per side. Bake breasts until cooked though and crumbs are browned, about 15 minutes. Top with marinara sauce, mozzarella and parmesan and return to oven for an additional 10 minutes, until cheese is bubbling.

Pasta with Lemon Cream Sauce

Friday, March 20th, 2009

Another delicious recipe from Cooking Light! This recipe for Pasta with Lemon Cream Sauce, Asparagus and Peas is a quick and easy weeknight meal.

My husband and I often eat meat-free meals, but most are heavier in flavor and rely on a tomato base. This is quite different from our usual fare. I actually selected the recipe several weeks ago when I was looking to use up heavy cream left over from my ice cream making adventure, and some excess asparagus.

I was amazed at how quickly the dish came together. While the instructions list the pasta and sauce preparation serially, I prepared them concurrently. I started making the sauce at the same time I threw the pasta in the boiling water. I think it took about 20 minutes from the time I put the water on to boil to when I tossed the pasta and sauce together.

I followed there recipe pretty closely, altering the ingredients and procedure only slightly based upon what I had in the house at the time. Since I didn’t have cornstarch, I thickened the lemon cream sauce with about a tablespoon of flour. I also added a handful of Parmesan cheese at the same time I added the cream.

The lemon cream sauce is smooth, light and fresh. The bright tang of lemon and the tasty crunch of asparagus hint at the coming of spring. Served with a Caesar side salad, it was a refreshing and fun weeknight meal.


Pasta with Lemon Cream Sauce, Asparagus and Peas

Yields 4 Servings

8 ounces uncooked long fusilli, or pasta of your choice
1 3/4 cups (1 1/2-inch) slices asparagus (about 1/2 pound)
1 cup frozen green peas, thawed
1 tablespoon butter
1 garlic clove, minced
1 cup vegetable broth
1 teaspoon cornstarch
1/3 cup heavy cream
3 tablespoons fresh lemon juice (about 1 lemon)
1/2 teaspoon salt
1/4 teaspoon freshly ground black pepper
Dash of ground red pepper
Coarsely ground black pepper (optional)

1. Cook pasta according to package directions.
2. During the last minute of cooking time, add asparagus and peas. 3. Drain pasta mixture and set aside.
4. Melt butter in a saute pan over medium-high heat.
5. Saute garlic for 1 minute.
6. In a separate bowl, whisk together cornstarch and broth.
7. Add broth mixture to saute pan and bring to a boil.
8. Cook 1 minute or until thick, stirring constantly.
9. Remove pan from heat and stire in cream, lemon juice, salt, black pepper and red pepper.
10. Pour sauce over pasta and toss to coat.

St. Patrick’s Day Feast

Tuesday, March 17th, 2009

As a tribute to my Irish heritage, I decided to post some St. Patrick’s day recipes – well, they may not be Irish per se, but at least they have Guinness in them! My husband and I have been on a big Irish food kick for the past couple weeks in preparation for a big trip to Ireland we’re planning for May, so I’ve been on the prowl for Ireland-inspired Guinness recipes for several weeks now.

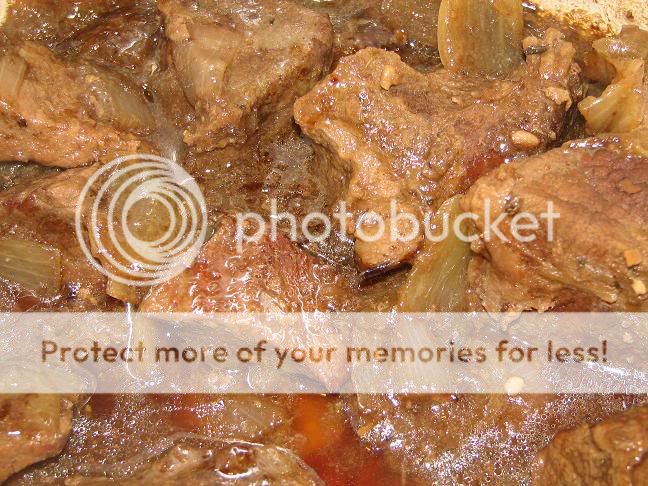
First, I made a traditionally Belgian dish, Beef Carbonnade, Irish by using Guinness instead of a belgian ale – this recipe was modified from How to Cook Everything, by Mark Bittmann (which was actually a book Beth gave me for my engagement! ) Anyway, I highly recommend the book – it really does teach you how to cook everything.

Irish Beef Carbonnade
1-2 tablespoons of canola or vegetable oil

2lbs beef stew meat

1 clove garlic, peeled & crushed

2 large or 3 medium onions, cut into eighths

1 1/2 cups of Guinness

Salt and Pepper to taste

1/2 teaspoon dried thyme leaves

1 Bay Leaf

Instructions:

Heat a large casserole dish (or deep skillet) over medium-high heat for 2-3 minutes. Add the oil and the crushed garlic. Cook, stirring, for about 1 minute. Remove the garlic from the pan.

Add the beef to the skillet, browning on all sides. Season with salt and pepper lightly while it sautes.

When the meat is browned, remove it from the pan. Add the onions. Cook, stirring for about 10 minutes. Then add the Guinness and add back the beef. Bring to a boil, then reduce heat to low and cook undisturbed for about 60 minutes, or until you’re happy with the consistency of the stew.

Serve over warm buttered egg noodles, or boiled potatoes.

Guinness Chocolate Cake with Cream Cheese Frosting

My second dish is a chocolate cake (yum!), also made with Guinness. I found this recipe a while back and thought it looked fabulous, and I’ve been saving it for St. Patrick’s day – I made it for a family celebration last weekend, and it went over very well! It’s not too sweet, very moist, and the Guinness adds a complexity to the chocolate flavor I really appreciated. I think the cream cheese frosting complimented the flavor well – although I did have to add much more confectioner’s sugar than it called for – my measurements are what I included below. In the end, though, the consistency was lovely. I decorated the cake with a shamrock, in the spirit of a finely poured pint in Ireland.

Ingredients
Cake
1 cup Guinness
1 stick unsalted butter, sliced
? cup unsweetened cocoa powder
2 cups granulated sugar
? cup sour cream
2 eggs
1 tablespoon vanilla extract
2 cups all-purpose flour
2 ? teaspoons baking soda

Icing
8 ounce cream cheese
2 cups confectioners’ sugar
2 tbsp heavy cream

Method
Preheat oven to 350 degrees. Butter a 9-inch springform pan and line bottom with parchment paper.

Pour Guinness into a large saucepan, add butter and heat until melted. Whisk in cocoa powder and sugar. In a small bowl, beat sour cream with eggs and vanilla and then pour into brown, buttery, beery mixture and finally whisk in flour and baking soda.

Pour cake batter into greased and line pan and bake for 45 minutes to an hour (Check at 45 minutes for doneness, poking a skewer in center.). Leave to cool completely in the pan on a cooling rack, as it is quite a damp cake.

When cake is cold, gently peel off parchment paper and transfer to a platter or cake stand.

Place cream cheese and confectioners’ sugar in a mixing bowl, and whip with an electric beater, until smooth (You may also do this with a food processor.).

Add cream and beat again until you have a spreadable consistency. Frost the cake, beginning in the middle and fanning outward (like foam might, on a real pint!).

Spinach and Artichoke Topped Chicken

Thursday, March 12th, 2009

I just love spinach and artichoke dip, so when I saw this recipe for Spinach and Artichoke Topped Chicken on Joelen’s Culinary Adventures I knew I just had to try it! I had some heavy cream on hand after my ice cream making adventure, so I whipped up this dish.

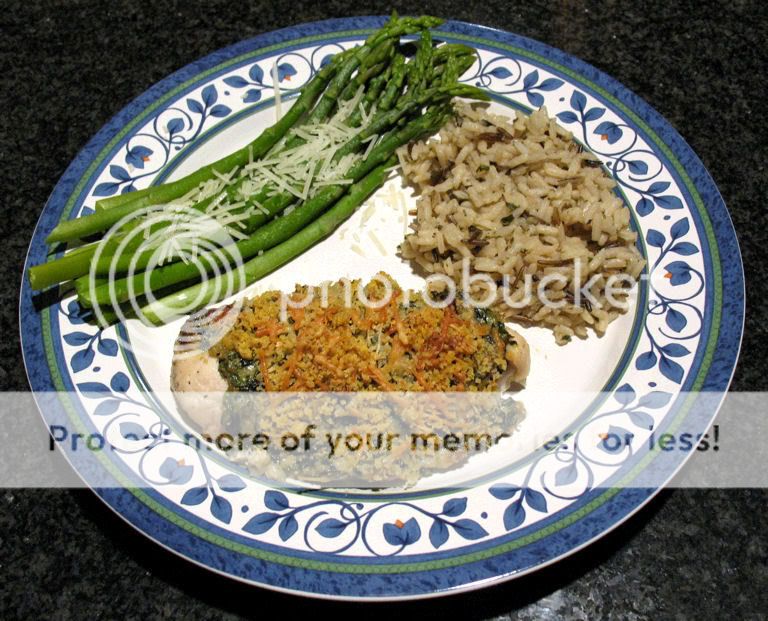
Preparing the topping was quite easy, but it took a little longer than my usual routine of quickly seasoning chicken breasts with random herbs or salad dressings and tossing it in the oven. I had never thought to top the chicken breasts with something other than a simple sauce while they baked. I’m certainly glad I found this recipe.

The chicken was delicious! The creamy topping was rich and flavorful, and the chicken turned out very tender. This recipe will be going into my regular rotation, and I plan to experiment with other topping combinations.

Spinach and Artichoke Topped Chicken

For Chicken:
4-6 boneless skinless chicken breasts
salt & pepper to taste or seasoning salt
garlic & onion powder to taste

For Sauce:
1/2 10-oz box frozen spinach
1 tablespoon EVOO (extra-virgin olive oil), twice around the pan
1/2 tablespoon unsalted butter
1-2 garlic cloves, chopped
1 small onion, peeled and halved
1 tablespoon all-purpose flour
1/2 cup chicken stock
1/2 cup heavy cream
pinch of freshly grated nutmeg (eyeball it)
1/2 14 ounce can artichoke hearts in water, drained and chopped
1-2 handfuls grated Parmigiano-Reggiano or Pecorino Romano cheese
Salt and black pepper

For Topping:
1/2 cup panko breadcrumbs for topping
1/4 cup grated Parmigiano-Reggiano or Pecorino Romano cheese

Preheat oven to 375 degrees.

Prepare your chicken by seasoning it to taste with salt, pepper, seasoning salt, garlic and/or onion powder (however you’d like) Place chicken on baking sheet.

For the sauce, begin by microwaving the spinach on high for 6 minutes to defrost.

Heat a deep skillet over medium heat with the EVOO and butter. When the butter melts and is hot, add the garlic. Using a box grater, grate the onion directly into the skillet.

Saute the onions and garlic for 5 minutes. Sprinkle the flour into the skillet and cook for 1 minute. Whisk in the stock, then the cream, and bring the sauce to a boil. Season the sauce with nutmeg and reduce the heat to low.

Place the defrosted spinach in a clean kitchen towel and wring it dry. Separate it as you add it to the sauce. Stir in the chopped artichokes and a couple handfuls of cheese, then season the spinach-artichoke sauce with salt and pepper. Topped the raw chicken breast with spinach artichoke sauce.

Combine the panko breadcrumbs and cheese for the topping and sprinkle on top of the spinach artichoke sauce.

Bake chicken in preheated oven for 20-25 minutes until juices run clear and chicken is thoroughly cooked.

Turkey and Bean Burritos

Wednesday, February 25th, 2009

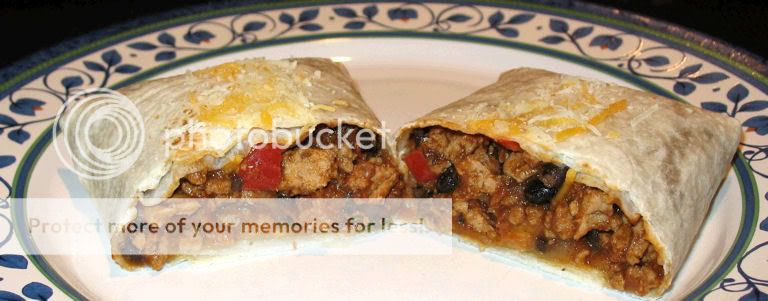
This was the first Mexican dish that I made that did not involve a pre-mixed packet of taco or fajita seasoning. When I first made this dish, my husband and I were amazed at how easy it was to throw together a warm, tasty Mexican dish. Turkey and bean burritos have become a staple meal in our home. They’re easy enough to make on a weeknight, and work well on their own or with a side of Mexican rice.

Over the years, the turkey and bean burritos have undergone some minor changes. The original recipe is for Turkey, Tomatillo, and Bean Burritos and can be found in Rachel Ray’s 365: No Repeats cookbook. The recipe uses tomatillo salsa as the base, but I initially used whatever regular tomato salsa I had on had. I now use tomato sauce, cumin, chili powder and poultry seasoning in place of the salsa. I think it makes the filling more moist, and the flavor more consistent.

If I’m just cooking for Mike and I, I will only assemble and heat two burritos and store the filling in a bowl. I’ve found that pre-assembled burritos get soggy in the fridge. When it’s time for leftovers, I warm the filling in the microwave, and assemble the burritos before popping them in the oven.

And of course, no Mexican meal is complete without a margarita! :)

Turkey and Bean Burritos
adapted from Rachel Ray’s Turkey, Tomatillo, and Bean Burritos (found in 365: No Repeats)

Yields 4-6 servings

6 10-inch flour tortillas
1 package (1 1/3 pounds) ground turkey breast
1 large onion, chopped
3 garlic cloves, finely chopped
1 red bell pepper, cored, seeded and chopped
salt and freshly ground black pepper
2 tsp cumin
2 tbsp chili powder
1 tsp poultry seasoning
1 cup tomato sauce (plain, no-salt added)
1 cup chicken broth
1 15 oz can black beans, rinsed and drained
2 tbsp fresh cilantro leaves, chopped
shredded cheese of your choice

1. Preheat the oven to 275.
2. Brown turkey in large non-stick skillet. Season with salt and pepper. Once turkey is browned, transfer to bowl. Drain most of the fat, leaving a small amount in the skillet. (Or, drain fat and use olive oil)
3. Add onions, garlic and pepper to skillet. Saute on medium heat for several minutes until onions are translucent and peppers are soft.
4. Add browned turkey to pan and mix in. Season with cumin, chili powder and poultry seasoning.
5. Stir in the black beans, tomato sauce and chicken broth.
6. Increase heat and continue to cook for 5-10 minutes more, or until the mixture is thickened.
7. Remove from heat and stir in cilantro.
8. Heat tortillas in microwave to make them more pliable.
9. Spoon turkey mixture onto tortillas, top with shredded cheese and roll up.
10. Place rolled tortillas seam-side down on a cookie sheet. Sprinkle with cheese and bake for 10 minutes.