Authors
Beth
Kathleen
Lisa
Contact
domesticpursuits [at] gmail.com
Categories

Archive for the ‘Vegetable’ Category

Conquering the deep freeze- 5 foods to heat up any dish

Sunday, January 9th, 2011

A well-stocked freezer is a thing of beauty

A trip to the warehouse club can be a dangerous thing if you own a chest freezer.  One moment you’re innocently walking down an aisle buying a package of toilet paper, and the next thing you know– you have a 48-pack of mini quiche sitting in your deep freezer.  How long has it been there? When did you even buy it?!?! And who will take the blame when it’s sitting there taking up space two years from now? It’s time to shape up that freezer and ship out what you know you’ll never eat.

I’m proud to say that our deep freezer was one of the most exciting purchases during my foray into domesticity.  Visions of well-labeled canisters of homemade soup, packets of meat, and frozen vegetables danced in my head. Never again would I need to worry about what to make for dinner– it would all be sitting in my freezer just waiting to be defrosted. However, in order to have dinner at your fingertips, you’ve gotta have the basics and a little something exciting to make you actually WANT to cook dinner.

To kick things off in this season of snow and ice, I present to you Kathleen’s list of Top Five Items to Get in your Freezer Right Now! If you have these on hand, you’ll never end up reaching for that take-out menu.  I swear by all five of the following items, and for the record– they’re all sitting in my chest freezer at this very moment.

5.  Spinach

We all know the story– the dark greens are good for us. If you don’t have it right now, get yourself one of those frozen spinach blocks (or two) and plop them into your freezer. Why? Aside from the nutritional benefits, spinach will liven up and make a one-note dish more colorful. Just defrost for a few minutes, squeeze out as much water as possible, and add it to soups, jarred pasta sauce, and dips. Mix it with ricotta and bam! You’ve got the filling for stuffed shells or cannelloni.  Mix with sour cream and mayo for a great dip. You could even just serve it warm as a side dish (but we know you’re not going to do that).

*Extra Credit:  Make some room in your freezer for those frozen basil cubes and pesto you made at the end of this summer.

4. Frozen cheese-filled tortellini

If you’re feeling ambitious, you could sit down one evening and crank out some handmade filled pasta. Or you could be like me– wanting to boil water and be done with it.  For as simple as it is, frozen tortellini is a grand staple. Sauted lightly with olive oil and that frozen spinach (#5), it’s a simple and satisfying dinner. Thrown into a soup or broth, and you’ve got something that will easily stave off a winter chill. Marinate some overnight in salad dressing and skewer with tomato and mozzarella cubes– and you have a simple and elegant appetizer. As an added bonus, you’ll always have something on hand to whip up for that surprise vegetarian dinner guest or picky nephew. If you’re feeling really experimental, try topping a salad with chilled, cooked tortellini instead of croutons.  I’m a fan.

*Extra credit:  If you can find frozen pumpkin ravioli, stock up. It’s one of those “impress your friends with an easy entree” items.  Saute with brown butter and sage, add a little crumbled Italian sausage (#2), and you’re good to go.

3. Frozen Peas or Corn

Don’t laugh.  It’s a sad day indeed when I realize that we’re out of frozen peas.  I’ll let you check out Beth’s amazing corn salsa if you need extra reason to stock up on some kernels.  Aside from instant faux ice packs when you’ve got a splitting headache, these two veggies are incredibly versatile when you’re looking to spice up your dinner. Just thaw (no need to boil) and add to your dinner salad when all you have is a head of iceberg. Add peas to alfredo or to my incredible artery-clogging, bacon-tastic carbonara (coming soon to DP!) for a splash of color.  Puree with some salt and pepper for an easy dip.

*Extra credit:  We also keep a stock of frozen edamame (soybeans), both shelled and unshelled.  The shelled ones just need a little hot water and salt to make a great appetizer or pea replacement.

2. Italian sausage

Everyone has frozen ground beef in their freezer– I think it might even be issued with the purchase of a chest freezer.  But how inspiring are those little balls of freezer-burned beef? Not very.  I like to purchase Italian sausage (still in casings) and freeze portioned packets of two links each. Once defrosted, it’s easy to pull the casing off, and you’ve got a great way to spice up your dinner. Try mixing in Italian sausage with ground beef for burgers or meatballs. Brown some and add to your frozen tortellini (#4).  Or just keep in the casing and fire up the grill.  I normally have both mild and spicy links on hand for variety.

*Extra credit: This might sound a little lame coming from someone who likes to cook, but do yourself a favor and buy frozen mini meatballs (I like the ground turkey ones, myself). Yes, it’s lazy. However, knowing all you have to do is heat them and serve gives you a lot of options in the kitchen. Add to pasta for an easy dinner. Add to a broth with a few noodles for a soup. Add some sauce and you’ve got a sandwich, or throw into a slow cooker for an easy party appetizer.

and for my absolute staple in the freezer….. (drumroll, please)

1. Bacon!

To know bacon is to love bacon– at least when it comes to adding flavor and variety to your cooking repertoire.  Perhaps you already have the beloved breakfast meat in your freezer, so I’ll be a little more specific. During your next grocery trip, pick up a package or two and immediately slice each 1lb slab into four chunks (each which conveniently fit well in a quart freezer bag).  The next time you’re looking for a bit of extra flavor, pull out a bag. This amount of bacon easily defrosts right in the pan, and you’re already on your way to a fancy mac ‘n’ cheese or rich carbonara.  I’ll often pull out a package just for an easy breakfast addition or something extra to throw into a dip. My personal favorite is to fry up a little bacon, and use some of the drippings to saute fresh brussel sprouts.  I’ve even used it to infuse vodka and create a surprising brownie– but those are recipes for sharing on another day.

*Extra credit: If you’re feeling really adventurous, pick up a small package of pork belly.  This can be just as easily diced up and added to give a little more heft to a pasta or really liven up a salad. And contrary to popular belief, you don’t have to be on a competitive cooking show in order to cook with this luscious ingredient.

What food items do you lean on when it comes to heating up dinner ideas? We want to hear! In the meantime, happy defrosting!

Crock Pot Chicken Cacciatore

Tuesday, June 2nd, 2009

It’s been quite awhile since I last posted. Over the last few weeks, I’ve been spending much of my spare time working in the yard. I’m thrilled with the way everything is turning out; the flowers are beautiful, my herbs and starter plants are doing well and my newly-decorated deck looks great. The yard definitely deserves its own post at some point.

Just as house projects change with the season, so does my cooking. With spring in full swing and summer on the way, I’ve been doing a lot of grilling lately. Since a few days last week felt more like March than May, I pulled out my Crock Pot to make an warm, easy dinner.

I used this recipe from Recipezaar as a guide, but modified the liquid content slightly. There’s a bit of chopping involved, but the recipe goes together quite quickly. The chicken is fall-apart tender and infused with so much flavor. Served atop whole grain pasta, this makes for a filling, comforting and healthy dinner.

Crock Pot Chicken Cacciatore

Yields 4 Servings

28 oz. crushed tomatoes
2 cloves garlic, minced
2 tsp dried oregano
1 tsp dried basil
1/2 tsp celery powder
1 tsp salt
1/4 tsp black pepper

2 large chicken breasts
1 large onion, thinly sliced
10 oz. fresh mushrooms, sliced
1 pepper, finely chopped

1. Pour tomatoes into Crock Pot.
2. Season with garlic, oregano, basil, celery powder, salt and black pepper. Stir to combine.
3. Add chicken breasts and cover with sauce.
4. Add onion, mushrooms and pepper. Stir to combine with sauce. Ensure that the chicken is covered with sauce and vegetables.
5. Cook on low for 7-9 hours or high for 3-4 hours.

Homemade Vegetable Stock

Tuesday, March 24th, 2009

I usually don’t use vegetable stock. Chicken broth is an excellent substitute, and it usually costs much less. For some reason, our grocery stores don’t carry generic or reduced-sodium vegetable stock. Now that it’s Lent, I have needed vegetable stock for several recipes. It seemed foolish to pay $1 or more for vegetable-flavored water, when I could just make it myself. Really, how hard could it be?

I did a little searching online and found that it’s just as easy as I thought it would be. Over the course of about two weeks, I stashed bits of vegetables in a zip-top bag in my freezer. Once it looked like I had enough vegetable scraps, I followed the instructions on this website. Most vegetables can be used in stock, but cabbage, broccoli, cauliflower, asparagus and tomato can be overwhelming.

Among other things, I accumulated bits of onion and zucchini, scraps and ribs of peppers and green leek tops. For good measure, I added a little bit of frozen corn, 2 bay leaves, whole peppercorn, a chopped up garlic clove and a several shakes of dried spices. Some cilantro was starting to look wilted, so I threw a small amount of that in too.

While the site listed above recommends a 1:1 ratio of solids to liquid, I found other sites that went with a 2:1 solid to liquid ratio. Wanting to get more bang for my buck, I tried the latter. The vegetable scraps filled about 6 cups, so I added 12 cups of water. After simmering for nearly and hour and straining out the solids, I was left with 8 cups of dark, flavorful vegetable stock. Not only did I save a few dollars, but I think my homemade stock tastes better than the store-bought variety and is sodium-free.

Cavatelli and Broccoli

Tuesday, February 17th, 2009

I got this Cavatelli and Broccoli recipe from a friend of mine whose Italian cooking is second to none. It’s one of my favorite vegetarian dinners. It is very easy to make, and the only tip I have is to make sure to use fresh broccoli! It really just isn’t the same without that crisp texture that frozen broccoli lacks. This serves about 4 people as a main dish, more if you serve it as a side.

Cavatelli and Broccoli

Ingredients -

  • 2 average-size broccoli crowns, cut into bite-size florets
  • 2 cloves of garlic, minced
  • 1 bag of frozen ricotta cavatelli (located the frozen pasta section of the grocery store)
  • 2 tablespoons olive oil
  • Salt and pepper
  • 1/4 cup grated parmesan cheese

Bring a large pot of water to a boil.

In the mean time, put the olive oil into a medium sized skillet over medium-high heat. Add the garlic when the oil is heated and saute until lightly browned. Add the broccoli florets to the skillet and saute until the broccoli becomes a brighter shade of green, about 5 minutes.

When the pot of water comes to a boil, add the frozen cavatelli straight from the freezer to the water. These cook really fast – once water returns to a boil, let cook for 1-2 minutes then drain.

Mix the cavatelli into the skillet with the broccoli. Sprinkle the parmesan cheese over the cavatelli and broccoli and serve!

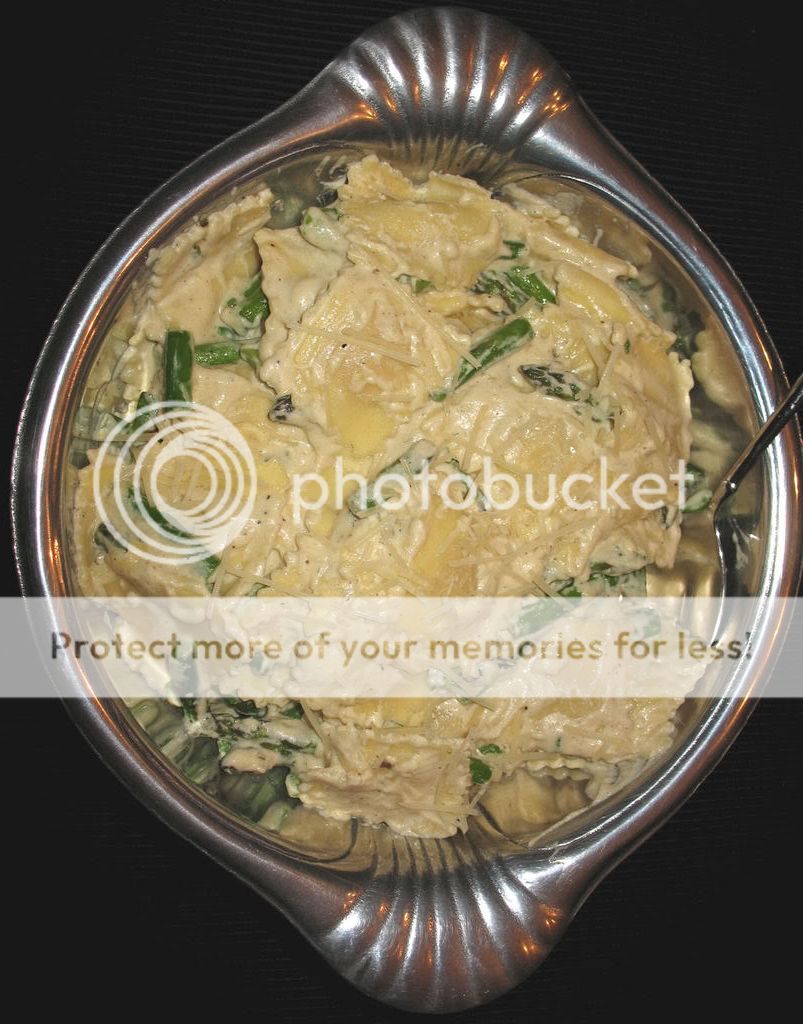
Asparagus and Ravioli with Dijon Alfredo Sauce

Sunday, February 1st, 2009

I’ve been making this recipe for Dijon Alfredo Sauce for years. My husband and I stumbled across this on allrecipes.com when we were searching for a cream sauce to go along with a bottle of Gew?rztraminer that we had picked up.

The Dijon mustard adds an interesting bite to the creamy Alfredo sauce and complements the asparagus quite nicely. In fact, this dish made me fall in love with asparagus. The sauce is rather rich, but it’s a fun treat. This dish has always gotten rave reviews from guests.

I love making this dish for company because of its’ unique flavor combinations and impressive presentation. It does require around 30 minutes of hands-on preparation, but the steps aren’t too complicated. I typically work on dinner while casually visiting with guests in the kitchen.

Based upon reader reviews, I have lightened up a the recipe by reducing the amount of butter and using light cream in place of whipping cream. I also use far less mustard than the original recipe. The resulting sauce is rich, smooth and flavorful.


Asparagus and Ravioli with Dijon Alfredo Sauce

Yields 4 servings

2 (9 ounce) packages refrigerated chicken- or cheese-filled ravioli
1 pound fresh asparagus
6 tbsp butter, divided
2 cloves garlic, pressed
1-2 tbsp Dijon mustard
1 1/2 cups light cream
1/2 cup grated Parmesan cheese
1/2 teaspoon pepper

1. Cook ravioli in a large saucepan according to package directions; drain and keep warm.
2. Snap off tough ends of asparagus; cut asparagus into 2-inch-long pieces.
3. Melt 1 tablespoon butter in a large skillet over medium-high heat; add asparagus, and saute 2 minutes or until crisp-tender. Spoon over ravioli.
4. Melt remaining 5 tablespoons butter in skillet over medium heat; add garlic, and saute 1 minute. Whisk in mustard. Gradually whisk in light cream until smooth.
5. Bring cream mixture to a boil; reduce heat, and cook, stirring often, 5 minutes. Stir in cheese and remaining ingredients. Cook, stirring constantly, until cheese melts. Pour over asparagus and ravioli, and toss. Serve immediately.

Black Bean, Corn and Zucchini Enchiladas

Tuesday, January 13th, 2009

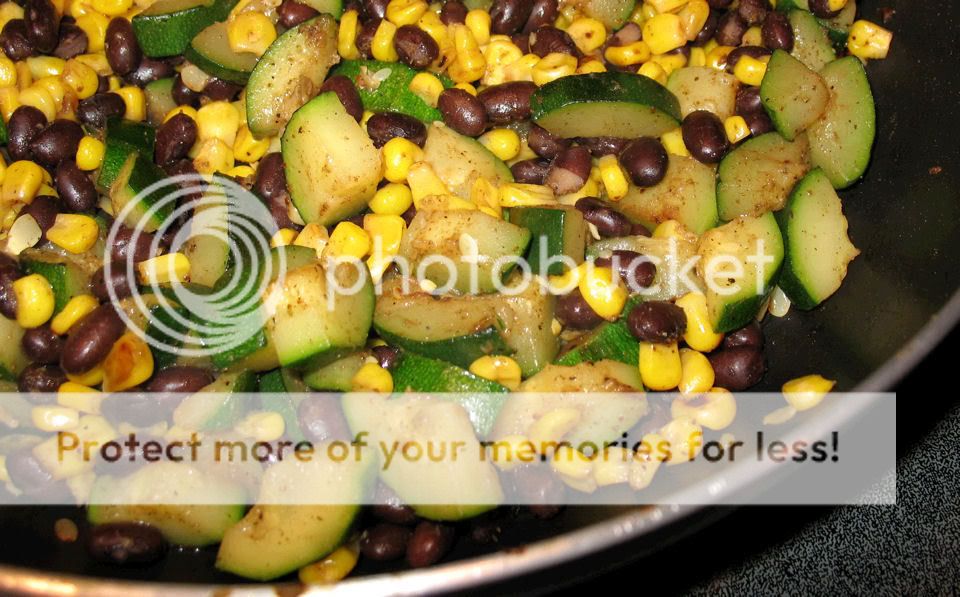
I pulled this recipe for Black Bean, Corn and Zucchini Enchiladas from a Cooking Light magazine. The vegetable filling provides a nice change from some of the more typical meat-heavy Mexican dishes.

This is a relatively time consuming recipe, but the resulting meal is well worth the effort. The enchilada sauce requires 30 minutes of simmer time, but it’s possible to save some time by preparing the vegetable filling concurrently. The magazine’s copy of the recipe suggests preparing the enchilada sauce a few days in advance and then refrigerating it. I’ve never planned far enough ahead to do this, but it would certainly be a time saver!

I have made very few changes to the original enchilada recipe. In order to reduce total calories and fat, I halved the amount of cheese used. I also sprinkle a small amount of cumin and chili powder on the vegetable filling before assembling the enchiladas. I find that this gives the filling a little more flavor, and complements the seasonings in the enchilada sauce quite nicely. It’s also worth noting that typically end up with only six enchiladas, while Cooking Light states that the recipe yields eight.

Black Bean, Corn and Zucchini Enchilada Recipe

Yields 6 servings (1 enchilada each)

1 teaspoon canola oil
2 cups diced zucchini
1 (10-ounce) package frozen whole-kernel corn
1 (15-ounce) can black beans, rinsed and drained
3 cups Enchilada Sauce, divided (see recipe below)
Cooking spray
8 (8-inch) whole wheat tortillas
1 cup (8 ounces) shredded reduced-fat cheddar cheese, divided

1 ) Preheat oven to 350?.
2 ) Heat oil in a large nonstick skillet over medium-high heat. Add 2 cups zucchini and corn; saut? for 5 minutes or until vegetables are tender.
3 ) Remove from heat, and stir in beans.
4 ) Spread 1 cup Enchilada Sauce in the bottom of a 13 x 9-inch baking dish coated with cooking spray.
5 ) Spoon about 1/2 cup zucchini mixture down center of 1 tortilla; sprinkle with 1 tablespoons cheese, and roll up. Place seam-side down in baking dish.
6 ) Repeat procedure with remaining tortillas, zucchini mixture, and 5 tablespoons cheese. Spread remaining 2 cups sauce evenly over enchiladas.
7 ) Cover with foil; bake at 350? for 30 minutes.
8 ) Uncover; top with remaining cheese (10 tbsp) . Bake, uncovered, for 10 minutes or until cheese melts.

Enchilada Sauce

Yields 3 cups

1 teaspoon canola oil
1/2 cup diced red onion
1 teaspoon minced garlic
1/2 cup vegetable or chicken broth
1 tablespoon chili powder
1 tablespoon honey
1 teaspoon ground cumin
1/2 teaspoon salt
1 (28-ounce) can crushed tomatoes, undrained

1) Heat oil in a large saucepan over medium heat.
2) Add onion and garlic; saut? 5 minutes or until onion is tender.
3) Stir in broth and remaining ingredients.
4) Reduce heat, and simmer 30 minutes.

Ratatouille

Friday, January 9th, 2009

Preparation for this dish requires a great deal of chopping, but the results are well worth it. Ratatouille is an interesting way to incorporate many different kinds of vegetables into a meal.

This is yet another meal that I found inspiration for on allrecipes.com. My finished product is somewhat saucier than the original. I have made a number of modifications to the original ratatouille recipe, including reducing the amount of cheese used and switching out some vegetables. Since mushrooms are a favorite in my house, I opted to use a full 10 oz package, as opposed to only 2 cups of sliced mushrooms. Given my aversion to fresh tomatoes, I substituted a 28 oz container of crushed, seasoned tomatoes. Finally, the original ratatouille recipe calls for eggplant, but I had more than enough vegetables without it.

When I made this dish tonight, I ended up using 1 zucchini and 1 yellow squash. Since yellow squash tends to have thicker skin, I sliced it very thin. Out of laziness, I skipped the fresh garlic cloves, opting to shake a little garlic powder on each layer of vegetables. While the resulting dish was flavorful, it was lacking that garlic zing. Next time, I’ll make the effort to mince and saute a few garlic cloves. Finally, make sure bake the Ratatouille in a dish that is large enough. I used a 2.5 qt casserole dish, and the vegetables were a little firmer than I would prefer, even with additional time. In the past, I have used a 9×13 baking dish that has allowed the vegetables to cook more quickly.

Ratatouille Recipe

Yields 4-6 servings

olive oil
3 cloves garlic, minced (or garlic powder)
2 tsp dried parsley
salt to taste
1/2 cup grated Parmesan cheese
2 zucchini, sliced
1/2 large onion, sliced into rings
10 oz fresh mushrooms, sliced
1 red pepper, sliced
28 oz can crushed tomatoes with Italian spices

1) Preheat oven to 350. Coat bottom of 13×9 baking dish with a small amount of crushed tomatoes.
2) Heat oil in skillet over medium heat and saute garlic until lightly browned.
3) Spread zucchini over bottom of prepared casserole dish, mixing in the sauteed garlic. Lightly salt and sprinkle this layer with cheese. Cover with a thin layer of crushed tomato.
4) Continue layering with the onion, mushroom and bell pepper, covering each layer with a sprinkling of salt, cheese and crushed tomato. Cover the top layer completely with crushed tomato.
5) Bake uncovered for 45 minutes, or until vegetables are tender.

Black Bean Chili

Wednesday, January 7th, 2009

Since I have concluded my baking marathon, I’ve decided to return my focus to regularly cooking filling, flavorful, wholesome meals.

I found this Black Bean Chili recipe on allrecipes.com a few years ago. My husband was initially skeptical about trying a chili recipe with no meat. His fears were allayed when he found that this chili is hearty and tasty. The combination of beans and other vegetable result in a rich, flavorful chili. Pureeing some of the chili lends thickness to the finished product.

The only modification I have made to the chili recipe is to substitute 28 oz. of canned diced tomatoes for the fresh diced tomatoes. I’m not a fan of the consistency of fresh tomatoes, so I usually substitute some sort of canned tomato product or sauce.

Using some canned or frozen products and employing a food processor to chop the vegetables greatly reduces prep time. It was only recently that my husband and I realized how much time we could save by using our food processor (took awhile, I know). What started off as my husband prepping the ingredients for me, turned into a full-on cooking session. He was pleased at how easily the chili came together. It’s worth noting that this black bean chili does not need to simmer for a long time, making it suitable for weeknight meals.

As with most chilis and soups, this chili tastes even better the next day. It also freezes well.

Colorful, tasty sauteed vegetables

Black Bean Chili Recipe

Yields 6 servings

1 tbsp olive oil
1 onion, chopped
2 red bell peppers, seeded and chopped
1 jalapeno pepper, seeded and minced
10 fresh mushrooms, quartered
1 28 oz. can diced tomatoes
1 cup corn kernels
1 tsp ground black pepper
1 tsp ground cumin
1 tbsp chili powder
2 15 oz. cans black beans, drained and rinsed
1 1/2 cups fat free, reduced sodium chicken broth or vegetable broth
1 tsp salt.

1) Heat oil in a large stockpot over medium-high heat. Saute the onion, red bell peppers, jalapeno, mushrooms and corn for 10 minutes or until the onions are translucent.
2) Season with black pepper, cumin and chili powder.
3) Stir in diced tomatoes, black beans, chicken broth and salt.
4) Bring to a boil and then simmer for 15-20 minutes.
5) Place 1 1/2 cups of chili in food processor and process until smooth. Stir the pureed bean mixture back into the stock pot.

Black Bean and Corn Quesadillas

Thursday, November 20th, 2008

Since our evening was quite busy, my husband and I opted to have appetizers for dinner. We both love Mexican food. It’s tasty, fun to make and pairs perfectly with a yummy margarita. We decided that quesadillas would be a quick, filling appetizer-for-dinner.

I adapted this recipe from the “Black Bean Quesadilla” recipe in Favorite Brand Name Mexican. My husband bought this cookbook for my birthday, and I love it. Not only does it contain quite a variety of recipes, but it’s well-organized and chock full of lovely photos. I really like to see picture of what I’m making.

The original recipe does not include corn and only calls for 1/2 cup of black beans. Adding the corn and doubling the amount of beans makes for a very filling quesadilla. I also increased the amount of cheese by about 1/4 of a cup, because I like cheesy quesadillas. Extra cheese also helps to hold things together.

This is not a recipe that needs to be followed carefully. Have fun changing proportions and switching up ingredients to include your favorite mix of flavors!

Black Bean and Corn Quesadillas

Cooking spray
4 8-inch flour tortillas
1 cup shredded cheese (cheddar or Mexican blend are perfect)
1 cup canned black beans, rinsed and drained
1 cup corn (if using frozen, thaw first)
2 green onions with tops, sliced
1/2 tsp ground cumin
1 tbsp dried cilantro
salsa and sour cream for garnish

1. Preheat oven to 450 degrees. Spray large nonstick baking sheet with cooking spray. Place two tortillas on baking sheet.
2. Combine beans, corn, green onions, cumin and cilantro in a small bowl; mix lightly.
3. Spoon corn and bean mixture onto tortillas. Sprinkle cheese over mixture.
4. Top with remaining tortillas and coat tops with cooking spray.
5. Bake 10-12 minutes or until cheese is melted and tortillas are lightly browned.
6. Cut each quesadilla into 6 wedges. Top with salsa and sour cream, if desired.

Subscribe
Email Registration  Email
  RSS
Recipe Sites
  • All Recipes
  • Cooking Light
  • Epicurious
  • Food Network
Archives
Sitemeter
Blog Directories
Add to Technorati Favorites