Authors
Beth
Kathleen
Lisa
Contact
domesticpursuits [at] gmail.com
Categories

Archive for the ‘Ice Cream/Sorbet’ Category

Homemade Hot Fudge

Thursday, August 18th, 2011

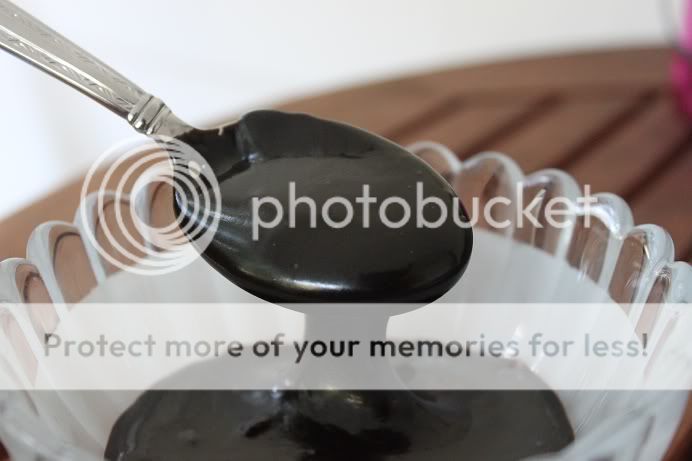
Oh. My. Gosh.  This was amazing.  I have never had better hot fudge, seriously.  And I love me some hot fudge, so that’s saying something.  The perfect time arose for me to make this ’30 while 30‘ recipe when I was actually on my way to my co-blogger Beth’s house for dinner.  I offered to bring dessert – but it was just too darn hot to bake, so I thought ice cream sundaes would be the perfect sweet treat to end our evening.  I could have just stopped at the multiple grocery stores between our houses to pick up a jar of hot fudge – but where would the fun in that be?!  Instead, I decided to knock one more item off of my list and make it myself.  It took me about 10 minutes, start to finish – but if I don’t say so myself, tasted like I spent hours slaving over the stove with a candy thermometer.  Let me tell you friends – this recipe is about my favorite recipe ever.  It uses things most people (well, most insane blogging-bakers) have in their pantry – items such as cocoa powder, chopped chocolate (in my case, chocolate chips), and corn syrup.  Why stop and buy the mass-produced variety when in just 10 minutes you too can look like Ms. Betty Crocker herself!!

It looks even better on ice cream.

Homemade Hot Fudge

from: thatssoyummy.com

Ingredients

  • 1/4 cup unsweetened Dutch-processed cocoa powder
  • 1/3 cup packed dark brown sugar
  • 1/2 cup light corn syrup
  • 2/3 cup heavy cream
  • 1/4 teaspoon salt
  • 6 ounces chocolate chips (or bittersweet chocolate, finely chopped)
  • 2 Tablespoon unsalted butter, cup into 1/2 Tablespoons
  • 1 teaspoon vanilla extract

Directions:

In a heavy sauce pan, combine the cocoa, dark brown sugar, corn syrup, cream and salt, along with about half of the chocolate chips.  Heat over medium heat until the chocolate melts and the mixture appears smooth.  Cook for 5 minutes more at a low boil, remembering to stir intermittently so it doesn’t burn!  Remove from the heat, and stir in the remaining chocolate chips, the butter, and the vanilla.  Let cool slightly before serving.  Enjoy!
Pumpkin Ice Cream

Tuesday, October 26th, 2010

I love making ice cream!  While others may consider these crisp fall days as a sign to put the freezer bowl away for the season, I just shift gears and start considering seasonal flavors that can be incorporated into frozen concoctions.

When I first tried pumpkin ice cream, I was hesitant.  One would think that the warm flavors of pumpkin, nutmeg, cinnamon and ginger would be at odds with cool, refreshing ice cream.  Strangely enough, it works very well.  The ice cream is rich and creamy and tastes an awful lot like frozen pumpkin pie!

The addition of pumpkin puree to the milk and cream base makes for a much thicker base.  Because the base was so heavy to begin with, it churned for less time.  This resulted in a denser, richer ice cream with less air incorporated into the final product.  A little goes a long way!

Pumpkin Ice Cream

adapted from Williams Sonoma

1 cup canned pumpkin puree (pure pumpkin NOT pumpkin pie filling)
1 1/2 tsp vanilla extract
2 cups heavy cream
3/4 cup firmly packed dark brown sugar
4 egg yolks
3/4 tsp ground cinnamon
1/2 tsp ground ginger
3/8 tsp ground nutmeg
1/4 tsp salt

1.  In a heavy 2-quart saucepan over medium heat, combine 1 1/2 cups of the cream and 1/2 cup of the brown sugar. Cook until bubbles form around the edges of the pan, about 5 minutes.
2.  Meanwhile, in a bowl, combine the egg yolks, cinnamon, ginger, salt, nutmeg, the remaining 1/2 cup cream and the remaining 1/4 cup brown sugar. Whisk until smooth and the sugar begins to dissolve.
3.  Remove the cream mixture from the heat. Gradually whisk about 1/2 cup of the hot cream mixture into the egg mixture until smooth.
4.  Pour the egg mixture back into the pan. Cook over medium heat, stirring constantly with a wooden spoon until the temperature reached 170-180.  It will be thick enough to coat the back of the spoon and leaves a clear trail when a finger is drawn through it.  Do not allow the custard to boil.
5. Strain through a fine-mesh sieve into a bowl.   Add pumpkin and vanilla, whisking well to combine.
6.  Cover with plastic wrap, pressing it directly on the surface of the custard to prevent a skin from forming.
7.  Refrigerate until chilled, preferably overnight.  Freeze in your ice cream maker according to the manufacturer’s instructions.  The base will be quite thick, so you may want to whisk it before churning.

National Ice Cream Day

Sunday, July 18th, 2010

Happy National Ice Cream day! In 1984, Congress designated July as national ice cream month and President Ronald Reagan followed up with a Presidential Proclamation urging “the people of the United States to to observe these events with appropriate ceremonies and activities.” While it appears that the Senate Joint Resolution and Presidential Proclamation only technically apply to the year 1984, do you really need an excuse to celebrate ice cream?

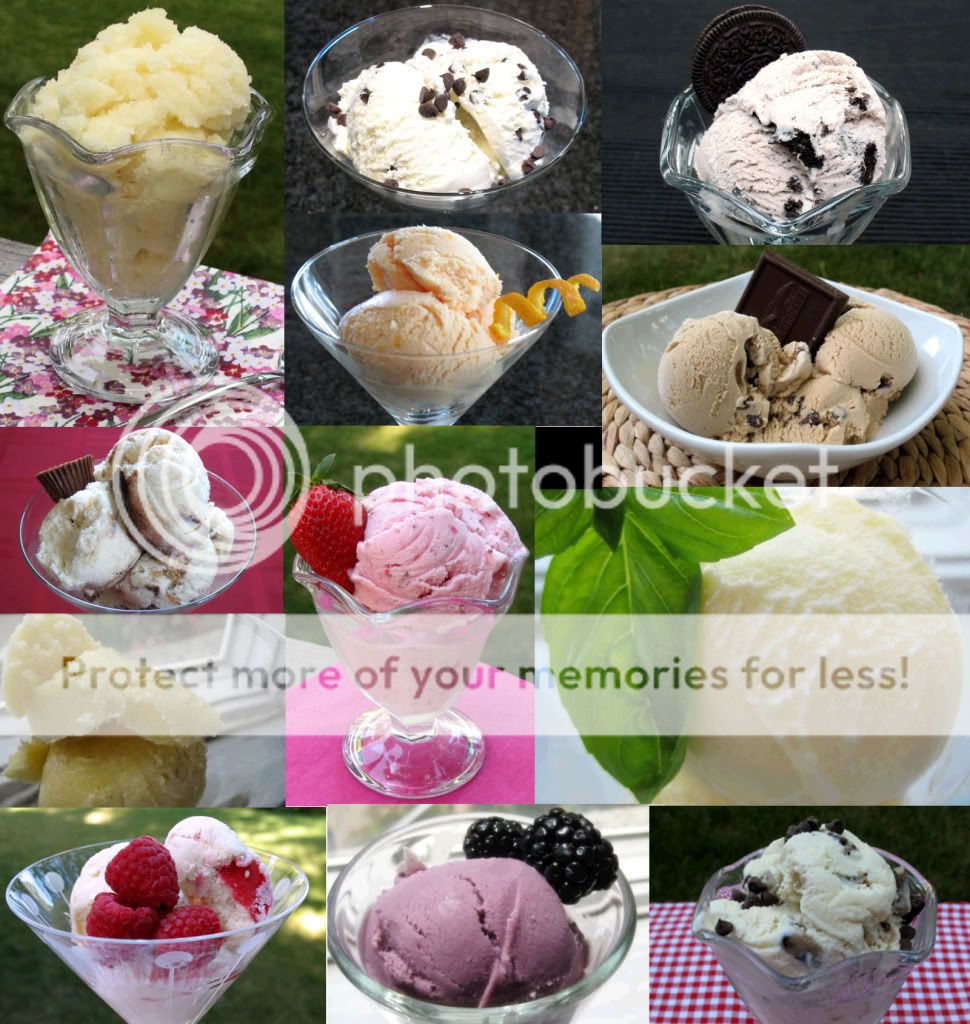
If you’re looking for some fun frozen treats, check out the assortment of ice cream, sorbet and gelato below. I have an array of homemade ice cream in my freezer and will be heading to my favorite ice cream stand in the afternoon. Are you doing anything celebrate?

Pineapple Sorbet

Mint Chocolate Chip Ice Cream

Orange Creamsicle Ice Cream

Cookies and Cream Ice Cream

Coffee Chip Ice Cream

Moose Tracks Ice Cream

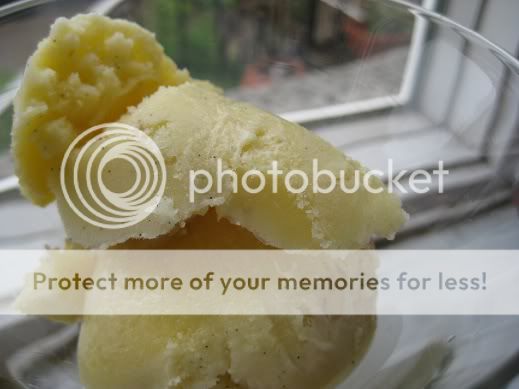
Vanilla Bean Ice Cream

Strawberry Ice Cream

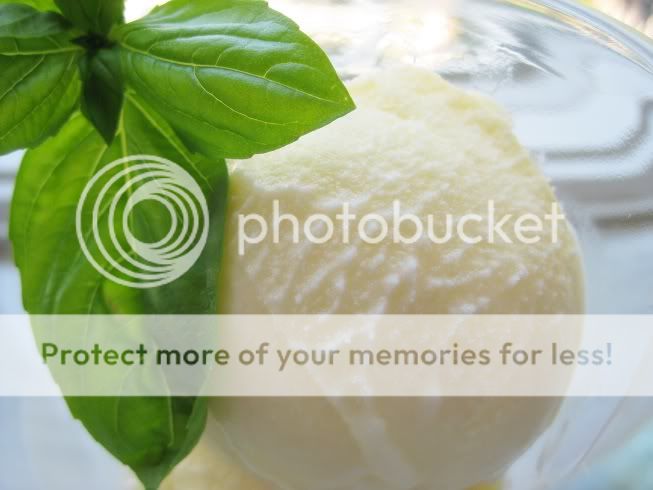
Basil Gelato

Vanilla Bean Ice Cream

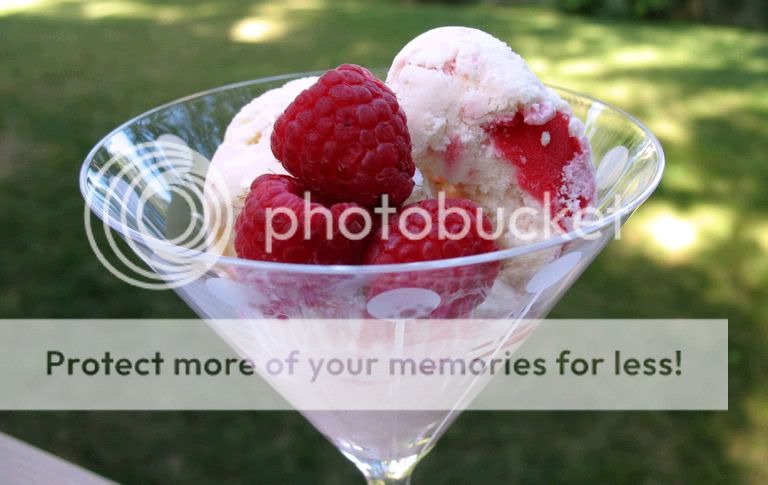
Raspberry Ripple Ice Cream

Blackberry Ice Cream

Chocolate Chip Cookie Dough Ice Cream

Gelato al Basilico – Basil Gelato

Sunday, July 18th, 2010

In celebration of National Ice Cream Month, I have been making a concerted effort to make more frozen treats this summer!  Recently, my husband and I went to this adventurous little dessert cafe in the Queen Village area of Philadelphia – not only do they sell fantastic adventurous chocolates (such as the Balsamic Vinegar and Jalapeno truffles) but also have an incredible dessert selection which I highly recommend.  I saw Basil Gelato on the menu and the thought intrigued me – I, like many, had only enjoyed this fabulous herb in savory dishes like Caprese Salad and Pesto.  The idea of a basil ice cream was too unique to pass up – so I gave it a try.  The flavor was absolutely one of the most unique and amazing tastes I’ve ever enjoyed - spicy, sweet, and fresh all at the same time.  I returned home determined to try and replicate this flavor myself – I compiled a Basil Gelato recipe from a recipe I located in an old ice cream cookbook I found (Iced, by Jane Lawson) and this recipe I found online.  Simple enough for most anyone to follow, and requires only 10-12 basil leaves, which even the smallest container herb garden can supply!  It does require having a thermometer – but frankly I think a cooking thermometer is an indispensable kitchen tool.  There are multiple kinds – we have a fairly simple digital probe thermometer – its original purpose is for meat, but temperature is temperature - so we’ve also used it to  safely pasteurize frozen custards, make candy and fry things - so now’s a good time to pick one up!

Now, I liked the online recipe best, however it contains an astounding 12 egg yolks (or 2500+ mg of cholesterol) in just one batch.  For my day job, I am a pediatrician - and there is NO way I could in good conscience use a recipe like this!  I was able to cut the recipe down to just 5 egg yolks per batch, which seemed much more reasonable to me.  The texture was still velvety smooth like any good gelato, but had less than half the cholesterol than the original recipe. 

Now don’t get me wrong – I am as much a fan of ice cream as the next gal, but this is definitely a very rich recipe and I highly suggest enjoying it in small batches.  It would be fantastic with a nice dark hot fudge sauce on the side.  Get in touch with your Italian side and give this dessert a try!

Gelato al Basilico

Ingredients

  • 10-12 fresh basil leaves, cut into 1/4 inch strips (chiffonade style)
  • 4 cups half-and-half
  • 1 and 1/2 cups sugar
  • 5 large egg yolks

Begin by placing the egg yolks, 1 cups of the half-and-half, and half of the sugar into a large bowl, beating to combine thoroughly.  In a heavy saucepan, add the remaining 3 cups of half-and-half, the remaining sugar, and the thinly sliced basil.  Heat over low-medium heat until the mixture reaches a boil, then remove from heat.  Let this mixture sit and cool for 5 minutes to fully extract all the flavor from your basil.  Pour the heated basil mixture into the bowl containing the egg yolks and half-and-half, stirring constantly to make sure your eggs do not scramble on you!  Pour the bowl contents back into the saucepan through a strainer, removing the basil from the final product.  Over low-medium heat, bring the mixture to a temperature of 178 degrees stirring constantly and leave it there for 5 minutes in order to pasteurize your gelato.  Cool the finished liquid completely in a refrigerator – for at least 3-4 hours.  Freeze according to your ice cream maker’s instructions.  For firmer consistency, put gelato back in the freezer for several hours before serving.  Enjoy!

Coffee Chip Ice Cream

Friday, July 9th, 2010

My neighbors must think I’m crazy.  I recently discovered that the late-afternoon light in my backyard is just perfect for food photography.  I regularly scamper into the backyard with a white resin table, place-mat, dish of food and my camera and proceed to crawl around on the ground snapping pictures.  Taking this picture was a race against time, as ice cream doesn’t really appreciate 90 degree temperatures.

Onto the ice cream:  I simply love this coffee ice cream!  While I have enjoyed all of my homemade frozen confections, this is one of my favorites.  It’s smooth and creamy with the perfect punch of coffee flavor.  Mini chocolate chips  add a nice crunch and burst of chocolate.

Most coffee ice cream recipes I found involved steeping whole beans for an hour or so.  This seemed like a time-consuming and relatively expensive way to make coffee ice cream.  Homemade ice cream is certainly not a money-saving endeavor, but I figured that there had to be an easier, less pricey way to do this.  I decided to experiment with my favorite vanilla ice cream recipe and some instant coffee.  By reducing the sugar, eliminating the vanilla extract and adding 2 tablespoons of instant coffee, I was able to easily whip up the coffee ice cream I had been dreaming of.

Coffee Chip Ice Cream

1/4 cup Egg Beaters
7 oz. fat free sweetened condensed milk (1/2 can)
4 tbsp white sugar
8 oz heavy whipping cream
2 tbsp instant coffee
8 oz fat free half and half
8 oz skim milk
1/2 cup semi-sweet mini chocolate chips

1. Pour half and half into small saucepan and heat, stirring occasionally, until steam rises. Remove from heat.
2. In a separate bowl, use a whisk or electric mixer to beat Egg Beaters, sweetened condensed milk and sugar together. Beat in 1/2 cup of hot half and half and then stir this mixture into the saucepan with the remaining half and half.
3. Cook over medium-low heat, stirring almost constantly. Continue until the mixture reached 170-180 degrees or is slightly thickened. Do not bring the mixture to a boil.
4. Pour the mixture into a separate bowl and stir in the cream, milk, vanilla extract and salt.
5. Chill the mixture for several hours (overnight is even better). You can speed up the process by placing the bowl containing the mixture in a large bowl filled with ice and water.
6. Freeze in ice cream maker according to manufacturer’s directions.
7. Once the ice cream is done, gently fold in the cookie dough chunks and chocolate chips.

Raspberry Ripple Ice Cream

Tuesday, July 6th, 2010

It’s that time of year when there’s an abundance of beautiful fresh berries on sale at grocery stores across the country! Having already tackeled Strawberry Ice Cream this summer, I decided to snag a package of raspberries.

In The Perfect Scoop, David Lebovitz details a recipe for Raspberry Swirl ice cream. Using that as inspiration, I made my go-to vanilla base and layered it with a smooth, bright raspberry sauce. David’s recipe simply calls for mashing the whole berries with a fork, but I opted to puree the raspberries and strain out the seeds.

The final product is even better than I had imagined. The tangy, fresh raspberry sauce pairs beautifully with the mellow vanilla ice cream. While certainly delicious on its own, a generous helping of hot fudge takes this ice cream to another level.

Raspberry Ripple Ice Cream

1/4 cup Egg Beaters
7 oz. fat free sweetened condensed milk (1/2 can)
3 tbsp white sugar
3 tbsp brown sugar, not packed
8 oz heavy whipping cream
8 oz fat free half and half
8 oz skim milk
1/8 tsp salt
1 1/2 tbsp vanilla extract
1/4-1/2 cup raspberry sauce (see recipe below)

1. Pour half and half into small saucepan and heat, stirring occasionally, until steam rises. Remove from heat.
2. In a separate bowl, use a whisk or electric mixer to beat Egg Beaters, sweetened condensed milk and sugar together. Beat in 1/2 cup of hot half and half and then stir this mixture into the saucepan with the remaining half and half.
3. Cook over medium-low heat, stirring almost constantly. Continue until the mixture reached 170-180 degrees or is slightly thickened. Do not bring the mixture to a boil.
4. Pour the mixture into a separate bowl and stir in the cream, milk, vanilla extract and salt.
5. Chill the mixture for several hours (overnight is even better). You can speed up the process by placing the bowl containing the mixture in a large bowl filled with ice and water.
6. Freeze in ice cream maker according to manufacturer’s directions.
7. Transfer the ice cream to a storage container, alternating layers of ice cream with generous drizzle of raspberry sauce. Do not mix the ice cream and the sauce, as it will become muddied.

Raspberry Sauce
adapted from David Lebovitz’s Raspberry Swirl
The Perfect Scoop, p.92-93

1.5 cups (160 grams) raspberries, fresh or frozen
3 tbsp sugar
1 tbsp vodka

1. Puree the raspberries in a food processor or blender.
2. Using a rubber spatula, press the puree through a mesh strainer to remove the seeds.
3. Whisk the sugar and vodka into the strained sauce.
4. Cover and store in the refrigerator until needed.

Blackberry Ice Cream

Saturday, July 3rd, 2010

I don’t know if you’ve had this sense recently, but I’m getting the feeling it’s a good year for blackberries!  Our favorite produce store has had blackberry sales pretty much every time we’re there – so I’ve been searching for recipes to use them in.  Naturally, as July was appointed National Ice Cream Month, I figured heading into July it was time to break out the old ice cream maker again.  I’ve always loved the smooth sweet taste of black raspberry ice cream, so I figured giving blackberry ice cream a try would be my next logical step!  I adapted this recipe, adapted by the blog ’Salt and Chocolate’ for blackberries from a recipe originally for raspberry ice cream in David Lebowitz’s “The Perfect Scoop.”  My main changes related to using all half and half, as I was trying to cut the fat just a little…it came out great, perhaps a little firmer out of the freezer than it’s full-fat counterpart would be.  The flavor was perfectly sweet, and the lemon juice definitely helps emphasize the blackberries!  Perfect treat at the end of a long July day.

Blackberry Ice Cream

  • 4 cups fresh blackberries
  • 3 cups half-and-half
  • 1 cup sugar
  • 4 egg yolks
  • 1 tbsp fresh squeezed lemon juice

Before you start, puree blackberries in a food processor and pass the puree through a fine mesh strainer to get all the seeds out.  Place 1 and 1/2 cups half-and-half in a saucepan with the sugar and heat over low-medium heat until the sugar dissolves.  In a separate bowl, beat together the egg yolks until smooth.  Add about 1/4 cup of the heated half-and-half/sugar mixture to the egg yolks, stirring constantly so that the eggs don’t scramble on you!  Then add the egg yolk mixture back to the saucepan and continue stirring constantly while heating until the mixture reaches 163-168 degrees farenheit – keep it in this range for 5 minutes in order to pasteurize the custard.  Remove custard from the heat.  Pour through mesh strainer into a bowl.  Stir in the remaining half and half, blackberry puree and the lemon juice.  Chill completely.  Freeze in your ice cream maker according to manufacturers instructions.  Enjoy!

Chocolate Chip Cookie Dough Ice Cream

Friday, July 2nd, 2010

I’m a bit of a late bloomer when it comes to chocolate chip cookie dough. While others grew up stealing tastes or outright devouring raw dough, I shunned it in fear of raw eggs. In fact, I still won’t consume uncooked cookie dough. But homemade eggless cookie dough – that’s another matter entirely.

This ice cream falls into the “where have you been all my life?” category. It’s amazing. The cookie dough bits, courtesy of David Lebovitz, are perfectly buttery and sweet – I could (and did!) eat them like candy. Regular readers of this blog may recognize the vanilla ice cream recipe, as it’s the same one used for Cookies and Cream, as well as Moose Tracks. It’s rich, creamy and oh-so-easy to make.

Cookie Dough Ice Cream

1/4 cup Egg Beaters
7 oz. fat free sweetened condensed milk (1/2 can)
3 tbsp white sugar
3 tbsp brown sugar, not packed
8 oz heavy whipping cream
8 oz fat free half and half
8 oz skim milk
1/8 tsp salt
1 1/2 tbsp vanilla extract
1 batch of eggless cookie dough chunks (see recipe below)
1/4-1/2 cup semi-sweet chocolate chips

1. Pour half and half into small saucepan and heat, stirring occasionally, until steam rises. Remove from heat.
2. In a separate bowl, use a whisk or electric mixer to beat Egg Beaters, sweetened condensed milk and sugar together. Beat in 1/2 cup of hot half and half and then stir this mixture into the saucepan with the remaining half and half.
3. Cook over medium-low heat, stirring almost constantly. Continue until the mixture reached 170-180 degrees or is slightly thickened. Do not bring the mixture to a boil.
4. Pour the mixture into a separate bowl and stir in the cream, milk, vanilla extract and salt.
5. Chill the mixture for several hours (overnight is even better). You can speed up the process by placing the bowl containing the mixture in a large bowl filled with ice and water.
6. Freeze in ice cream maker according to manufacturer?s directions.
7. Once the ice cream is done, gently fold in the cookie dough chunks and chocolate chips.

Cookie Dough
The Perfect Scoop, p. 209

5 tbsp salted butter, melted
1/3 cup packed light brown sugar
1/4 cup flour
1/2 tsp vanilla extract
3/4 cup semisweet or bittersweet chocolate chips

1. In a medium-sized mixing bowl, stir together the butter and sugar until smooth.
2. Stir in the flour (I needed to add an extra tablespoon), followed by the vanilla and chocolate chips.
3. Form the dough into a 1/2 inch disk. Wrap in plastic and chill in freezer for 30 minutes.
4. Unwrap the dough, chop into bite-sized pieces. (using a chef’s knife works well)
5. Store the pieces in the freezer, covered, until you’re ready to use them.

Strawberry Ice Cream

Saturday, June 26th, 2010

There are few things more summery than ice cream and strawberries.   While I have long enjoyed fresh strawberry desserts, strawberry ice cream just didn’t interest me.  Most store-bought varieties seem vaguely strawberry flavored and quite artificial.  Using a pound of fresh strawberries and sour cream, this David Lebovitz recipe produces a creamy, subtly sweet ice cream with an authentic strawberry flavor.

I like to play around with the dairy ingredients in an attempt to cut fat and calories.  As written, the ice cream is perfectly smooth and creamy.    While any reduced-fat substitute will effect the ice cream’s texture, I have found that  using reduced fat sour cream and half and half in place of the sour cream and heavy cream yields a delicious, smooth ice cream.  Straight out of the freezer, it’s a little harder than its full-fat counterpart, but nothing that a few minutes on the counter won’t fix.

Topped with fresh strawberries and whipped cream, this ice cream is the perfect treat for a warm summer day.

Strawberry Sour Cream Ice Cream
David Lebovitz: The Perfect Scoop

Yields about 1 1/4 quarts

1 lb fresh strawberries, rinsed and hulled
3/4 cup sugar
1 tbsp vodka
1 cup sour cream
1 cup heavy cream
1/2 tsp freshly squeezed lemon juice.

1. Slice strawberries. In a medium bowl, combine strawberries, sugar and vodka. Stire until the sugar begins to dissolve.
2. Cover the bowl and let stand at room temperature for about an hour, stirring occasionally.
3. Using a blender or food processor, pulse the strawberries and their liquid with the sour cream, heavy cream and lemon juice until smooth but slightly chunky.
4. Chill the mixture in the refrigerator for at least 1 hour and then freeze in your ice cream maker according to the manufacturer’s instructions.

Vanilla Bean Ice Cream

Sunday, April 25th, 2010

I love entertaining!!  It gives me a chance to try out recipes I usually don’t make – for example, homemade Vanilla Bean ice cream.  As we were having company over, and we happened to have several Vanilla beans on hand, I decided to give it a whirl.  For my birthday last year, my lovely husband ordered (all the way from Europe!) the aptly titled “Book of Sweet Things,” full of ice cream recipes published by the world’s best ice cream makers (no exaggeration) who we happened upon by chance during our Ireland vacation last year.  I have tried a few of their recipes – Chocolate Whiskey, and Mint Chocolate Chip (which was so fabulous it didn’t last long enough to blog about!  Stay tuned, while my mint grows anew this spring…), and they have all been amazing.  I figured their vanilla would be equally as tasty.  I made a few modifications – first, while I typically do use cream in my ice creams, this time I just didn’t have any on hand – so I made due with just whole milk.  It was a little icy, but still tasted fantastic and had less fat than typical ice creams.  I modified the measurements since I don’t think in metric.  Additionally, I highly recommend a candy thermometer or digital cooking thermometer so that you can make sure everything gets to the right temperatures for the right amount of time; I do pasteurize everything, seeing as I’m a germophobe!  It was just wonderful, especially paired with ripe blackberries, chocolate mousse cake, and great friends!

Ingredients:

1 cup Sugar 
5 Egg Yolk 
2 1/4 Cups Whole Milk
1 Vanilla bean

Optional – 1-2 tsp of vanilla liquor (I used Tuaca) – if you’re making low-fat ice cream like me, will help with the texture!

First, split the vanilla bean down the middle and place in a saucepan with a cup of milk.  Bring to a simmer over low heat.  In the meantime, beat together the sugar and egg yolks until they turn light yellow and are smooth.  When the milk is simmering, remove the bean and slowly beat the milk into the egg mixture.  Place the egg and milk mixture back into the saucepan, and add back the bean, again over low heat.  Heat to 163 degrees Farenheit (73 degrees C), and keep at that temperature for 3-5 minutes (this will Pasteurize your ice cream!), being careful not to exceed 168 degrees Farenheit (76 degrees C) lest you have vanilla scrambled eggs instead of ice cream.  Cool the mixture in a refrigerator completely.  Mix in rest of the milk, and the liquor if you are using it, and freeze according to your ice cream maker instructions!

Subscribe
Email Registration  Email
  RSS
Recipe Sites
  • All Recipes
  • Cooking Light
  • Epicurious
  • Food Network
Archives
Sitemeter