Authors
Beth
Kathleen
Lisa
Contact
domesticpursuits [at] gmail.com
Categories

Archive for the ‘Side Dishes’ Category

Peach Ginger Preserves

Thursday, August 18th, 2011

So until I took on this 30-while-30 post, I had never canned anything.  I was rather intimidated by the whole process, mostly because I didn’t understand how it worked.  However, making preserves was enough of an impetus for me to figure it out.  I will caveat this with you absolutely do NOT have to can these preserves – in fact, they are so delicious you likely will finish them in a very short period of time, and therefore not need to can them – however, it’s a really fun treat to pull homemade preserves out of the pantry, say for a tea party with a friendly co-blogger.   It is very, very easy to make your own preserves – basically you just boil fruit with some sugar and voila – preserves. 

When I tackled this process, I figured if I am taking the time to make my own preserves, I would go off the beaten track and make a flavor I couldn’t find at my local grocery purveyor.  Ginger peach preserves sounded just about perfect – particularly because they do not include pectin, and I am still a little intimidated by using pectin.  I cut the amount of sugar in the recipe by over half, and also omitted the allspice because I just didn’t think the recipe really needed it.  It came out absolutely fantastic – the spice of the ginger goes very well with the sweet peaches, and add that little something extra to make this spread stand out.  These preserves happen to go absolutely perfect with Beth’s orange chocolate chip scones.  Try it, you will not be disappointed.  They also go very well with crumpets, english muffins, on vanilla ice cream, and nearly anything else. 

Ginger Peach Preserves

From Mirj via food.com

  • 3 lbs peaches
  • 1 cup granulated sugar
  • 3 tablespoons finely chopped fresh ginger
  • 2 teaspoons lemon juice

In a pot of boiling water, drop peaches to cook for about 1 minute, or until the skins loosen.  Remove from the boiling water and immediately immerse into a waiting ice bath.  Remove peach skins and chop into small uniform pieces.  Add the peaches, sugar, ginger, and lemon juice to a thick bottomed skillet and cook for about 30 minutes or until the mixture appears thickened.  Cool and enjoy!!

If you plan on canning these preserves – I found this guide to be particularly helpful.  I processed (boiled) mine for 15 minutes in the jars.  Good luck!
Calabacitas

Thursday, August 19th, 2010

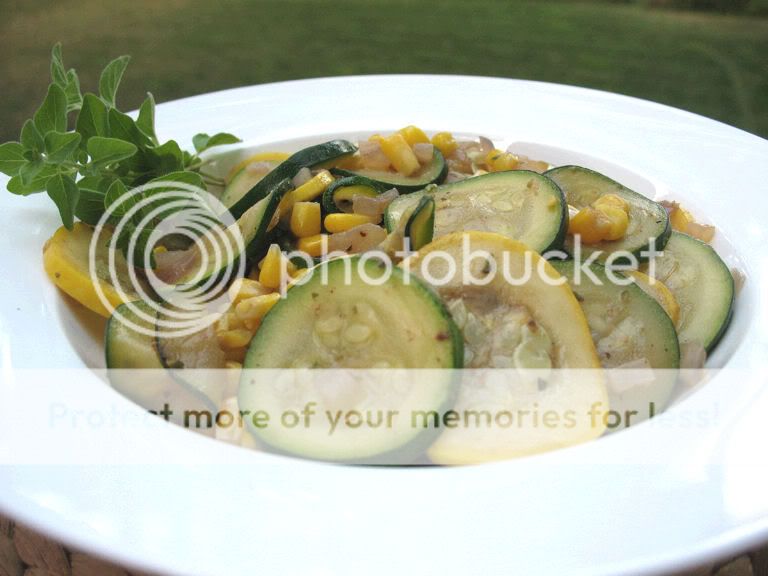
Looking for a Mexican side-dish that’s full of vegetables and great flavor?  Look no further than calabacitas, which traslates to “little squash.”   This dish goes together easily and showcases fresh summer flavors – zucchini, summer squash, corn and fresh oregano.   Throw in some onions, season with salt, pepper and red pepper flakes (if you want the heat), sauté for a few minutes and you’re good to go!

Calabacitas

olive oil
1 small zucchini, sliced thin
1 small yellow squash, sliced thin
1 Roma tomato, diced (I omitted)
1 small red onion, diced
1 clove garlic, minced
1/2 c. frozen or fresh corn
1 tsp. chopped fresh oregano
red pepper flakes, to taste
cumin, to taste (around 1/2 tsp)
1/2 tsp salt
1/2 tsp black pepper

1. Coat sauté pan with olive oil
2. Lightly coat a sauté pan with oil. On medium heat, cook onion, zucchini and squash until slightly softened – about 5-10 minutes.
3. When zucchini has almost reached desired consistency, add corn and heat through.
4. Season with oregano, cumin, red pepper flakes, salt and pepper before serving.

Slow-cooker Black Beans

Wednesday, May 19th, 2010

I like to save money. Who doesn’t? If I can save some money by making something myself, assuming the time-commitment is not excessive, I’ll usually do it. For the longest time, dried beans remained the exception to the rule.  I knew that it would be a money saver, but I just never planned ahead enough…until today.

Once cooked, a one pound bag of dried beans yields about as much as three 15 ounce cans  These cans contain extra liquid… not to mention tons of salt.  At my local grocery store, a one pound bag of dried beans costs one dollar, while a 15 ounce can costs 80 cents.  Clearly, this is a savings opportunity.

How long will this take?   If you use your slow-cooker, there’s less than 5 minutes of attended preparation. I followed instructions from A Year of Slowcooking, and the whole process could not have been easier.  After an overnight soak, the water is changed and the slow-cooker is set to low for at least 8 hours. That’s it.

I used about 2.5 cups of beans in tonight’s dinner and bagged the rest up for future use.  According to the instructions I followed, the beans can be refrigerated for a week or frozen for six months.  I cook with beans quite often, so I definitely plan to do this again!

Cooking Dried Beans

1 bag dried black beans
water

1.  Pour the bag of beans into a colander and rinse in cold water Remove broken beans, any that look shriveled or anything that floats to the surface.
2.  Transfer beans to slow-cooker and add enough water so that the beans are submerged under two inches of water.
3.  Cover the slow-cooker but do not turn it on. Let the beans soak for at least 6 hours – overnight is fine. If your home is very warm, put the slow-cooker stoneware in the refrigerator to prevent bacteria growth.
4.  After the beans have soaked, drain the soaking water and rinse the beans.
5.  Return the beans to the slow-cooker. Cover with enough water to completely submerge the beans with an additional 2-3 inches.
6.  Cover and cook on low for at least 8 hours. The beans are done when they are bit-tender.
7.  Drain the beans and use in your favorite recipe or pack them for storage.

Since there’s no filler liquid, you can substitute 1 2/3 cups of freshly prepared beans for 1 can of beans.

Zucchini and Sausage Quiche

Monday, October 5th, 2009

One of my favorite dishes is quiche, yet for some reason we rarely make it! Lately I’ve been spending a lot of time studying for a big upcoming exam – so in order to procrastinate more effectively, I decided to spend a few hours making quiche…crust from scratch and everything. I picked up some zucchini at a local farm stand, and was inspired to find some other ingredients that went with zucchini well. I used a variety of recipes for inspiration – although this one does not have a crust, it did have a great combination of veggies and flavors. My husband usually protests if we have too much vegetarian food, so I threw in a bit of sweet italian sausage for him – but I imagine this would taste great without it. I made a pastry crust from Mark Bittman’s How to Cook Everything. I tweaked the amount of eggs included and the cheese a bit, as I didn’t have any monterey jack on hand. The quiche was great…and hopefully I’ll still pass my big exam!

Zucchini and Sausage Quiche

Crust Ingredients:

5 oz flour (1 and 1/8 cups)

1/2 teaspoon salt

1 teaspoon sugar

1 stick butter, cut into pieces

3 tablespoons ice water

Filling Ingredients:

2 medium zucchini, sliced thinly

1 medium onion, sliced thinly

2 cloves garlic

2 links of sweet italian sausage

5 eggs

1/2 tsp dried basil and dried marjoram

1/2 cup parmesan cheese

1/2 cup mild cheddar cheese

To make the crust – Preheat oven to 425. place the flour, sugar, and salt into a food processor and pulse to combine. Add the cut-up butter to the dry ingredients and pulse repeatedly until the butter and flour is well combined – it will look a little like cornmeal. Place this in a bowl and sprinkle water over the flour/butter combination and then combine to form a ball. Chill the ball (wrapped in saran wrap) in the freezer for 10 minutes. Dust the chilled dough with flour and place the chilled dough between two layers of saran wrap. If it becomes too soft, chill again! Put the crust into a pie plate and pierce all over – cover with foil and fill with pie weights (or dried beans – cheaper!) and bake at 425 degrees for 12 minutes.

To make the filling – Set oven for 325 degrees. Saute the zucchini, onion and garlic in a medium skillet until softened, then put aside. Remove the sausage casing and brown the meat until no longer pink at all. In a bowl, beat 5 eggs together with the marjoram, basil and parmesan cheese until combined. Stir in the zucchini/onion mix, cheddar cheese and sausage. Place the mixture in the prepared pie crust. Bake at 325 degrees for 30-40 minutes – until the center is set. Enjoy!

Corn Salsa

Wednesday, June 10th, 2009

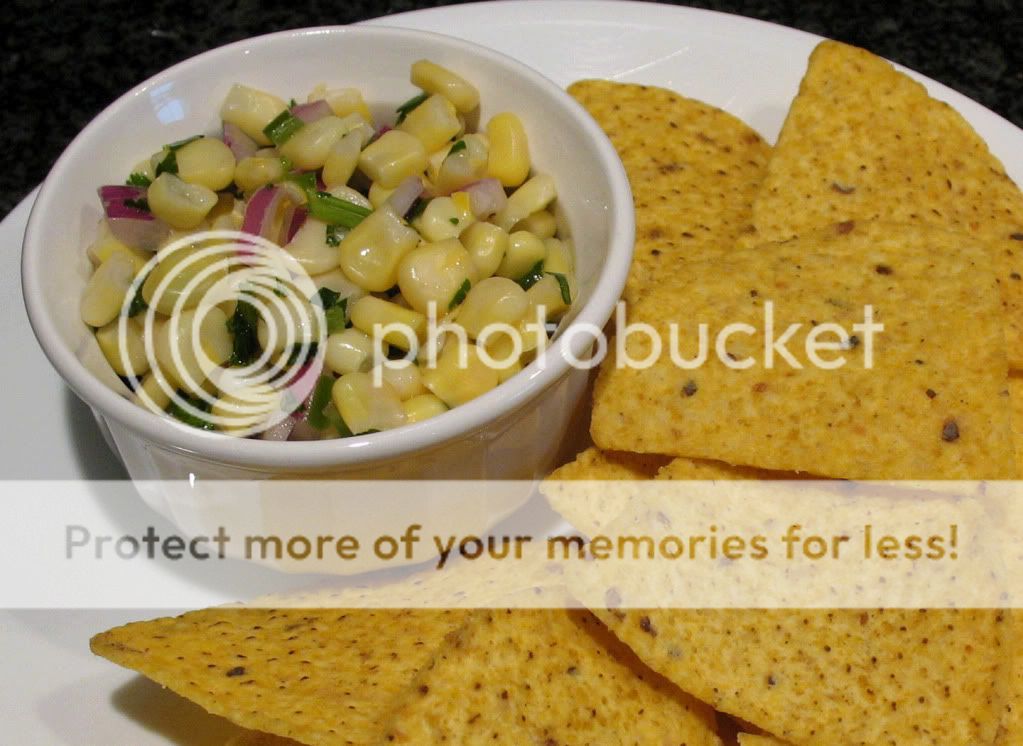
I do not like tomatoes. While I love the taste of tomatoes, I won’t touch anything that resembles a fresh tomato. As you might imagine, this limits my options for fresh salsas. Enter corn salsa. When I tried it at Chipotle, it was love at first bite. It’s crisp, fresh, flavorful and contains no trace of tomato.

Inspired by my love of Chipotle’s corn salsa, I set out to create a reasonable approximation at home. When I first started making the salsa, I used this recipe from About.com as my guide, but now I just eyeball all of the ingredients. This is a non-particular recipe that can be easily adjusted to suit individual preference. I can safely say that I use more jalapeno, cilantro and onion than called for in the original recipe.

You can certainly use frozen corn to make this salsa, but it tastes even better with fresh, native corn stripped from the cob. When I use fresh corn, I boil a few ears as if I were going to serve it and then slice the kernels from the cob. The fresh corn lends a crisp sweetness to the salsa.

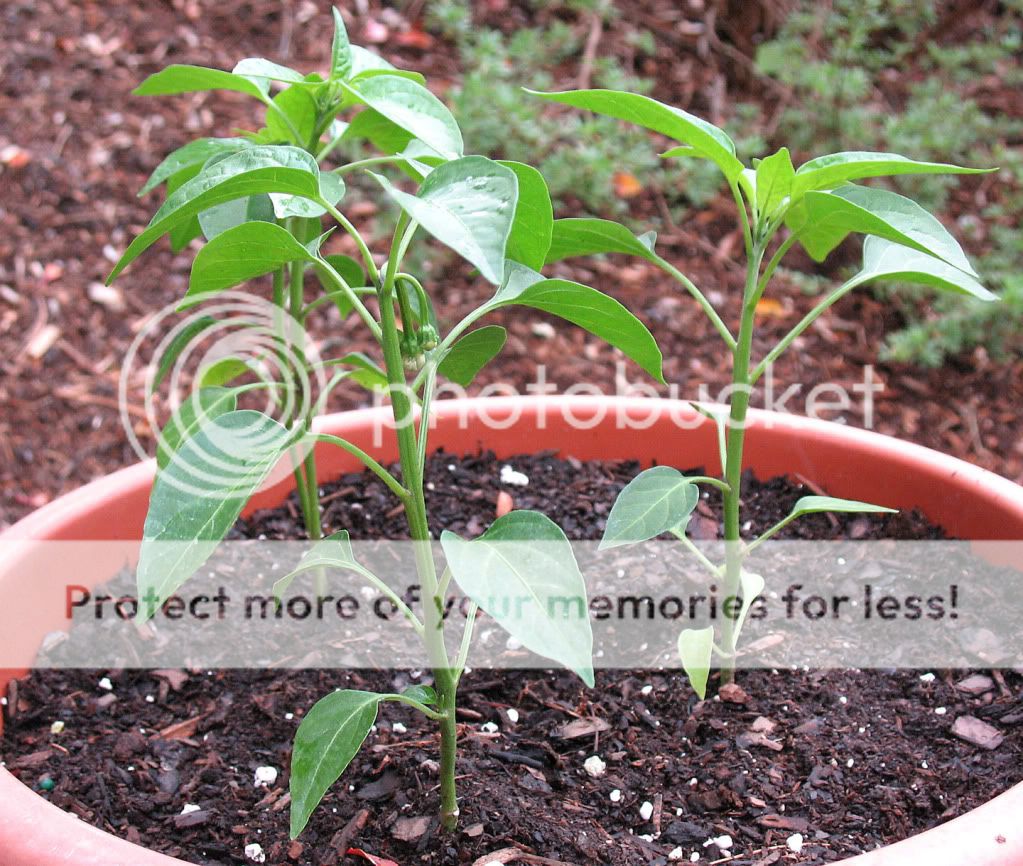
I’m growing jalapeno peppers this year, as well as cilantro. The starter pepper plants look good, as long as the squirrels leave the tiny peppers alone! I started the cilantro from seed, and it just sprouted a few days ago. Every few weeks, I plan to sow a new batch of cilantro so I will have a continuous supply. By the time my favorite farm stand is selling their native corn, I hope to have jalapenos and cilantro from my garden to use in this salsa!

Since it’s so easy to put together, this salsa has become a summer staple in my household. It’s delicious as an accompaniment to corn chips, or grilled meats. In face, it complements tequila lime chicken beautifully. However you sever it, this corn salsa is simple, fresh and flavorful.

Corn Salsa

2 cups frozen corn kernels, thawed (2-3 medium ears of fresh corn)
1/3 cup chopped red onion
3 tablespoons chopped fresh cilantro
2 tablespoons fresh lime juice (juice of one lime)
1 to 2 tablespoons finely chopped jalapeno pepper
1/2 teaspoon salt

1. Combine all ingredients in a small bowl.
2. Cover and refrigerate for 2 to 4 hours.
3. Can be served cold or at room temperature.

Cilantro Lime Rice

Thursday, May 14th, 2009

I was searching for a Chipotle-inspired rice to serve with tequila lime chicken when found this recipe for Cilantro Lime Rice on allrecipes.com. Sadly, it’s not the same as Chipotle’s rice. It’s still delicious.

This is an easy recipe that uses very few ingredients. The rice has a nice lime flavor, and I love the earthy cilantro. I used more than the two tablespoons of cilantro called for in the original recipe. I don’t know how much I used, as I just sprinkled in extra cilantro until it looked right.

After I made this rice, I found a Chipotle Fan site that provides copy-cat recipes that promise to emulate Chipotle staples. I will be trying their chicken marinade and rice soon.

Cilantro Lime Rice

Yields 6 Servings

1 cup long grain white rice
2 cups chicken broth
2 tbsp lime juice (juice of 1 lime)
2 tbsp chopped fresh cilantro
salt to taste

1. Bring rice and chicken broth to a boil in a saucepan over high heat.
2. Reduce heat to medium-low, cover and simmer for 20-25 minutes or until rice is tender.
3. Remove from heat and stir in lime juice, cilantro and salt. Fluff with fork and serve.

Mexican Rice

Wednesday, February 25th, 2009

I’ve tried a number of different Mexican rice recipes over the past few years, but none of them were quite right. When I saw this recipe on Dinner & Dessert, I knew I needed to give it a whirl. Since my husband Mike and I were planning a Mexican night with company last weekend, this seemed like the perfect side dish to try out.

This Mexican Rice recipe is a great find! It does take awhile to prepare this dish, but the finished product is certainly worth the effort. It has a great flavor, and was the perfect accompaniment for our black bean and turkey burritos. This recipe makes a lot of rice, but I’ll be following Erin’s recommendations and freezing the leftovers. It will be nice to be able to pull perfectly-flavored rice from the freezer any time I want.

Mexican Rice (source: Cook?s Illustrated September 2004)
found on Dinner & Dessert

2 ripe tomatoes (about 12 ounces), cored and quartered

1 medium onion, preferably white, peeled, trimmed of root end, and quartered

3 medium jalapeno chiles

2 cups long grain white rice

1/3 cup canola oil

4 cloves garlic, minced or pressed through garlic press (about 4 teaspoons)

2 cups low-sodium chicken broth (or vegetable broth)

1 tablespoon tomato paste

1 ? teaspoons table salt

? cup minced fresh cilantro leaves

1 lime, cut into wedges for serving

Adjust oven rack to middle position and heat oven to 350 degrees. Process tomatoes and onion in food processor until smooth and thoroughly pureed, about 15 seconds, scraping down bowl if necessary. Transfer mixture to liquid measuring cup; you should have 2 cups (if necessary, spoon off excess so that volume equals 2 cups). Remove ribs and seeds from 2 jalape?os and discard; mince flesh and set aside. Mince remaining jalape?o, including ribs and seeds; set aside.

Place rice in large fine-mesh strainer and rinse under cold running water until water runs clear, about 1 1/2 minutes. Shake rice vigorously in strainer to remove all excess water.

Heat oil in heavy-bottomed ovensafe 12-inch straight-sided saut? pan or Dutch oven with tight-fitting lid over medium-high heat, 1 to 2 minutes. Drop 3 or 4 grains rice in oil; if grains sizzle, oil is ready. Add rice and fry, stirring frequently, until rice is light golden and translucent, 6 to 8 minutes. Reduce heat to medium, add garlic and seeded minced jalape?os; cook, stirring constantly, until fragrant, about 1 1/2 minutes. Stir in pureed tomatoes and onions, chicken broth, tomato paste, and salt; increase heat to medium-high and bring to boil. Cover pan and transfer to oven; bake until liquid is absorbed and rice is tender, 30 to 35 minutes, stirring well after 15 minutes.

Stir in cilantro and reserved minced jalape?o with seeds to taste. Serve immediately, passing lime wedges separately.

Roasted Red Peppers

Sunday, February 8th, 2009

When I went to the grocery store last week, I found big, beautiful red peppers on an excellent sale. Since I had my eye on some recipes that used roasted red peppers, I decided to try my hand at roasting my own. I decided to start with only two peppers, just in case things didn’t go too well.

A quick Google search turned up a number of tutorials detailing various roasting methods. I opted to follow the instructions by The Wednesday Chef, because they seemed very straightforward and didn’t use the broiler.

It was just as easy as it looked! I took heed of the advice given in some of the comments and placed the red peppers in a shallow dish covered in plastic wrap while I waited for them to cool. Despite the fact that my peppers didn’t blacken as much as those pictured on the instruction page, they were tender and easy to peel.

My house smelled amazing and the finished product was delicious! I’ve used the roasted red peppers on pita pizza and in my Tuscan Chicken Vegetable Soup. I plan to roast more to freeze, so that I’ll always have a stash of roasted peppers on hand. I really don’t know why I didn’t try this sooner! :)

Zucchini Sticks

Thursday, February 5th, 2009

I spotted this recipe on the cooking blog A Year in the Kitchen. It looked like a fun, different way to serve zucchini. When I saw some nice-looking fresh zucchini at the store (not an easy feat in New England during the winter!), I knew I had to try the recipe.

I served the zucchini sticks with baked chicken parm and whole wheat pasta. They were a nice change from the salad that I usually serve with pasta dishes.

I followed the recipe exactly as written, and was very happy with the results. The breading turned out crispy and flavorful, while the zucchini was moist and tender.

Zucchini Sticks

2 egg whites, whipped to a foam
1 cup panko bread crumbs
1/4 cup Italian style bread crumbs
1/2 tsp. salt
1/4 tsp pepper
1 tsp. Italian seasoning
2 zucchini, chopped into 1/2 inch wide sticks

1. Preheat oven to 450.
2. Combine zucchini breading ingredients in a shallow dish.
3. Whip egg whites in a bowl until they foam.
4. Toss zucchini in the egg whites, then toss in the bread crumbs. 5. Transfer to a baking sheet.
6. Bake for about 20 minutes, until crispy and brown.

Subscribe
Email Registration  Email
  RSS
Recipe Sites
  • All Recipes
  • Cooking Light
  • Epicurious
  • Food Network
Archives
Sitemeter
Blog Directories
Add to Technorati Favorites