Authors
Beth
Kathleen
Lisa
Contact
domesticpursuits [at] gmail.com
Categories

Archive for the ‘Uncategorized’ Category

Conquering the deep freeze- 5 foods to heat up any dish

Sunday, January 9th, 2011

A well-stocked freezer is a thing of beauty

A trip to the warehouse club can be a dangerous thing if you own a chest freezer.  One moment you’re innocently walking down an aisle buying a package of toilet paper, and the next thing you know– you have a 48-pack of mini quiche sitting in your deep freezer.  How long has it been there? When did you even buy it?!?! And who will take the blame when it’s sitting there taking up space two years from now? It’s time to shape up that freezer and ship out what you know you’ll never eat.

I’m proud to say that our deep freezer was one of the most exciting purchases during my foray into domesticity.  Visions of well-labeled canisters of homemade soup, packets of meat, and frozen vegetables danced in my head. Never again would I need to worry about what to make for dinner– it would all be sitting in my freezer just waiting to be defrosted. However, in order to have dinner at your fingertips, you’ve gotta have the basics and a little something exciting to make you actually WANT to cook dinner.

To kick things off in this season of snow and ice, I present to you Kathleen’s list of Top Five Items to Get in your Freezer Right Now! If you have these on hand, you’ll never end up reaching for that take-out menu.  I swear by all five of the following items, and for the record– they’re all sitting in my chest freezer at this very moment.

5.  Spinach

We all know the story– the dark greens are good for us. If you don’t have it right now, get yourself one of those frozen spinach blocks (or two) and plop them into your freezer. Why? Aside from the nutritional benefits, spinach will liven up and make a one-note dish more colorful. Just defrost for a few minutes, squeeze out as much water as possible, and add it to soups, jarred pasta sauce, and dips. Mix it with ricotta and bam! You’ve got the filling for stuffed shells or cannelloni.  Mix with sour cream and mayo for a great dip. You could even just serve it warm as a side dish (but we know you’re not going to do that).

*Extra Credit:  Make some room in your freezer for those frozen basil cubes and pesto you made at the end of this summer.

4. Frozen cheese-filled tortellini

If you’re feeling ambitious, you could sit down one evening and crank out some handmade filled pasta. Or you could be like me– wanting to boil water and be done with it.  For as simple as it is, frozen tortellini is a grand staple. Sauted lightly with olive oil and that frozen spinach (#5), it’s a simple and satisfying dinner. Thrown into a soup or broth, and you’ve got something that will easily stave off a winter chill. Marinate some overnight in salad dressing and skewer with tomato and mozzarella cubes– and you have a simple and elegant appetizer. As an added bonus, you’ll always have something on hand to whip up for that surprise vegetarian dinner guest or picky nephew. If you’re feeling really experimental, try topping a salad with chilled, cooked tortellini instead of croutons.  I’m a fan.

*Extra credit:  If you can find frozen pumpkin ravioli, stock up. It’s one of those “impress your friends with an easy entree” items.  Saute with brown butter and sage, add a little crumbled Italian sausage (#2), and you’re good to go.

3. Frozen Peas or Corn

Don’t laugh.  It’s a sad day indeed when I realize that we’re out of frozen peas.  I’ll let you check out Beth’s amazing corn salsa if you need extra reason to stock up on some kernels.  Aside from instant faux ice packs when you’ve got a splitting headache, these two veggies are incredibly versatile when you’re looking to spice up your dinner. Just thaw (no need to boil) and add to your dinner salad when all you have is a head of iceberg. Add peas to alfredo or to my incredible artery-clogging, bacon-tastic carbonara (coming soon to DP!) for a splash of color.  Puree with some salt and pepper for an easy dip.

*Extra credit:  We also keep a stock of frozen edamame (soybeans), both shelled and unshelled.  The shelled ones just need a little hot water and salt to make a great appetizer or pea replacement.

2. Italian sausage

Everyone has frozen ground beef in their freezer– I think it might even be issued with the purchase of a chest freezer.  But how inspiring are those little balls of freezer-burned beef? Not very.  I like to purchase Italian sausage (still in casings) and freeze portioned packets of two links each. Once defrosted, it’s easy to pull the casing off, and you’ve got a great way to spice up your dinner. Try mixing in Italian sausage with ground beef for burgers or meatballs. Brown some and add to your frozen tortellini (#4).  Or just keep in the casing and fire up the grill.  I normally have both mild and spicy links on hand for variety.

*Extra credit: This might sound a little lame coming from someone who likes to cook, but do yourself a favor and buy frozen mini meatballs (I like the ground turkey ones, myself). Yes, it’s lazy. However, knowing all you have to do is heat them and serve gives you a lot of options in the kitchen. Add to pasta for an easy dinner. Add to a broth with a few noodles for a soup. Add some sauce and you’ve got a sandwich, or throw into a slow cooker for an easy party appetizer.

and for my absolute staple in the freezer….. (drumroll, please)

1. Bacon!

To know bacon is to love bacon– at least when it comes to adding flavor and variety to your cooking repertoire.  Perhaps you already have the beloved breakfast meat in your freezer, so I’ll be a little more specific. During your next grocery trip, pick up a package or two and immediately slice each 1lb slab into four chunks (each which conveniently fit well in a quart freezer bag).  The next time you’re looking for a bit of extra flavor, pull out a bag. This amount of bacon easily defrosts right in the pan, and you’re already on your way to a fancy mac ‘n’ cheese or rich carbonara.  I’ll often pull out a package just for an easy breakfast addition or something extra to throw into a dip. My personal favorite is to fry up a little bacon, and use some of the drippings to saute fresh brussel sprouts.  I’ve even used it to infuse vodka and create a surprising brownie– but those are recipes for sharing on another day.

*Extra credit: If you’re feeling really adventurous, pick up a small package of pork belly.  This can be just as easily diced up and added to give a little more heft to a pasta or really liven up a salad. And contrary to popular belief, you don’t have to be on a competitive cooking show in order to cook with this luscious ingredient.

What food items do you lean on when it comes to heating up dinner ideas? We want to hear! In the meantime, happy defrosting!

Happy New Year!

Saturday, January 8th, 2011

Greetings and a Happy New Year to all of you!

I don’t know about you, but I love the month of January.  The days get a little longer, the spring planting catalogs begin to fill my mailbox, and weekend advertisements focus on getting in shape and more organized.  I find myself making promises and resolutions to cook more, organize better, and worry less.

Unfortunately, by the third week of January or so, I find myself overwhelmed with potential projects and new recipes to try. The siren song of the local chain restaurant calls to me far too often on weekday nights. So what’s a food-loving lady with limited time to do at 7 pm on a Tuesday?

Worry not. In the next few weeks, Domestic Pursuits will present to you the absolute essentials for your pantry, parties, and cookware to help you flambe the winter doldrums without breaking the bank. We’re thrifty ladies who love good food, good wine, and good value. Are you with us?

Pumpkin Pancakes

Monday, November 15th, 2010

Between September and January, pumpkin puree does not last long in my house.  Here in New England, we’ve been fortunate enough to miss the canned pumpkin shortage that has plagued parts of the country for the past two baking seasons.  Last year, I was so concerned that we’d encounter a shortage that I bought multiple cans each time I went to the grocery store, resulting in quite a stockpile!  I’m not worried this year, but that hasn’t stopped me from stocking up.

These pumpkin pancakes are an excellent use for any pumpkin you may have lying around.  Fluffy and flavorful, they add a tantalizing taste of fall to your breakfast table.  A generous serving of maple syrup makes them extra heavenly.

The original recipe yields a large amount of pancakes, so I halved it and ended up with a good amount for just my husband and I.   The only complaints I noticed in the original recipe was that the pancakes didn’t cook well.  Since the batter was thick, it didn’t spread as much as pancake batter usually does.  I remedied this problem by gently spreading the batter with a rubber spatula until I reached the desired thickness.  The pancakes cooked up beautifully – light, fluffy and fully-cooked.

Pumpkin Pancakes
Yields 8-10 medium-sized pancakes

1 cup all-purpose flour
1.5 tbsp brown sugar
1 tsp baking powder
1/2 tsp baking soda
1/2 tsp ground allspice
1/2 tsp ground cinnamon
1/4 tsp ground ginger
1/4 tsp salt
3/4 cup milk
1/2 cup pumpkin puree
1/2 egg * (see below)
1 tbsp vegetable oil
1 tbsp vinegar

1.  In a large bowl, mix the milk, pumpkin, egg, oil and vinegar.
2. Whisk in brown sugar.
3. In a separate bowl, combine the flour, baking powder, baking soda, allspice, cinnamon, ginger and salt.
4. Stir the dry ingredients into the pumpkin mixture until just combined. Do not over-mix.
5. Heat a lightly oiled griddle or frying pan over medium high heat. Pour or scoop the batter onto the griddle, using approximately 1/4 cup for each pancake. Brown on both sides and serve hot.

* Q:  How do I add 1/2 of an egg?  A:  Crack the egg into liquid measuring cup and beat with a fork.  Note the measurement on your measuring cup and add half of that to your recipe.

Margarita Pie

Monday, May 31st, 2010

My husband and I planned a Mexican-themed dinner to celebrate Mother’s day with his Mom.  We served all of our favorites:  margaritas, chips and corn salsa, tequila-lime chicken fajitas with grilled vegetables and calabacitas.

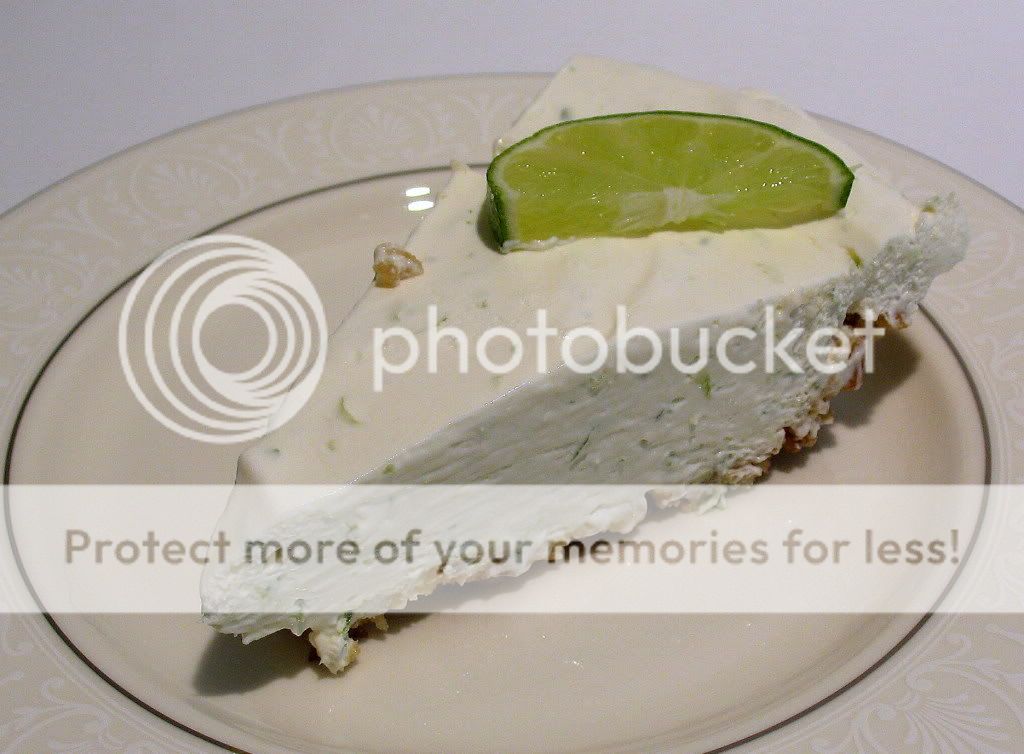
Margarita cupcakes are usually my go-to dessert for a celebration like this, but this time I wanted something light and summery.  A quick search on AllRecipes.com yielded this Margarita Pie.  The original recipe did not contain any alcohol, so I added tequila and triple sec to give it a true margarita flavor.

The margarita pie was a hit!  Everyone, including the guest of honor loved it!  The pie was cool and smooth with just the right combination of sweet and tangy flavors.  Using crushed pretzels for the crust added contrasting texture and the saltiness enhanced the margarita flavor – I for one love salt with my margarita!  I only allowed the pie to chill for three hours, so it was still a bit soft when I served it.  In the future I’d give it more time, but that certainly did not detract from the flavor.

Given the rave reviews and the ease with which this dessert came together, I’ll be adding it to my list of go-to summer desserts!

Margarita Pie

1 1/4 cups crushed pretzels
1/2 cup butter, melted
1/4 cup white sugar
2 limes, zested and juiced
1/4 cup orange juice
4 tsp tequila
1 tsp triple sec
1 (14 ounce) can sweetened condensed milk
(8 ounce) container frozen whipped topping, thawed

1. In a medium bowl, combine crushed pretzels, melted butter, and sugar. Press mixture into a pie pan.
2. In a large bowl, mix together lime juice, lime zest, orange juice, tequila, triple sec and sweetened condensed milk. Fold in whipped topping.
3. Spoon filling into pretzel crust. Place in refrigerator and allow to set for at least 4 hours.  (6+ hours or overnight is better)

Chicken Leek Pie

Monday, January 25th, 2010

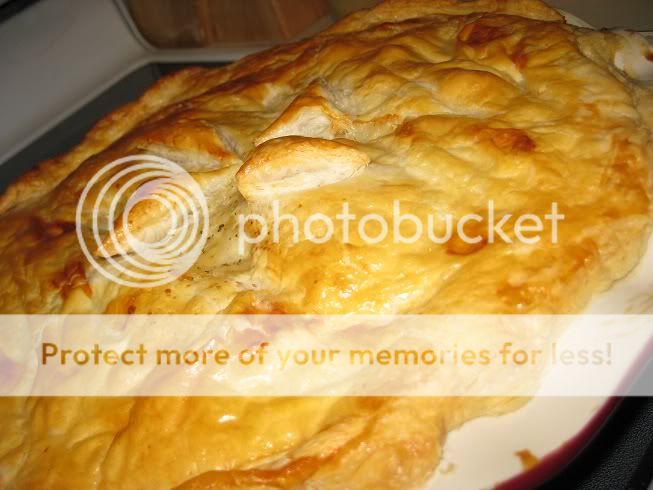
During the torrential rainstorm today, I drove 3 hrs each way to a job interview.  Consequentially I spent most of the day looking like a drowned rat in a business suit.  When I got home (aside from changing into my PJs and drying my hair) all I wanted was some comfort food and a nap.  We had lots of leftover chicken on hand and some leeks, so I decided to make a chicken pot pie.  This recipe caught my eye because it appeared fairly straightforward.  I made a few modifications, mostly because I didn’t have tarragon or grainy mustard (and as I was in my PJs, could not really go out to procure tarragon or grainy mustard…) and I also used skim milk because we didn’t have whole milk in the house.  It was a great way to end a very long and damp day.

Ingredients:

12 oz cooked chicken (I used a combination of boneless skinless chicken breast and thighs)

2 tablespoons butter

1 leek, sliced lengthwise and then into 1/2 inch strips

1 onion, diced

1 tablespoon mustard (I used dijon)

1/4 cup flour

1 cup chicken broth

3/4 cup plus 1 tablespoon reserved skim milk

1/4 cup heavy cream

1/2 tsp dried basil

1/2 tsp dried marjoram

Salt & pepper to taste

1 sheet frozen puff pastry, thawed

1 egg

Directions:

Melt the butter in a deep skillet over medium heat.  Saute the leek and onion until the onion becomes translucent – about 4-5 mins.  Add the mustard and the flour.  Cook for about 1-2 minutes stirring constantly.  Add the chicken broth, 3/4 cup skim milk and cream.  Cook for about 5 minutes, until the mixture begins to thicken.  Add the chicken and spices to the skillet and mix well.  Let the mixture cool.  Preheat oven to 375 degrees.  Place into a deep pie dish.  Roll the pastry out to a size able to cover the pie dish and press it over top, sealing it to the dish.  I used the extra bits of pastry dough to decorate the top.  Beat the egg and tablespoon of milk together and brush over top of the pastry crust before baking.  Bake for 45-50 minutes or until the crust becomes golden brown and puffy.

Snowed In, Part Deux

Monday, January 25th, 2010

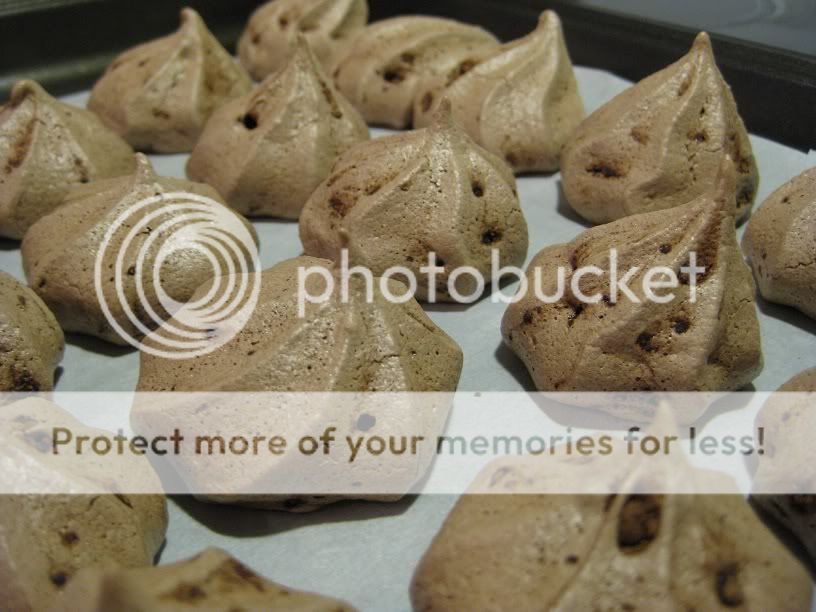
So we’re actually no longer snowed in – thankfully the 23.2 inches of snow we had here have now melted…but despite the fact that we can now leave the house I’m still in a baking mood, so here are a few more cookie recipes I tried out that weekend. The other two kinds of cookies I made that fabulous snowy weekend include Chocolate Meringues and Chocolate White Chip cookies.

Batch #3 – Chocolate Meringues

As I’ve mentioned before, my mother has celiac disease so whenever I bake cookies I try to include a gluten-free option. I hadn’t made chocolate meringues before, so I decided to give these a go and they were amazing. The outside was crisp and light and inside the filling stayed ever so slightly chewy, which was tasty and delicious. An added benefit to making meringue cookies is the low-fat healthy nature of these cookies – as they are made with only egg whites, no cholesterol too! One piece of advice – sift the cocoa! Mine have little bubbles in them, where the cocoa powder got stuck together…still tasted fabulous, but maybe not quite as pretty!

Ingredients:

  • 3 egg whites
  • 3/4 teaspoon vanilla extract
  • 3/4 cup sugar
  • 1/4 cup unsweetened cocoa, sifted
  • Directions:

    Preheat oven to 300 degrees. Line a cookie sheet with parchment. Place the egg whites and vanilla into a bowl – beat with an electric mixer until the mixture is foamy. Beat in the sugar, 1 tablespoon at a time, until the mixture becomes glossy appearing and stiff peaks form. Add about half of the cocoa and fold in gently until well incorporated. Add the rest of the cocoa in the same manner. Spoon the meringue mixture into a pastry bag (I used a frosting gun instead) with a large star tip and squeeze dallops onto the parchment-coated cookie sheet. You can place these fairly close together as they do not expand very much while baking. Bake for 30 minutes or until they appear dry, then cool completely on a cooling rack. Store in the fridge.

    Batch #4:

    I had lots of white chocolate chips on hand during this storm, so in the name of pantry space I decided to make a cookie that involved white chocolate chips. My favorite kind is the ones that have tasty white morsels in a traditional chocolate cookie dough, so I searched for a recipe until I found this one. The cookies came out amazingly tender and moist – we were all huge fans in my household. Especially wonderful with a glass of nice cold milk.

    Ingredients:

    • 2 1/4 cups all-purpose flour
    • 2/3 cup unsweetened cocoa
    • 1 teaspoon baking soda
    • 1/4 teaspoon salt
    • 2 sticks softened butter
    • 3/4 cup sugar
    • 2/3 cup packed brown sugar
    • 1 teaspoon vanilla
    • 2 eggs
    • 12 oz package of white chocolate chips

    Directions:

    Preheat oven to 350 degrees. Mix together flour, cocoa, bakin soda, and salt. Beat together butter, sugar, brown sugar and vanilla until creamy and smooth. Add eggs one at a time, mixing well after each. Gradually stir in the dry ingredients and add the chocolate chips in. Drop by the teaspoonful onto an ungreased cookie sheet, and bake for approximately 10 minutes. Cool completely on a wire rack.

Homemade Pizza Dough

Sunday, July 19th, 2009

Usually my husband and I purchase our Pizza dough at the grocery store, because it seems like a big project to make it ourselves. This week, however, I really really wanted grilled pizza and found us sadly out of dough. So, I decided to take the leap and try making dough myself. I used my go-to cookbook, “How to Cook Everything” by Mark Bittman for a recipe, and set to it!

It turns out it’s actually not nearly as hard as I thought it would be; I used my trusty stand-mixer and the dough nearly made itself. I added some fresh herbs to the dough; this time I chose oregano because I have a small oregano forest growing in our container garden and don’t know what else to do with it. I hear it’s great with rosemary as well!

Ingredients:

1 teaspoon active dry yeast

3 cups (or 14 ounces by weight) of all-purpose flour, plus more for dusting

2 teaspoons kosher salt

1-1 1/4 cups water

2 tablespoons olive oil

1 teaspoon finely chopped fresh oregano

Instructions:

1) Combine the yeast, half of the flour, oregano, salt, 2 tablespoons olive oil, and 1 cup water. Blend together until smooth.

2) Gradually mix in the remaining flour a little at a time until the dough is a sticky ball that pulls away from the sides. Knead the dough (either by hand or using the dough-hook for a stand mixer) adding as little extra flour as possible.

3) Place the dough in a bowl greased with the remaining teaspoon of olive oil, cover loosely, and let rise in a warm area for 1-2 hrs. Then top with your favorite toppings, and proceed with baking or grilling!

Subscribe
Email Registration  Email
  RSS
Recipe Sites
  • All Recipes
  • Cooking Light
  • Epicurious
  • Food Network
Archives
Sitemeter
Blog Directories
Add to Technorati Favorites