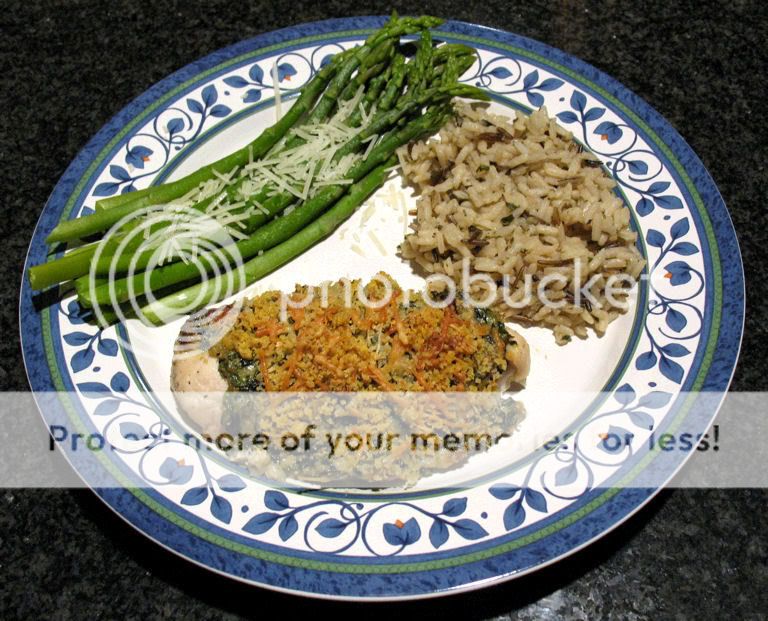
Low-fat Chicken Parmesan

March 21st, 2009 by Lisa

My husband LOVES chicken parm. I always used to like the taste too – but the fat content usually discouraged me from making it at home and ordering it when we’re out. A few months ago I came across this recipe, from Ellie Krieger (who is a dietitian and shares my passion for tasty healthy food) and I made it one night for dinner – it was a huge success. The technique of using cooking spray and then baking the chicken keeps the outside crispy while minimizing fat by avoiding frying. I know it sounds complicated to make your own bread crumbs, but it really is VERY easy and I think it adds a lot to this recipe – the crumbs just tasted so crispy and fresh when cooked.

We served this with whole wheat pasta and a tasty ceasar salad – a wonderful way to enjoy some great Italian food without all the guilt.

Ingredients

  • 4 slices whole-wheat bread (1-ounce each)
  • 1 teaspoon dried oregano
  • 1/2 teaspoon garlic powder
  • 2 teaspoons paprika
  • 1/2 teaspoon salt
  • 1/2 teaspoon black pepper
  • 2 egg whites
  • 1/2 cup skim milk
  • 1/2 cup all-purpose flour
  • 4 (6 ounce) skinless boneless chicken breast halves, pounded to 1/2-inch thickness
  • Olive oil cooking spray
  • 1 jar good-quality marinara sauce (about 3 1/2 cups)
  • 3/4 cup (3 ounces) shredded part-skim mozzarella cheese
  • 2 tablespoons (1/2-ounce) shredded Parmesan

Directions

Preheat the oven to 350 degrees F.

Place the bread in the bowl of a food processor and process until fine crumbs are formed, about 25 to 30 seconds. Put the crumbs on a baking sheet and bake for 12 minutes, until golden. (You will wind up with about 1 1/3 cups toasted crumbs.)

In a medium bowl, toss the crumbs with oregano, garlic powder, paprika, 1/4 teaspoon salt and 1/4 teaspoon pepper. In another bowl, whisk the egg whites and milk together. In a third bowl stir together the flour, and the remaining 1/4 teaspoon salt and 1/4 teaspoon black pepper. Dip each piece of chicken, 1 piece at a time, in flour, shaking off excess, then egg, then bread crumbs, shaking off excess.

Increase oven temperature to 400 degrees. Place breaded breasts in a glass baking dish and spray on each side with cooking spray, about 5 seconds total per side. Bake breasts until cooked though and crumbs are browned, about 15 minutes. Top with marinara sauce, mozzarella and parmesan and return to oven for an additional 10 minutes, until cheese is bubbling.

Pasta with Lemon Cream Sauce

March 20th, 2009 by Beth

Another delicious recipe from Cooking Light! This recipe for Pasta with Lemon Cream Sauce, Asparagus and Peas is a quick and easy weeknight meal.

My husband and I often eat meat-free meals, but most are heavier in flavor and rely on a tomato base. This is quite different from our usual fare. I actually selected the recipe several weeks ago when I was looking to use up heavy cream left over from my ice cream making adventure, and some excess asparagus.

I was amazed at how quickly the dish came together. While the instructions list the pasta and sauce preparation serially, I prepared them concurrently. I started making the sauce at the same time I threw the pasta in the boiling water. I think it took about 20 minutes from the time I put the water on to boil to when I tossed the pasta and sauce together.

I followed there recipe pretty closely, altering the ingredients and procedure only slightly based upon what I had in the house at the time. Since I didn’t have cornstarch, I thickened the lemon cream sauce with about a tablespoon of flour. I also added a handful of Parmesan cheese at the same time I added the cream.

The lemon cream sauce is smooth, light and fresh. The bright tang of lemon and the tasty crunch of asparagus hint at the coming of spring. Served with a Caesar side salad, it was a refreshing and fun weeknight meal.


Pasta with Lemon Cream Sauce, Asparagus and Peas

Yields 4 Servings

8 ounces uncooked long fusilli, or pasta of your choice
1 3/4 cups (1 1/2-inch) slices asparagus (about 1/2 pound)
1 cup frozen green peas, thawed
1 tablespoon butter
1 garlic clove, minced
1 cup vegetable broth
1 teaspoon cornstarch
1/3 cup heavy cream
3 tablespoons fresh lemon juice (about 1 lemon)
1/2 teaspoon salt
1/4 teaspoon freshly ground black pepper
Dash of ground red pepper
Coarsely ground black pepper (optional)

1. Cook pasta according to package directions.
2. During the last minute of cooking time, add asparagus and peas. 3. Drain pasta mixture and set aside.
4. Melt butter in a saute pan over medium-high heat.
5. Saute garlic for 1 minute.
6. In a separate bowl, whisk together cornstarch and broth.
7. Add broth mixture to saute pan and bring to a boil.
8. Cook 1 minute or until thick, stirring constantly.
9. Remove pan from heat and stire in cream, lemon juice, salt, black pepper and red pepper.
10. Pour sauce over pasta and toss to coat.

St. Patrick’s Day Feast

March 17th, 2009 by Lisa

As a tribute to my Irish heritage, I decided to post some St. Patrick’s day recipes – well, they may not be Irish per se, but at least they have Guinness in them! My husband and I have been on a big Irish food kick for the past couple weeks in preparation for a big trip to Ireland we’re planning for May, so I’ve been on the prowl for Ireland-inspired Guinness recipes for several weeks now.

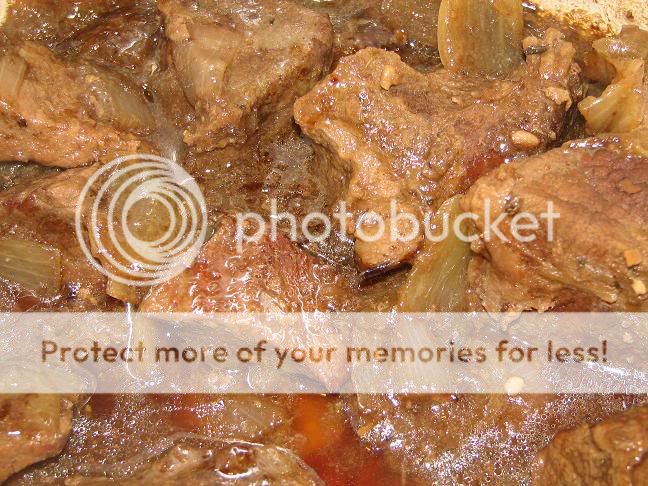
First, I made a traditionally Belgian dish, Beef Carbonnade, Irish by using Guinness instead of a belgian ale – this recipe was modified from How to Cook Everything, by Mark Bittmann (which was actually a book Beth gave me for my engagement! ) Anyway, I highly recommend the book – it really does teach you how to cook everything.

Irish Beef Carbonnade

1-2 tablespoons of canola or vegetable oil

2lbs beef stew meat

1 clove garlic, peeled & crushed

2 large or 3 medium onions, cut into eighths

1 1/2 cups of Guinness

Salt and Pepper to taste

1/2 teaspoon dried thyme leaves

1 Bay Leaf

Instructions:

Heat a large casserole dish (or deep skillet) over medium-high heat for 2-3 minutes. Add the oil and the crushed garlic. Cook, stirring, for about 1 minute. Remove the garlic from the pan.

Add the beef to the skillet, browning on all sides. Season with salt and pepper lightly while it sautes.

When the meat is browned, remove it from the pan. Add the onions. Cook, stirring for about 10 minutes. Then add the Guinness and add back the beef. Bring to a boil, then reduce heat to low and cook undisturbed for about 60 minutes, or until you’re happy with the consistency of the stew.

Serve over warm buttered egg noodles, or boiled potatoes.

Guinness Chocolate Cake with Cream Cheese Frosting

My second dish is a chocolate cake (yum!), also made with Guinness. I found this recipe a while back and thought it looked fabulous, and I’ve been saving it for St. Patrick’s day – I made it for a family celebration last weekend, and it went over very well! It’s not too sweet, very moist, and the Guinness adds a complexity to the chocolate flavor I really appreciated. I think the cream cheese frosting complimented the flavor well – although I did have to add much more confectioner’s sugar than it called for – my measurements are what I included below. In the end, though, the consistency was lovely. I decorated the cake with a shamrock, in the spirit of a finely poured pint in Ireland.

Ingredients
Cake
1 cup Guinness
1 stick unsalted butter, sliced
? cup unsweetened cocoa powder
2 cups granulated sugar
? cup sour cream
2 eggs
1 tablespoon vanilla extract
2 cups all-purpose flour
2 ? teaspoons baking soda

Icing
8 ounce cream cheese
2 cups confectioners’ sugar
2 tbsp heavy cream

Method
Preheat oven to 350 degrees. Butter a 9-inch springform pan and line bottom with parchment paper.

Pour Guinness into a large saucepan, add butter and heat until melted. Whisk in cocoa powder and sugar. In a small bowl, beat sour cream with eggs and vanilla and then pour into brown, buttery, beery mixture and finally whisk in flour and baking soda.

Pour cake batter into greased and line pan and bake for 45 minutes to an hour (Check at 45 minutes for doneness, poking a skewer in center.). Leave to cool completely in the pan on a cooling rack, as it is quite a damp cake.

When cake is cold, gently peel off parchment paper and transfer to a platter or cake stand.

Place cream cheese and confectioners’ sugar in a mixing bowl, and whip with an electric beater, until smooth (You may also do this with a food processor.).

Add cream and beat again until you have a spreadable consistency. Frost the cake, beginning in the middle and fanning outward (like foam might, on a real pint!).

Potato Leek Soup

March 17th, 2009 by Beth

Happy Saint Patrick’s Day!

Despite my Irish heritage, I have not done anything to celebrate Saint Patrick’s Day in recent years. Now that cooking has become a hobby, I thought it would be fun to create an Irish-inspired meal.

On Sunday, my mother and I made Potato Leek Soup and Brown Irish Soda Bread for our early Saint Patrick’s Day celebration.

I tried Potato Leek Soup for the first time at Epcot’s International Food and Wine Festival last fall. For some reason, I always shied away from leeks. I used to be a very picky eater, and I sometimes still avoid foods for no good reason. I’m glad I finally tried the soup! Since I love potatoes in just about any form and have quite a weakness for cream soups, this is a perfect soup. At the same time, I also sampled some Brown Soda Bread and Dubliner cheese.

I found this recipe for Potato Leek Soup in the Boston Globe. It appeared to be straightforward and was very similar to other Potato Leek Soup recipes I had found online. Since soup is always better when served with bread, I also made Brown Irish Soda bread.

I followed the recipe pretty closely, but omitted the parsley and added some dried rosemary. I started with 1/4 tsp, but added more as I altered the seasoning to fit my tastes. To speed up the cooking process, I cooked the potatoes at a low boil before mashing with a potato masher. Once the soup was done, I added an extra 1/4 cup of broth and 1/4 cup of cream. It’s worth noting that I think milk or half and half would work quite well in this soup in place of the heavy cream.

According to the Globe, this recipe produces 6 servings, but I got 8 1+ cup servings. The soup was delicious! I just finished the last of the leftovers, and were sad to see them go!

May your troubles be less,
And your blessing be more.
And nothing but happiness,
Come through your door.

Potato Leek Soup

Yields 6-8 1-cup servings
1/4 cup (4 tablespoons) butter
1 medium onion, chopped
3 leeks, thinly sliced and rinsed well
3 cloves garlic, smashed
5 medium russet (baking) potatoes, peeled and cut into 1-inch pieces
4-5 cups chicken or vegetable stock
Salt and pepper, to taste
3/4 cup heavy cream
1/4 tsp dried rosemary

1. In a large heavy-based stock pot, melt the butter over medium heat. Add the onions, leeks, and garlic. Cook, stirring often, for 10 minutes or until softened.

2. Add the potatoes, 4 cups of the stock, salt, and pepper. Bring to a boil. Lower the heat and simmer about 15 minutes or until the potatoes are tender.

3. Either mash the potatoes with a potato masher or, puree soup in batches in a blender. Return it to pot. Bring to a simmer. Add the cream and parsley, and taste for seasoning. Add more salt and pepper, if you like. If the soup is too thick, add remaining stock in 1/4-cup increments until it is the consistency you prefer.

Irish Brown Soda Bread

March 17th, 2009 by Beth

Since soup is always better when accompanied by bread, I made Irish Brown Soda Bread using a recipe from the Boston Globe. I was amazed at how easy it was to throw together this yeast-free bread. The resulting bread was moist and flavorful – perfect with a pat of butter or a slice of tart Dubliner cheese.

As written, the recipe produces two moderately-sized loaves of bread. We had enough bread for a Sunday family dinner and two nights of leftovers. If I was cooking for on me and my husband, I would probably halve the recipe and make a single loaf.

Irish Brown Soda Bread

Yields 2 loaves

2 3/4 cups whole-wheat flour
2 cups all-purpose flour
1 1/2 teaspoons baking soda
1/4 cup sugar
1 1/2 teaspoons salt
1/3 cup canola oil
2 cups buttermilk
Extra whole-wheat flour (for sprinkling)
1. Set the oven at 375 degrees. Line a baking sheet with parchment paper.

2. In a bowl, combine the whole-wheat and all-purpose flours, baking soda, sugar, and salt. With a wooden spoon, mix the dry ingredients until they are blended.

3. In another bowl, combine the oil and buttermilk. Use the spoon to stir the liquids into the flour mixture until they comes together to form a dough.

4. Turn the dough out onto a lightly floured counter and knead it gently several times until smooth. Divide the dough in half and shape each into a ball. Pinch the edges into the center and turn the balls over so the tops are smooth. Set them, smooth sides up, on the baking sheet, leaving at least 4 inches between them.

5. With a paring knife, mark a 3/4-inch-deep cross on the top of each round. Bake the breads for 25 to 30 minutes or until they are puffed and browned and sound hollow when tapped on the bottom.

6. Cool on a wire rack. Cut into thick slices for serving.

Spinach and Artichoke Topped Chicken

March 12th, 2009 by Beth

I just love spinach and artichoke dip, so when I saw this recipe for Spinach and Artichoke Topped Chicken on Joelen’s Culinary Adventures I knew I just had to try it! I had some heavy cream on hand after my ice cream making adventure, so I whipped up this dish.

Preparing the topping was quite easy, but it took a little longer than my usual routine of quickly seasoning chicken breasts with random herbs or salad dressings and tossing it in the oven. I had never thought to top the chicken breasts with something other than a simple sauce while they baked. I’m certainly glad I found this recipe.

The chicken was delicious! The creamy topping was rich and flavorful, and the chicken turned out very tender. This recipe will be going into my regular rotation, and I plan to experiment with other topping combinations.

Spinach and Artichoke Topped Chicken

For Chicken:
4-6 boneless skinless chicken breasts
salt & pepper to taste or seasoning salt
garlic & onion powder to taste

For Sauce:
1/2 10-oz box frozen spinach
1 tablespoon EVOO (extra-virgin olive oil), twice around the pan
1/2 tablespoon unsalted butter
1-2 garlic cloves, chopped
1 small onion, peeled and halved
1 tablespoon all-purpose flour
1/2 cup chicken stock
1/2 cup heavy cream
pinch of freshly grated nutmeg (eyeball it)
1/2 14 ounce can artichoke hearts in water, drained and chopped
1-2 handfuls grated Parmigiano-Reggiano or Pecorino Romano cheese
Salt and black pepper

For Topping:
1/2 cup panko breadcrumbs for topping
1/4 cup grated Parmigiano-Reggiano or Pecorino Romano cheese

Preheat oven to 375 degrees.

Prepare your chicken by seasoning it to taste with salt, pepper, seasoning salt, garlic and/or onion powder (however you’d like) Place chicken on baking sheet.

For the sauce, begin by microwaving the spinach on high for 6 minutes to defrost.

Heat a deep skillet over medium heat with the EVOO and butter. When the butter melts and is hot, add the garlic. Using a box grater, grate the onion directly into the skillet.

Saute the onions and garlic for 5 minutes. Sprinkle the flour into the skillet and cook for 1 minute. Whisk in the stock, then the cream, and bring the sauce to a boil. Season the sauce with nutmeg and reduce the heat to low.

Place the defrosted spinach in a clean kitchen towel and wring it dry. Separate it as you add it to the sauce. Stir in the chopped artichokes and a couple handfuls of cheese, then season the spinach-artichoke sauce with salt and pepper. Topped the raw chicken breast with spinach artichoke sauce.

Combine the panko breadcrumbs and cheese for the topping and sprinkle on top of the spinach artichoke sauce.

Bake chicken in preheated oven for 20-25 minutes until juices run clear and chicken is thoroughly cooked.

Flourless Chocolate Torte

March 11th, 2009 by Lisa

First, sorry for the long break in posting! My husband and I were refinishing our guest room. 2 buckets of spackle, a roll of fiberglass tape, and a few buckets of paint later…we are tired but done.

In tastier news, my mother-in-law gave me this recipe for a Flourless Chocolate Torte – she first made it for my mother, who follows a gluten-free diet, at a family function a few years ago. The cake was an instant hit – it’s very rich and chocolatey, almost fudgey. Even the non-gluten-free folks in the room thought it was incredible! Unlike a lot of gluten-free cakes, it is incredibly moist and has a lovely texture. This recipe is now legend in our circle – friends and family alike have procured this recipe and make it for special occasions – I made one this week in preparation for a weekend celebration and can’t wait until Saturday to try it!

This recipe does require a fair amount of work – not something to try when you’re looking for something quick to whip up, but the results are very tasty and worth the time and effort.

Jan’s Flourless Chocolate Torte

Ingredients:

12 oz semi-sweet chocolate (I used chocolate chips)

1 oz (by weight) unsweetened cocoa powder

1 and 1/2 sticks of salted butter (sliced into tablespoon sized pieces)

8 eggs

1 tsp vanilla

1/8 tsp salt

2/3 cup brown sugar

Preheat oven to 350 degrees.

Melt the chocolate chips, cocoa powder, and butter in a double boiler (or a Pyrex bowl over a saucepan of hot water). Meanwhile, butter a springform pan (mine was 12 inches) and line the bottom with parchment paper. Cover the outside with a piece of aluminum foil – this cooks in a water bath, and using the foil keeps the water from seeping in!

Separate the 8 eggs. Add the vanilla to the egg yolk bowl and mix.

When the chocolate mixture has finished melting, remove it from the heat so it has the chance to cool a little. Take 1-2 tablespoons of the melted chocolate mixture and add it to the egg yolks, mixing well (this will gradually increase the yolk temperature so the eggs don’t cook!) Then add the egg yolk mixture back into the bowl with the rest of the melted chocolate mixture.

With the egg whites – add the salt and begin to whip the eggs in a bowl, gradually adding the brown sugar as you go. When all the sugar is incorporated beat on high until peaks begin to foam.

Stir about one half of the egg white mixture into the chocolate and egg yolk mixture until they are well mixed. Then gently fold in the rest of the egg white mixture, preserving the fluffiness of the egg whites as much as you can.

Pour the mixture into the prepared springform pan. Place the springform pan in a roasting pan and fill to about 1 inch depth with warm/hot water. Bake for 40-50 minutes; the cake is done when a good crust has formed.

Mint Brownie Cups

March 4th, 2009 by Beth

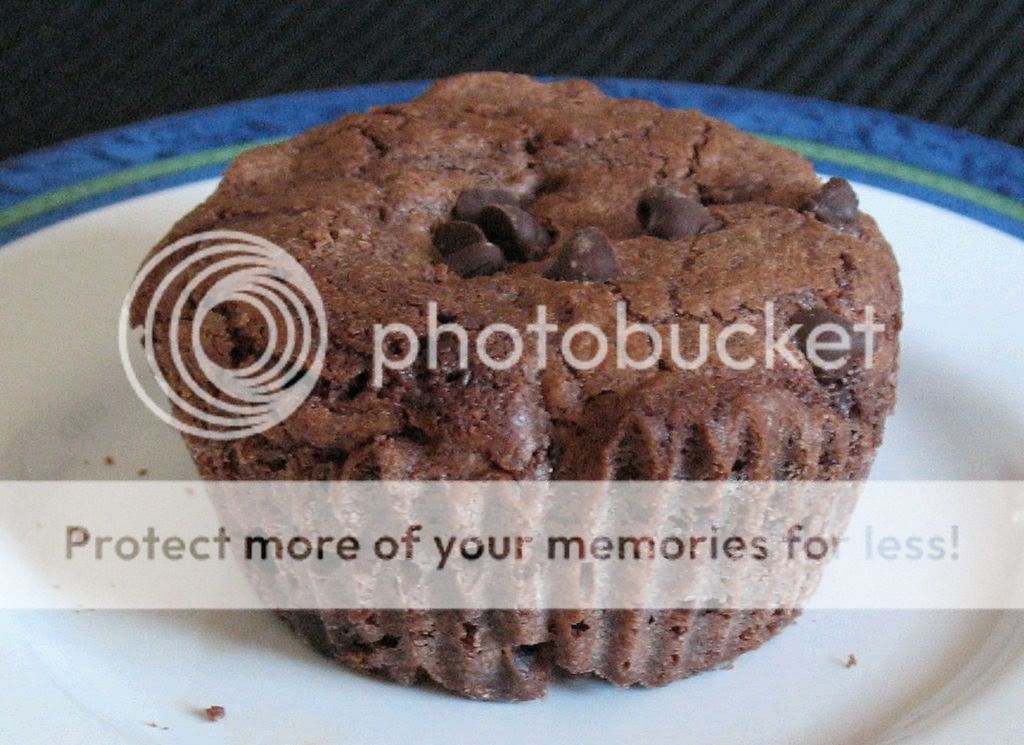
I picked up a bag of Andes Creme de Menthe baking chips at Target shortly after Christmas. I had thought that they’d be the perfect addition to some chocolate chocolate-chip cookies or basic brownies, as they’re essentially crushed Andes mints. After my holiday baking frenzy wound down, I promptly forgot about them.

As I was perusing older recipes from some of my favorite blogs, I found the perfect recipe in which to use my crushed Andes mints: the Peppermint Brownie Cups on Baking Blonde’s Weblog. The recipe looked like the perfect combination of mint and chocolate, and I liked that the brownies were pre-portioned using a muffin tin. I always say that I’m going to freeze most of the brownies that I make, but within a matter of days my husband and I have consumed every last one. Once the pan is out of the oven, my self-discipline goes out the window!

This was only my second time making brownies from scratch, and they’re just perfect! The brownies have a rich, chocolate flavor and a consistency that’s dense and chewy, but not too heavy. I followed the recipe quite closely, deviating only to use my Creme de Menthe Chips in place of the Peppermint Crunch Chips, and to top the brownies with mini chocolate chips.

After enjoying several of the brownies, I stashed the rest in the freezer. When a chocolate craving hits, these perfectly-portioned brownies will be ready in an instant!

Peppermint Brownie Cups

Yields 14-16 brownies
6 TBS butter
6 oz semisweet chocolate (chopped)
2 oz. bittersweet chocolate (chopped)
1 cup sugar
2 eggs
1/4 tsp peppermint extract
1/4 tsp vanilla
3/4 cup all-purpose flour
1/4 teaspoon baking powder
1/4 teaspoon salt
1/2 cup Milk Chocolate Chips
2 cups Andes Creme de Menthe Chips or Andes Peppermint Crunch Baking Chips

Preheat oven to 350 degrees.

Line a muffin tin with paper liners. Lightly spray liners with cooking spray.

In a heat-proof bowl, melt together butter and chocolate in the microwave in 30 second intervals stirring after each interval until smooth. Allow to cool for 5 minutes.

In a large bowl, whisk together flour, baking powder, and salt in a medium bowl; set aside.

Whisk or beat the sugar into the chocolate mixture. Add eggs and peppermint extract mixing until combined and smooth. Add flour mixture and mix until combined. Gently fold in the 1/2 cup chocolate chips and 1/2 cup Andes Peppermint Crunch Baking Chips.

Carefully pour batter to prepared each muffin liner filling about 2/3 full. Sprinkle a few Andes Peppermint chips over the top of each individual brownie. . Bake for 18-23 minutes or until a cake tester comes out with a few crumbs.

*Baking time will depend on your oven, watch carefully so you don?t overbake! Mine were done in 20 minutes.

Allow to cool before removing from muffin pan.
Keep brownies in cupcake liners until ready to serve to help prevent them from drying out.


Mint Chocolate Chip Ice Cream

March 1st, 2009 by Beth

As I mentioned in my sorbet post, I’ve been stockpiling homemade ice cream and sorbet recipes for quite awhile. Mint Chocolate Chip is one of my favorite flavors, so I was quite excited when I saw this recipe on the blog Proceed with Caution.

This was my first attempt at homemade ice cream, so I hesitated to stray from the original recipe. I was quite pleased to find an ice cream recipe that didn’t use copious amounts of whipping cream and egg yolks. Since I’ve read conflicting information on consuming uncooked Egg Beaters, I followed the ice cream making method set forth by Mark Bittman in How to Cook Everything, but used the ingredients and proportions found on Proceed with Caution. I’ve included both the original and modified preparation methods below.

When I was done mixing the base, I adjusted the flavor slightly. I found that I needed to increase the amount of sugar by two tablespoons (1/2 cup total) and I also decided to add an additional teaspoon of peppermint extract (1 1/2 teaspoons total). Since I like lots of chocolate bits in my ice cream, added a full cup of mini chocolate chips.

The finished product is rich, creamy and refreshingly minty. I’m happy that I had such a great recipe to follow for my first foray into homemade ice cream and will be consulting Proceed With Caution for other frozen confections.

Mint Chocolate Chip Ice Cream
Adapted from Doc Wilson, as found on Proceed with Caution

1/4 cup Egg Beaters
1/2 can of fat free sweetened condensed milk
1/2 cup white sugar
4 ounces heavy whipping cream
16 ounces fat free half and half
4 ounces skim milk (or 1%, or 2%, whatever you have)
1/8 tsp salt
1 1/2 teaspoon mint extract
2 tsp vodka OR mint schnapps OR “The Good Doctor” (optional)
1 cup mini chocolate chips

In a large mixing bowl whisk together egg beaters, sweetened condensed milk, and sugar until thoroughly mixed. Add heavy whipping cream, half and half, skim milk, salt, vodka or schnapps, and mint extract. For the very best results (who wants anything less?), let the mix chill in the refrigerator for about four hours which allows the mix to “age” before freezing according to the directions with your ice cream freezer. Add the mini chips in the last 5 minutes of freezing. This recipe makes the perfect amount to fit in a 1.5 quart ice cream maker. Makes between 4 and 5 cups of ice cream.

My revised preparation:
1. Pour half and half into small saucepan and heat, stirring occasionally, until steam rises. Remove from heat.
2. In a separate bowl, use a whisk or electric mixer to beat Egg Beaters, sweetened condensed milk and sugar together. Beat in 1/2 cup of hot half and half and then stir this mixture into the saucepan with the remaining half and half.
3. Cook over medium-low heat, stirring almost constantly. Continue until the mixture reached 170-180 degrees or is slightly thickened. Do not bring the mixture to a boil.
4. Pour the mixture into a separate bowl and stir in the cream and milk.
5. Once the mixture has cooled slightly, but is still hot, add the salt, mint extract and vodka. Taste the mixture and add more sugar or mint as needed.
6. Chill the mixture for several hours. You can speed up the process by placing the bowl containing the mixture in a large bowl filled with ice and water.
7. Freeze in ice cream maker according to manufacturer’s directions Add the mini chips during the last five minutes.

Turkey and Bean Burritos

February 25th, 2009 by Beth

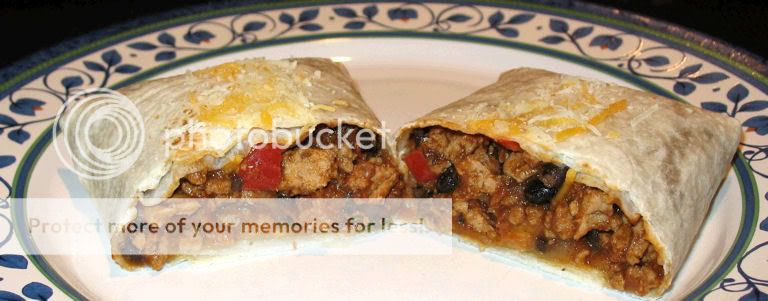
This was the first Mexican dish that I made that did not involve a pre-mixed packet of taco or fajita seasoning. When I first made this dish, my husband and I were amazed at how easy it was to throw together a warm, tasty Mexican dish. Turkey and bean burritos have become a staple meal in our home. They’re easy enough to make on a weeknight, and work well on their own or with a side of Mexican rice.

Over the years, the turkey and bean burritos have undergone some minor changes. The original recipe is for Turkey, Tomatillo, and Bean Burritos and can be found in Rachel Ray’s 365: No Repeats cookbook. The recipe uses tomatillo salsa as the base, but I initially used whatever regular tomato salsa I had on had. I now use tomato sauce, cumin, chili powder and poultry seasoning in place of the salsa. I think it makes the filling more moist, and the flavor more consistent.

If I’m just cooking for Mike and I, I will only assemble and heat two burritos and store the filling in a bowl. I’ve found that pre-assembled burritos get soggy in the fridge. When it’s time for leftovers, I warm the filling in the microwave, and assemble the burritos before popping them in the oven.

And of course, no Mexican meal is complete without a margarita! :)

Turkey and Bean Burritos
adapted from Rachel Ray’s Turkey, Tomatillo, and Bean Burritos (found in 365: No Repeats)

Yields 4-6 servings

6 10-inch flour tortillas
1 package (1 1/3 pounds) ground turkey breast
1 large onion, chopped
3 garlic cloves, finely chopped
1 red bell pepper, cored, seeded and chopped
salt and freshly ground black pepper
2 tsp cumin
2 tbsp chili powder
1 tsp poultry seasoning
1 cup tomato sauce (plain, no-salt added)
1 cup chicken broth
1 15 oz can black beans, rinsed and drained
2 tbsp fresh cilantro leaves, chopped
shredded cheese of your choice

1. Preheat the oven to 275.
2. Brown turkey in large non-stick skillet. Season with salt and pepper. Once turkey is browned, transfer to bowl. Drain most of the fat, leaving a small amount in the skillet. (Or, drain fat and use olive oil)
3. Add onions, garlic and pepper to skillet. Saute on medium heat for several minutes until onions are translucent and peppers are soft.
4. Add browned turkey to pan and mix in. Season with cumin, chili powder and poultry seasoning.
5. Stir in the black beans, tomato sauce and chicken broth.
6. Increase heat and continue to cook for 5-10 minutes more, or until the mixture is thickened.
7. Remove from heat and stir in cilantro.
8. Heat tortillas in microwave to make them more pliable.
9. Spoon turkey mixture onto tortillas, top with shredded cheese and roll up.
10. Place rolled tortillas seam-side down on a cookie sheet. Sprinkle with cheese and bake for 10 minutes.