Pumpkin Cupcakes

November 10th, 2009 by Beth
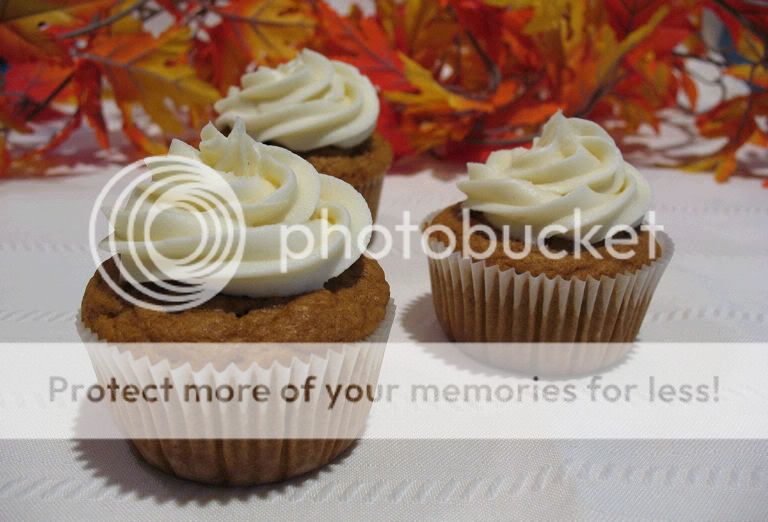
When I make something new, I don’t want just a recipe, I want the perfect recipe! My desire for a tried and true favorite helps explain why I often prefer to get my recipes from blogs and community-oriented cooking websites as opposed to magazine and cookbooks.

A pumpkin cupcake comparison from The Way the Cookie Crumbles popped up in my Google Reader a few weeks ago. In this post, Bridget details her experiences with three different pumpkin cupcake recipes. This recipe found on Smitten Kitchen was her favorite, and I have now fallen in love with it as well! This clearly is the perfect pumpkin cupcake recipe.

While I couldn’t justify making these for just me and my husband, a dinner at a friend’s house presented the perfect opportunity to whip up this fun fall treat. Pumpkin, cinnamon, nutmeg, cloves, maple syrup… you can’t get much more fall-ish than this! The cupcakes have a light, airy texture and a flavor reminiscent of spice cake with a pop of pumpkin. Instead of using the original maple cream cheese frosting, I opted to use a maple butter cream frosting recipe from Annie’s Eats. It’s the perfect companion to the pumpkin cupcakes: smooth and sweet and fall-inspired.
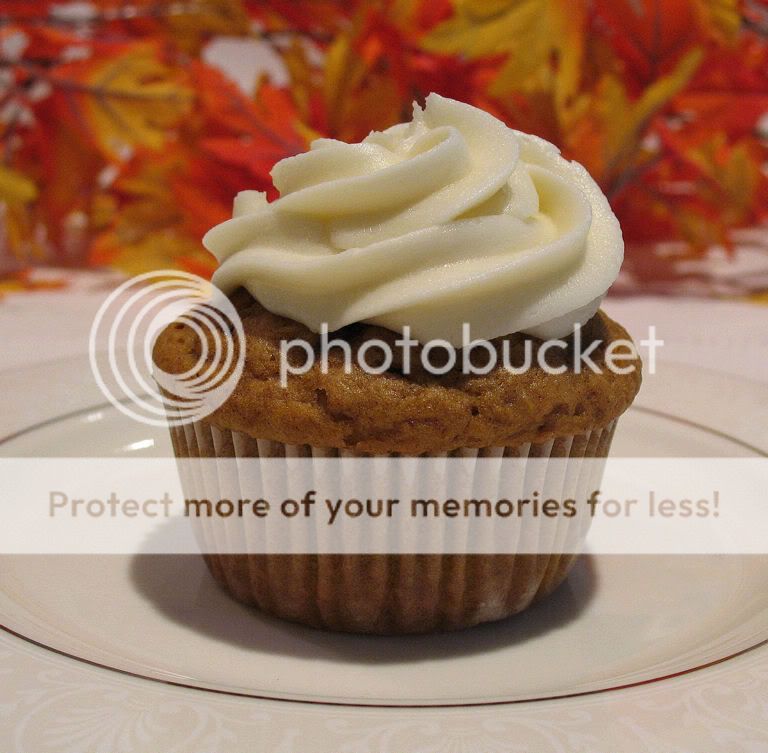
Pumpkin Cupcakes
(From David Leite via Smitten Kitchen)
Yields 18 cupcakes

1 stick unsalted butter, room temperature
1 cup firmly packed dark-brown sugar (I used light brown)
? cup granulated sugar
2 cups cake flour
2 tsp baking powder
1 tsp baking soda
1 tsp ground cinnamon
1 tsp ground ginger
? tsp ground nutmeg
? tsp ground cloves
? tsp salt
? tsp freshly ground black pepper (I omitted)
2 large eggs
? cup buttermilk mixed with 1 tsp vanilla
1? cups canned solid-pack pumpkin (not pumpkin pie filling)

1. Preheat the oven to 350? and line cupcake pans with 18 liners.
2. Using a stand mixer, beat the butter, granulated sugar and brown sugar on medium speed until fluffy, about 5 minutes.
3. In a separate bowl, sift the flour, baking powder, baking soda, cinnamon, ginger, nutmeg, cloves, salt, and pepper into a medium bowl.
4. Add the eggs 1 at a time to the mixer, blending well and scraping down the sides after each addition. 5. Alternate adding the flour and milk mixtures, beginning and ending with the flour.
5. Add the pumpkin and beat pumpkin until smooth.
6. Divide the batter equally between the cups. (They?ll be about ? full.) Rap the filled pans once on the counter to release any air bubbles.
7. Bake the cakes until a toothpick inserted into the center comes out clean, about 20 to 25 minutes. Cool the cupcakes on racks completely.

Maple Buttercream Frosting
(Annie’s Eats)

1/2 cup unsalted butter, at room temperature
2 cups powdered sugar, sifted
2 tbsp. maple syrup
1-2 tbsp. milk

1. In the bowl of an electric mixer fitted with the paddle attachment, cream the butter on medium-high speed until smooth.
2. Scrape down the sides of the bowl and add the powdered sugar. Beat on medium speed until well combined, then increase speed and beat until smooth.
3. Scrape down the sides of the bowl again and add the maple syrup. Mix until incorporated.
4. If the frosting is too thick, add 1-2 tablespoons of milk and beat until smooth and desired consistency is achieved.

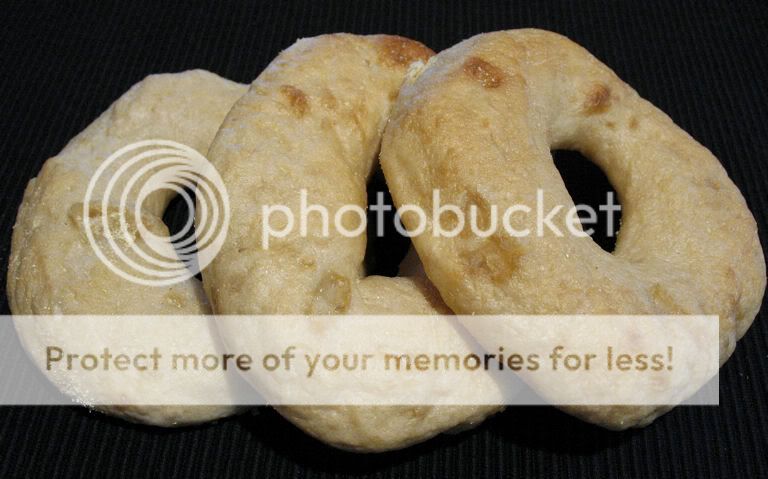
Plain Bagels

November 8th, 2009 by Beth

I love to bake. In recent years, I conquered my fear of yeast and have found the process of transforming basic ingredients like flour, water, yeast and salt into beautiful, flavorful breads to be quite enjoyable. I did less baking during the summer, but I’ve been anxious to try new recipes as the cool fall weather has rolled in. I’ve had my eye on a few varieties of bagels that Brown Eyed Baker has made during the past several months.

When I told one of my friends that my husband I and I had made our own bagels, she asked me “Are they hard to make?” As with most homemade items, they’re not hard to make, but they do take some time and a little planning. Each step is not difficult, but there are several steps that must be followed over the course of at least two days. You need to prepare the sponge, prepare the dough, divide the dough and allow it to rise, shape the bagels and let them rise, throw them in the refrigerator to rise slowly, boil them and finally bake them. See? No single step is overly complicated.

I must admit that while I was boiling my bagels two at a time, I thought “This had better be worth it!” Then, as the bagels baked my house became filled with the warm, yeasty aroma of fresh-baked bread. When I finally bit into a warm bagel, I saw the light! Store-bought plain bagels are good, but these are amazing! I don’t know what it is, but they’re soft (not too doughy) and far more flavorful then their mass-produced plain counterparts.

It’s true that it takes a bit of time to make bagels at home – certainly more time than it takes to grab a bag of bagels at the grocery store. After my first foray into the world of homemade bages, I can attest that the extra time and effort is well worth it!

You’ll find the full recipe below the break.

Read the rest of this entry »

Pumpkin Risotto with Chicken

November 4th, 2009 by Lisa

Now that fall is upon us, I’ve been wanting to try some savory pumpkin recipes in addition to my usual standby cookie and quick bread recipes. I made some tasty pumpkin chocolate chip cookies a week ago and with the leftovers decided to try making some pumpkin risotto. I decided to try a variety with chicken in it but I am sure this would be equally tasty as a vegetarian dish as well. It came out really creamy and flavorful, despite the healthy label the original posting site gave it. Risotto always seemed complicated to make – but aside from taking a little bit of time standing at the stove, it’s really not hard! It would make for an interesting addition to Thanksgiving dinner, or a nice tasty dinner for a cold November evening as we enjoyed it!

8 cups chicken broth
2 Tbsp. olive oil
2 Tbsp. unsalted butter
1 small onion, minced
2 cups short grain Italian rice (such as Arborio)
1/2 cup dry white wine
1/2 cup canned pumpkin puree
8 ounces chopped skinless chicken
pinch of nutmeg
1/2 – 3/4 tsp dried thyme leaves
Salt to taste
1/2 cup grated hard cheese, such as Parmigiano-Reggiano

Instructions: Bring the chicken broth to a simmer. In a separate deep heavy duty skillet, saute the onion in the olive oil and 1 tbsp butter until it is translucent but not carmelized. Stir in the rice and toast the rice while stirring constantly for about 1 minute. Add the wine and simmer for 1-2 minutes. Add the pumpkin, chopped chicken breast, nutmeg, and 2 cups of the simmering chicken broth. Stir until most of the liquid is absorbed. Continue to add chicken broth, about 1/2 cup at a time and allowing the rice a minute or two to absorb the liquid each time before adding more. After about 15 minutes of adding liquid, taste the rice – if it is too hard, keep adding liquid until it is soft. When the rice is soft, remove from the heat and stir in the cheese and other tablespoon of butter.

Zucchini and Sausage Quiche

October 5th, 2009 by Lisa

One of my favorite dishes is quiche, yet for some reason we rarely make it! Lately I’ve been spending a lot of time studying for a big upcoming exam – so in order to procrastinate more effectively, I decided to spend a few hours making quiche…crust from scratch and everything. I picked up some zucchini at a local farm stand, and was inspired to find some other ingredients that went with zucchini well. I used a variety of recipes for inspiration – although this one does not have a crust, it did have a great combination of veggies and flavors. My husband usually protests if we have too much vegetarian food, so I threw in a bit of sweet italian sausage for him – but I imagine this would taste great without it. I made a pastry crust from Mark Bittman’s How to Cook Everything. I tweaked the amount of eggs included and the cheese a bit, as I didn’t have any monterey jack on hand. The quiche was great…and hopefully I’ll still pass my big exam!

Zucchini and Sausage Quiche

Crust Ingredients:

5 oz flour (1 and 1/8 cups)

1/2 teaspoon salt

1 teaspoon sugar

1 stick butter, cut into pieces

3 tablespoons ice water

Filling Ingredients:

2 medium zucchini, sliced thinly

1 medium onion, sliced thinly

2 cloves garlic

2 links of sweet italian sausage

5 eggs

1/2 tsp dried basil and dried marjoram

1/2 cup parmesan cheese

1/2 cup mild cheddar cheese

To make the crust – Preheat oven to 425. place the flour, sugar, and salt into a food processor and pulse to combine. Add the cut-up butter to the dry ingredients and pulse repeatedly until the butter and flour is well combined – it will look a little like cornmeal. Place this in a bowl and sprinkle water over the flour/butter combination and then combine to form a ball. Chill the ball (wrapped in saran wrap) in the freezer for 10 minutes. Dust the chilled dough with flour and place the chilled dough between two layers of saran wrap. If it becomes too soft, chill again! Put the crust into a pie plate and pierce all over – cover with foil and fill with pie weights (or dried beans – cheaper!) and bake at 425 degrees for 12 minutes.

To make the filling – Set oven for 325 degrees. Saute the zucchini, onion and garlic in a medium skillet until softened, then put aside. Remove the sausage casing and brown the meat until no longer pink at all. In a bowl, beat 5 eggs together with the marjoram, basil and parmesan cheese until combined. Stir in the zucchini/onion mix, cheddar cheese and sausage. Place the mixture in the prepared pie crust. Bake at 325 degrees for 30-40 minutes – until the center is set. Enjoy!

Chocolate Peanut Butter Cupcakes

September 30th, 2009 by Beth

I am a relatively new member of the chocolate peanut butter fan club, and these cupcakes had something to do with it. My husband and a number of my friends have always been passionate lovers of all things chocolate and peanut butter, while my feelings were ambivalent.

When I first spotted these cupcakes on Proceed with Caution, I knew I had to make something like them for the chocolate peanut butter aficionados in my life. I used my go-to chocolate cake recipe (Hershey?s Perfectly Chocolate Cake), incorporated peanut butter into my grandmother?s frosting and made the peanut butter balls as written.

The resulting cupcake is heavenly! As I bit into my first one I thought ?Now I know what all the fuss is about!? If the creamy peanut butter frosting doesn?t provide a peanut-y enough kick for you, there?s a sweet peanut butter ball nestled inside the cupcake. Topped with half of a miniature Reese?s Peanut Butter Cup, these cupcakes should satisfy the most demanding chocolate peanut butter lover in your life.

Sadly, I don?t have many photos of these delectable cupcakes because the batch was quickly demolished by my peanut butter and chocolate loving friends!

Chocolate Peanut Butter Cupcakes
Yields 30

For the Filling:
2/3 cup confectioners’ sugar
1/2 cup creamy peanut butter
2 tbsp butter
1/4 tsp vanilla

For the cupcakes:
2 cups sugar
1 3/4 cups all-purpose flour
3/4 cup Cocoa
1 1/2 tsp baking powder
1 1/2 tsp baking soda
1 tsp salt
2 eggs
1 cup milk
1/2 cup vegetable oil
2 tsp vanilla extract
1 cup boiling water

1. Using a mixer on medium speed, beat together confectioners’ sugar, peanut butter, 2 butter, and 1/4 teaspoon vanilla until blended. Shape mixture into 24 balls using heaping measuring teaspoons. The balls will be sticky and don’t need to be perfectly shaped. Place shaped balls on waxed paper-lined cookie sheet and set aside.
2. Heat oven to 350?F. Line muffin pans with paper liners.
3. Stir together sugar, flour, cocoa, baking powder, baking soda and salt in medium bowl.
4. In a large bowl, combine eggs, milk, oil and vanilla. Stir until well blended.
5. Add flour mixture to large bowl and beat on medium speed of mixer 2 minutes.
6. Stir in boiling water (batter will be thin).
7. Spoon 1 heaping measuring tablespoon batter into each muffin-pan cup. Drop 1 peanut butter ball in center of each cup and top off muffin cup with batter (should be 3/4 full)
8. Bake 22 to 25 minutes. Cool completely

For the frosting:
2 1-lb packages of confectioner?s sugar
1/2 cup vegetable shortening
1/2 cup creamy peanut butter
1/2 cup warm water
2 tsp vanilla extract

1. Beat shortening and peanut butter together until creamy and then beat in water.
2. Gradually beat in confectioner?s sugar and beat until creamy.
3. Add vanilla and beat in well.
4. If needed, add more water, 1 tbsp at a time, to attain desired consistency.
5. If frosting will not be used right away, store in an airtight container.

Cumin & Lime Salsa

September 15th, 2009 by Beth

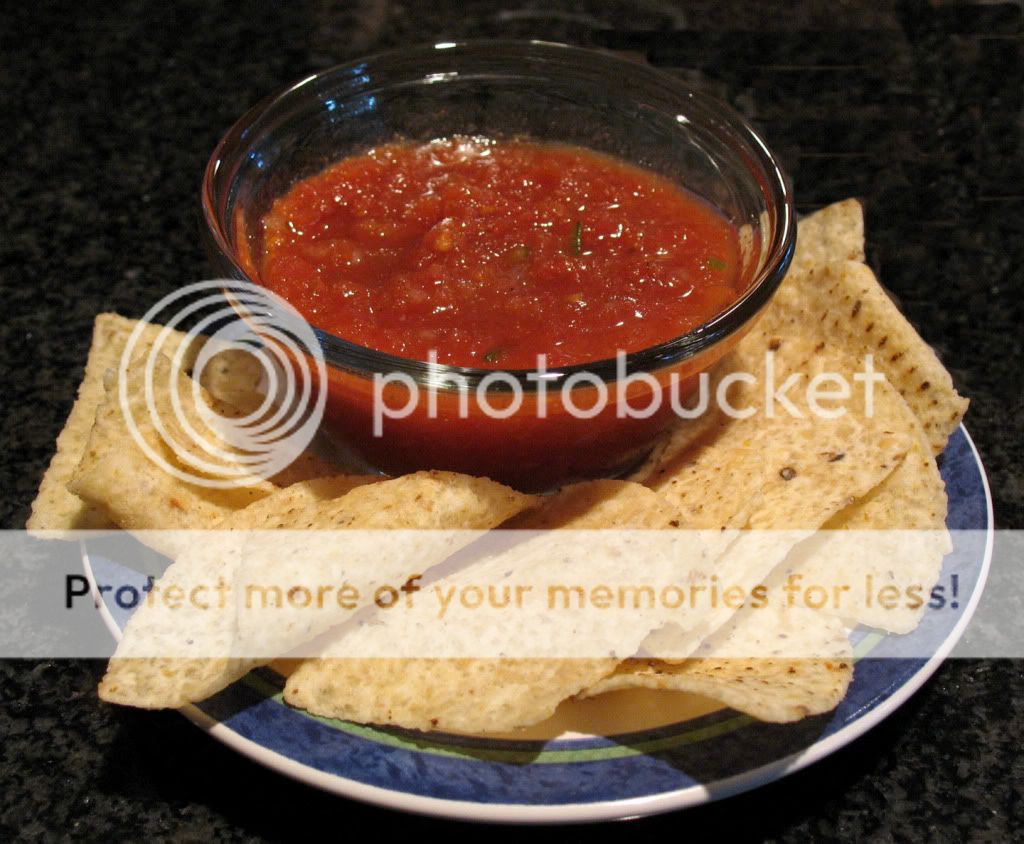
When we were engaged, my husband and I registered for the Cuisinart Duet, a combination food processor and blender. Beyond making frozen beverages, I had no idea what I would use these small appliances for, but I registered for them because it was the thing to do and they seemed potentially useful. While unpacking our shower gifts, I thumbed through the enclosed recipe booklet and was surprised to see that many recipes called for the blender, including salad dressings and (Mike’s favorite!) salsa. Thinking that Mike would be equally interested, I shared the news with him: “Guess what? We can use our blender to make more than just frozen margaritas!” Mike responded with “Like frozen daiquiris?” While I ended up using the food processor to make salsa, I often remember this exchange and smile.

We go through lots of salsa in our house. Not only does my husband love it, we often serve it as a simple appetizer when friends visit for dinner. While I think there are plenty of excellent jarred salsa, homemade salsas remain my favorite. I started making this particular salsa a few years ago based upon a Chili’s salsa copycat recipe. Over time, I’ve modified it to suit our particular tastes. That’s the beauty of salsa: it’s completely customizable, super-easy to make and almost impossible to run.

Now go grab your food processor or blender, a bag of chips and maybe even a frozen margarita!

Cumin & Lime Salsa

1 (14 1/2 ounce) can tomatoes and green chilies
1 (14 1/2 ounce) can whole canned tomatoes (plus the juice)
1 tbsp teaspoons chopped (canned, not pickled)
1/4 cup yellow onion, diced
1/2 tsp garlic powder
1 tsp cumin
1/2 tsp chili powder
1 – 2 tsp lime juice
1/4 tsp sugar

1. Pulse japapenos and onions in food processor.
2. Add both cans of tomatoes, garlic powder, cumin, chili powder, lime juice and sugar.
3. Process all ingredients until well blended, but do not puree.
4. Place in covered container and refrigerate for a few hours before serving.

Margarita Cupcakes

August 25th, 2009 by Beth

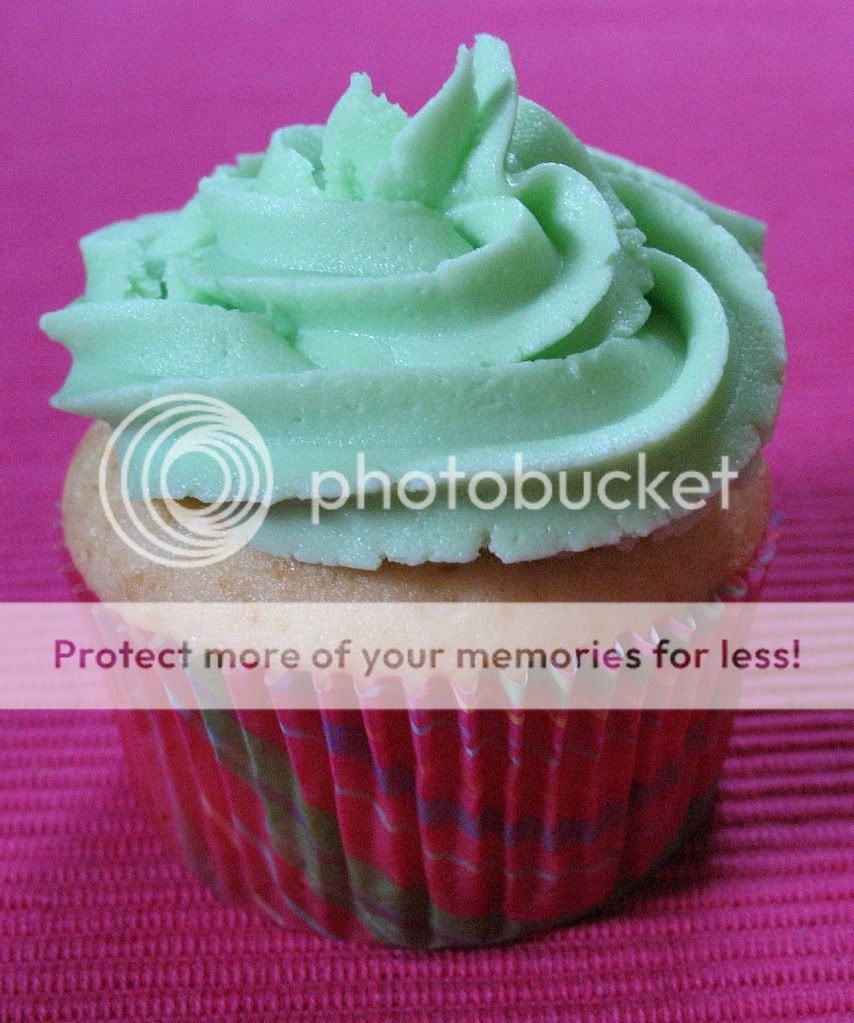
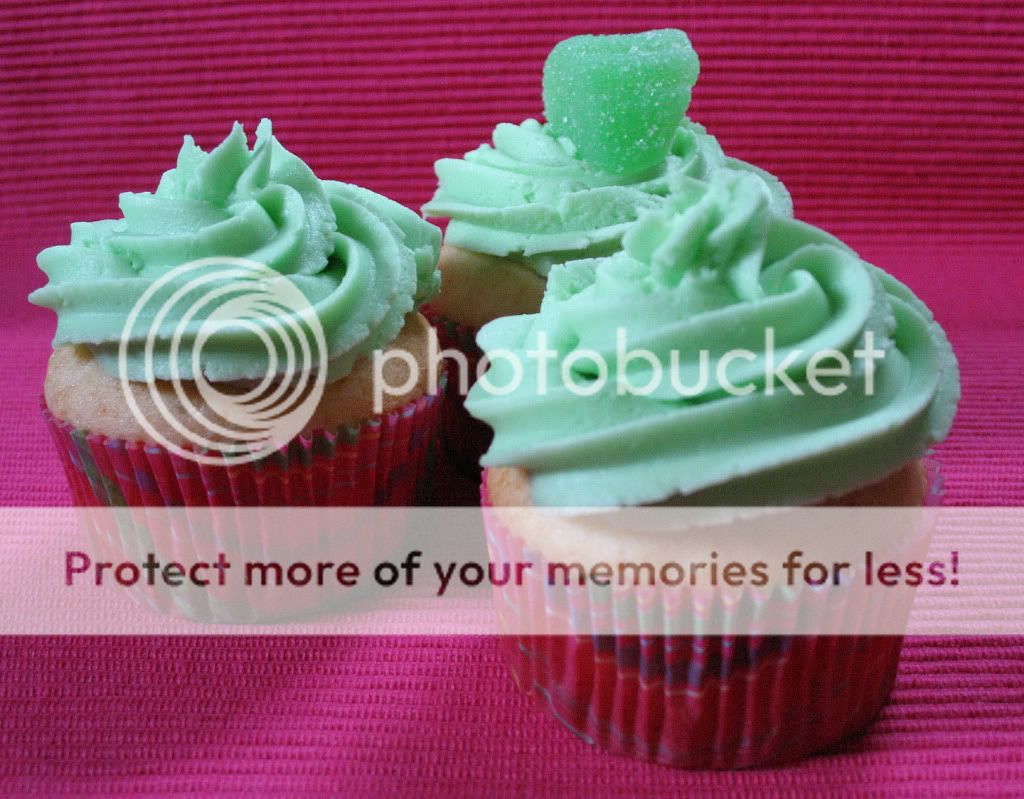
In keeping with our apparent theme of alcohol in unexpected places, I present to you: Margarita Cupcakes! I stumbled upon this recipe on Confections of a Foodie Bride a few years ago. They’re a fun alternative to standard chocolate or vanilla-based cupcakes. The margarita and lime zest impart a recognizable, refreshing tang to the cupcakes. They serve as a perfect dessert for a Mexican-inspired meal or summer barbecue.

Since these cupcakes are a creatively doctored white cake mix, there’s far less measuring than a typical made-from-scratch cake would require. Most of the measuring is related to mixing the actual margarita, and who can complain about that? More importantly, a mini-rita remains after 1 1/4 cups of the mix is used in the cupcake batter. It’s the perfect excuse for a small, refreshing drink at any time of day. On one occasion, I may or may not have baked these cupcakes at ten o’clock in the morning. ;)

Since I think my husband makes the best margaritas (a sentiment shared by many of our dinner guests), I adjusted the margarita proportions to reflect his drink recipe. I also used my Grandmother’s frosting recipe, changing the original liquid measurements to include a touch of lime.

Margarita Cupcakes

Yields 24 cupcakes

8 oz margarita mix
3 oz tequila (Jose Cuervo is my fav!)
1 oz triple sec
White cake mix
3 egg whites,beaten
2 Tbsp vegetable oil
1 Tbsp lime zest (you’ll use the lime juice in the frosting)

1. Mix together the margarita mix, tequila, and triple sec in a large glass or spouted bowl. You will use 1 1/4 cup of this in the cupcake mix. Pour the leftovers over ice and enjoy!
2. In a large mixing bowl, combine the cake mix, egg whites, vegetable oil, lime zest and 1 1/4 of margarita mixture.
3. Using a hand mixer (or stand mixer), beat on low speed for about 30 seconds to combine ingredients. Increase to medium speed and beat for two minutes.
4. Spoon the batter into muffin tins, filling each cup about 2/3 – 3/4 full.
5. Bake at 350 for about 25 minutes, or until a toothpick inserted in the center of a cupcake comes out clean.
6. Allow to cool for at least 5 minutes before transferring to a wire rack to cool completely.
7. Cool completely before decorating.

Lime Frosting

Yields enough for 24 cupcakes

1 package confectioner’s sugar
1/2 cup shortening
2 tbsp warm water
2 tbsp lime juice

1. Beat shortening, water and lime juice together.
2. Gradually beat in confectioner’s sugar and beat until creamy.
3. You may need to add more water (1 tbsp at a time) to achieve desired consistency. If you prefer your frosting much sweeter, you can add more lime juice. Beware – too much lime juice can make the frosting painfully sweet!

Margarita Cupcakes

Chocolate Whiskey Cupcakes

August 18th, 2009 by Lisa

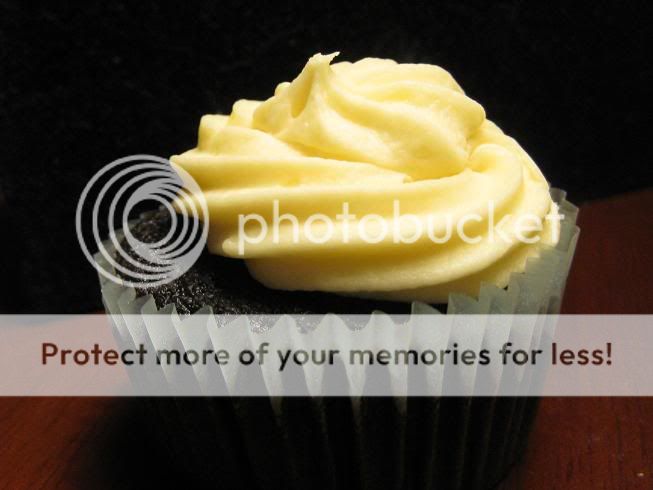
I made these cupcakes for my husband’s birthday at the beginning of the month – mostly because he loves cake, frosting, Guinness, whiskey, and all other things Irish. After a bit of searching, I found this recipe that uses not one but three kinds of Irish alcohol! What better way to celebrate. They came out incredible! The frosting was particularly amazing, but the beer and whiskey really adds a great depth to the chocolate flavor.

Chocolate Whiskey Cupcakes

Cake:

1 cup stout (such as Guinness)
1 cup (2 sticks) unsalted butter
3/4 cup unsweetened cocoa powder
2 cups flour
2 cups sugar
1 1/2 teaspoons baking soda
3/4 teaspoon salt
2 large eggs
2/3 cup sour cream

Filling:

8 ounces bittersweet chocolate (I used chocolate chips)
2/3 cup heavy cream
2 tablespoons butter, room temperature
2 teaspoons Irish whiskey

Frosting:

3 to 4 cups confections sugar
1 stick (1/2 cup or 4 ounces) unsalted butter, at room temperatue
3 to 4 tablespoons Baileys (or milk, or heavy cream, or a combination thereof)

For the cake:

Preheat oven to 350. Bring stout and butter to a simmer over medium heat. Whisk in the cocoa powder and cool slightly. Mix dry ingredients in a separate bowl, whisking to combine. Beat eggs and sour cream together in another bowl. Add stout/butter mixture to the egg mixture slowly (so you don’t scramble the eggs accidentally!) Add the flour mixture to the wet ingredients and mix briefly on slow speed. Portion batter into lined cupcake tins; it should fill 24 cups approximately 2/3 of the way. Bake for 17-20 minutes or until cake tester comes out clean. Cool completely.

For the ganache:

Melt the chocolate. Heat the cream until it is simmering and then pour over the chocolate. Let sit for about a minute and then stir until smooth. Add butter and whiskey stirring to combine. Let cool until it starts to thicken. You can use an apple corer to cut out a hole in the cupcakes, but I chose instead to use a piping bag, poked a hole in the cupcake and filled them. The cupcake will swell a little, but I did not have any crumble on me.

For the frosting:

Whip the butter until fluffy. Slowly add the confectioners sugar, several tablespoons at a time. When the frosting begins to look thickened, add the Bailey’s – if it becomes too thin, add some more sugar. This was more than enough to frost my 24 cupcakes.

Chocolate (Irish) Whiskey Ice Cream

August 13th, 2009 by Lisa

During our recent voyage to Ireland, we had the good fortune of visiting West Kerry, particularly enjoying Dingle town and peninsula. It was one of the highlights of our journey – not only was the scenery amazing, but we managed to have a drink at a combination hardware store & bar, eat at a brand new gourmet restaurant that had only opened 4 days earlier, and have the world’s most amazing ice cream. We were passing our evening wandering the streets of Dingle and enjoying the sites before retiring to our B&B when we came upon Murphy’s Ice Cream – having spent all day in the warmth and sunlight, we decided to stop in for a scoop. Quite possibly, this was the best decision on our entire trip! My husband & I both chose the Chocolate Whiskey ice cream, which was creamy and chocolatey and rich and amazing.

When we got back, I went on a bit of an Irish cooking kick…scones, stew, meat-laden breakfasts…and one day, I decided I would try to make the Chocolate Whiskey ice cream. After a quick Google search, I came upon this site, published by the same folks that happen to own Murphy’s! While I am quite sure nothing will ever match that scoop of ice cream I enjoyed while meandering through the streets of Dingle, this came as close as I think I can get without an international flight. I made small adjustments – mostly to accomodate using US measures – and it came out pretty accurate! A candy thermometer was very helpful for this dish, as I wanted to make sure the eggs were pasteurized. It is a bit labor-intensive, however completely worth it unless you can jet across the Atlantic at will to get Chocolate Whiskey Ice Cream fashioned by pro’s.

Chocolate Whiskey Ice Cream

1/2 cup sugar

4 egg yolks

1 cup milk

1 scant cup heavy cream (7oz or so)

5 squares (or ounces) dark baking chocolate

3 tablespoons Irish whiskey (I used Tullamore Dew because it was what we had on hand)

Instructions:

Melt the chocolate – I put the chocolate in the microwave for 15 second intervals, stirring in between. In a separate bowl, beat the egg yolks and sugar together until well blended. Bring the milk to a simmer in a saucepan. Remove from the heat and then add very slowly to the egg mixture (so you don’t accidentally cook the eggs too fast!) mixing constantly. Put the egg-sugar-milk mixture back into the saucepan and heat to 165 degrees farenheit, keeping it at that temperature for 5 minutes until the custard is thick. Immediately remove from the heat, and add this to bowl with the melted chocolate, stirring to combine. Let this cool (covered in plastic wrap) in the fridge. Stir in the whiskey. In a separate bowl, whip the cream on high until you have soft peaks and then fold this gently into the chocolate whiskey custard. Chill completely, and then freeze according to the instructions on your ice cream maker. Enjoy!

Pineapple Sorbet

August 3rd, 2009 by Beth

Pineapple Sorbet

Looking for a quick, light and refreshing way to beat the summer heat? This Pineapple Sorbet from David Lebovitz’s The Perfect Scoop is the easiest and cheapest recipe that I have come across for my ice cream maker. The original recipe suggests using a fresh pineapple, but canned pineapple (unsweetened and packed in juice) will do the trick! Using canned pineapple, I whipped up the base for chilling in a matter of minutes.

While the original recipe only included pineapple, sugar and water, I opted to add some Captain Morgan spiced rum (2 teaspoons). Inhaling the aroma of the unfrozen concoction conjured up images of lounging in the sun in a tropical paradise, but the rum flavor was more subdued once frozen. Next time, I think I’ll double the amount of rum and add a total of 1 tablespoon.

The finished product is heavenly. The pureed pineapple lends a nice body to the sorbet, so it is not icy and can be easily scooped right from the freezer. It has a light, sweet taste and while not super-low-calorie, is far friendlier to the waistline than it’s cream-laden counterparts.

Pineapple Sorbet

Yields about 3 cups

1/2 pineapple, peeled and cored OR 1 can of pineapple (unsweetened, packed in juice)
8 to 10 tbsp sugar
1/2 cup water
1 tbsp. spiced rum (Captain Morgan is a household favorite!)

1. Cut the pineapple into chunks and puree in a blender OR puree canned pineapple.
2. Remove pineapple puree and return only two cups to the blender.
3. Add sugar, water and rum and blend well.
4. Chill the mixture thoroughly before freezing in ice cream maker according to manufacturer’s directions.