Posts Tagged ‘Chocolate’

Hershey’s Chocolate Frosting

Monday, May 11th, 2009

Gold cake with chocolate frosting is mother’s favorite cake combination. I’ve had my eye on Hershey’s “Perfectly Chocolate” Chocolate Frosting for awhile now, and Mother’s Day seemed like the perfect opportunity to try it out.

I had really hoped that it would be delicious, because I really wanted her to enjoy her Mother’s Day dessert. This recipe did not disappoint! The frosting is rich and chocolate-y with a fudge-like flavor. It’s a snap to make and spreads quite easily on the cake.

The recipe makes enoug frosting to frost and decorate a 9-inch round layer cake with some to spare. The extra frosting is fantastic by the spoonful. :)

Hershey’s “Perfectly Chocolate” Chocolate Frosting

Yields about 2 cups of frosting

1/2 cup (1 stick) butter
2/3 cup HERSHEY’S Cocoa
3 cups powdered sugar
1/3 cup milk
1 teaspoon vanilla extract

1. Melt butter.
2. Beat in cocoa.
3. Alternately add powdered sugar and milk, beating to spreading consistency. Add small amount additional milk, if needed.
4. Beat in vanilla.

Oreo Cupcakes

Tuesday, April 21st, 2009

I have a major weakness for Oreos. I can easily demolish an entire bag in a few sittings, so I try to avoid buying them. I saw these Oreo cupcakes on the blog Proceed With Caution, and have been waiting for the right opportunity to make them.

The right opportunity presented itself in the form of dinner and 24 with our friends Carolyn and Rob. I had originally planned to make something simple and easy to eat neatly, since we would be eating dessert in front of the television. That plan didn’t last very long. :)

I used a Hershey’s recipe for ‘”Perfectly Chocolate” Chocolate Cake and was amazed at the number of cupcakes it produced. The recipe called for filling muffin cups 2/3 with batter, resulting in 30 cupcakes. I figured I could whittle that number down to 24 if I was generous in my batter allotment. Nope! I ended up with 31 Oreo cupcakes. I frosted half of them and will be freezing the rest for another occasion. It’s worth noting that the large number of cupcakes did cause a bit of a baking problem. I only have two muffin tins, so I had to bake 24 cupcakes first and then bake the remaining ones separately. The last 7 cupcakes did not rise as well as the first batch and ended up with a slightly concave appearance. However, they taste just fine!

I used a double batch of my grandmother’s frosting recipe and augmented it with crushed Oreos for the cookies and cream icing. The Oreos must be finely ground so that the frosting will spread easily.

Be careful when splitting the cookies to top these delicious Oreo cupcakes, as the Oreos tend to crumble quite easily. I followed suggestions found on Proceed With Caution and split the Oreos by placing the blade of my knife evenly across the cookie and pressing straight down. With a few exceptions, this method worked quite well. I certainly didn’t mind eating the Oreos that didn’t look pretty enough!

I am thrilled with the way that these came out. The Perfectly Chocolate cupcake is rich, but not too sweet. They complement the sweet cookies and cream icing quite nicely. Not only are these oreo cupcakes delicious, but I think they’re really cute! The frosting and Oreo garnish are fun and festive. This was the first time that I piped my cupcakes using a decorator bag, and I was happy to see that it’s not too hard. I’m looking forward to sharing my latest creation with friends and family!

Oreo Cupcakes

Yields 30 cupcakes

For the cupcakes:
30 Oreos, 1 side twisted off and reserved for frosting *
2 cups sugar
1 3/4 cups all-purpose flour
3/4 cup HERSHEY’S Cocoa
1 1/2 tsp baking powder
1 1/2 tsp baking soda
1 tsp salt
2 eggs
1 cup milk
1/2 cup vegetable oil
2 tsp vanilla extract
1 cup boiling water

1. Heat oven to 350?F. Line muffin pans with paper liners and place 1 Oreo (cream side up) in each liner.
2. Stir together  flour, cocoa, baking powder, baking soda and salt in medium bowl.
3. In a large bowl, combine sugar, eggs, milk, oil and vanilla. Stir until well blended.
4. Add flour mixture to large bowl and beat on medium speed of mixer 2 minutes.
5. Stir in boiling water (batter will be thin). Pour batter into prepared pans.
6. Fill muffin cups 3/4 full with batter (about 1/4 cup).
7. Bake 22 to 25 minutes. Cool completely

For the frosting:
2 1-lb packages of confectioner’s sugar
1 cup vegetable shortening
1/2 cup warm water
2 tsp vanilla extract
1 cup Oreo crumbs, made from reserved sides (used above) and additional cookies

1. Beat shortening and water together.
2. Gradually beat in confectioner’s sugar and beat until creamy.
3. Add vanilla and beat in well.
4. If needed, add more water, 1 tbsp at a time, to attain desired consistency.
5. Beat in Oreo crumbs.
6. If frosting will not be used right away, store in an airtight container.

Optional Garnish:
15 Oreos, split in half and placed atop the frosted cupcakes

* You’ll probably need more than 1 bag for the cupcakes, frosting and garnish

Flourless Chocolate Torte

Wednesday, March 11th, 2009

First, sorry for the long break in posting! My husband and I were refinishing our guest room. 2 buckets of spackle, a roll of fiberglass tape, and a few buckets of paint later…we are tired but done.

In tastier news, my mother-in-law gave me this recipe for a Flourless Chocolate Torte – she first made it for my mother, who follows a gluten-free diet, at a family function a few years ago. The cake was an instant hit – it’s very rich and chocolatey, almost fudgey. Even the non-gluten-free folks in the room thought it was incredible! Unlike a lot of gluten-free cakes, it is incredibly moist and has a lovely texture. This recipe is now legend in our circle – friends and family alike have procured this recipe and make it for special occasions – I made one this week in preparation for a weekend celebration and can’t wait until Saturday to try it!

This recipe does require a fair amount of work – not something to try when you’re looking for something quick to whip up, but the results are very tasty and worth the time and effort.

Jan’s Flourless Chocolate Torte

Ingredients:

12 oz semi-sweet chocolate (I used chocolate chips)

1 oz (by weight) unsweetened cocoa powder

1 and 1/2 sticks of salted butter (sliced into tablespoon sized pieces)

8 eggs

1 tsp vanilla

1/8 tsp salt

2/3 cup brown sugar

Preheat oven to 350 degrees.

Melt the chocolate chips, cocoa powder, and butter in a double boiler (or a Pyrex bowl over a saucepan of hot water). Meanwhile, butter a springform pan (mine was 12 inches) and line the bottom with parchment paper. Cover the outside with a piece of aluminum foil – this cooks in a water bath, and using the foil keeps the water from seeping in!

Separate the 8 eggs. Add the vanilla to the egg yolk bowl and mix.

When the chocolate mixture has finished melting, remove it from the heat so it has the chance to cool a little. Take 1-2 tablespoons of the melted chocolate mixture and add it to the egg yolks, mixing well (this will gradually increase the yolk temperature so the eggs don’t cook!) Then add the egg yolk mixture back into the bowl with the rest of the melted chocolate mixture.

With the egg whites – add the salt and begin to whip the eggs in a bowl, gradually adding the brown sugar as you go. When all the sugar is incorporated beat on high until peaks begin to foam.

Stir about one half of the egg white mixture into the chocolate and egg yolk mixture until they are well mixed. Then gently fold in the rest of the egg white mixture, preserving the fluffiness of the egg whites as much as you can.

Pour the mixture into the prepared springform pan. Place the springform pan in a roasting pan and fill to about 1 inch depth with warm/hot water. Bake for 40-50 minutes; the cake is done when a good crust has formed.

Mint Brownie Cups

Wednesday, March 4th, 2009

I picked up a bag of Andes Creme de Menthe baking chips at Target shortly after Christmas. I had thought that they’d be the perfect addition to some chocolate chocolate-chip cookies or basic brownies, as they’re essentially crushed Andes mints. After my holiday baking frenzy wound down, I promptly forgot about them.

As I was perusing older recipes from some of my favorite blogs, I found the perfect recipe in which to use my crushed Andes mints: the Peppermint Brownie Cups on Baking Blonde’s Weblog. The recipe looked like the perfect combination of mint and chocolate, and I liked that the brownies were pre-portioned using a muffin tin. I always say that I’m going to freeze most of the brownies that I make, but within a matter of days my husband and I have consumed every last one. Once the pan is out of the oven, my self-discipline goes out the window!

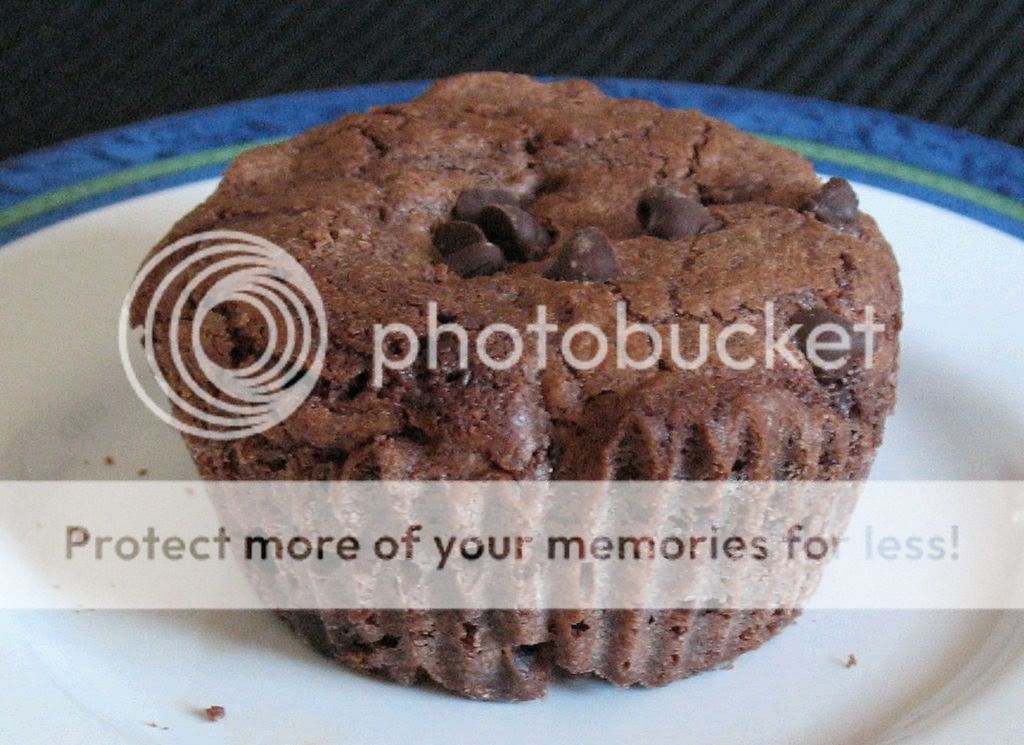
This was only my second time making brownies from scratch, and they’re just perfect! The brownies have a rich, chocolate flavor and a consistency that’s dense and chewy, but not too heavy. I followed the recipe quite closely, deviating only to use my Creme de Menthe Chips in place of the Peppermint Crunch Chips, and to top the brownies with mini chocolate chips.

After enjoying several of the brownies, I stashed the rest in the freezer. When a chocolate craving hits, these perfectly-portioned brownies will be ready in an instant!

Peppermint Brownie Cups

Yields 14-16 brownies
6 TBS butter
6 oz semisweet chocolate (chopped)
2 oz. bittersweet chocolate (chopped)
1 cup sugar
2 eggs
1/4 tsp peppermint extract
1/4 tsp vanilla
3/4 cup all-purpose flour
1/4 teaspoon baking powder
1/4 teaspoon salt
1/2 cup Milk Chocolate Chips
2 cups Andes Creme de Menthe Chips or Andes Peppermint Crunch Baking Chips

Preheat oven to 350 degrees.

Line a muffin tin with paper liners. Lightly spray liners with cooking spray.

In a heat-proof bowl, melt together butter and chocolate in the microwave in 30 second intervals stirring after each interval until smooth. Allow to cool for 5 minutes.

In a large bowl, whisk together flour, baking powder, and salt in a medium bowl; set aside.

Whisk or beat the sugar into the chocolate mixture. Add eggs and peppermint extract mixing until combined and smooth. Add flour mixture and mix until combined. Gently fold in the 1/2 cup chocolate chips and 1/2 cup Andes Peppermint Crunch Baking Chips.

Carefully pour batter to prepared each muffin liner filling about 2/3 full. Sprinkle a few Andes Peppermint chips over the top of each individual brownie. . Bake for 18-23 minutes or until a cake tester comes out with a few crumbs.

*Baking time will depend on your oven, watch carefully so you don?t overbake! Mine were done in 20 minutes.

Allow to cool before removing from muffin pan.
Keep brownies in cupcake liners until ready to serve to help prevent them from drying out.


Mint Chocolate Chip Ice Cream

Sunday, March 1st, 2009

As I mentioned in my sorbet post, I’ve been stockpiling homemade ice cream and sorbet recipes for quite awhile. Mint Chocolate Chip is one of my favorite flavors, so I was quite excited when I saw this recipe on the blog Proceed with Caution.

This was my first attempt at homemade ice cream, so I hesitated to stray from the original recipe. I was quite pleased to find an ice cream recipe that didn’t use copious amounts of whipping cream and egg yolks. Since I’ve read conflicting information on consuming uncooked Egg Beaters, I followed the ice cream making method set forth by Mark Bittman in How to Cook Everything, but used the ingredients and proportions found on Proceed with Caution. I’ve included both the original and modified preparation methods below.

When I was done mixing the base, I adjusted the flavor slightly. I found that I needed to increase the amount of sugar by two tablespoons (1/2 cup total) and I also decided to add an additional teaspoon of peppermint extract (1 1/2 teaspoons total). Since I like lots of chocolate bits in my ice cream, added a full cup of mini chocolate chips.

The finished product is rich, creamy and refreshingly minty. I’m happy that I had such a great recipe to follow for my first foray into homemade ice cream and will be consulting Proceed With Caution for other frozen confections.

Mint Chocolate Chip Ice Cream
Adapted from Doc Wilson, as found on Proceed with Caution

1/4 cup Egg Beaters
1/2 can of fat free sweetened condensed milk
1/2 cup white sugar
4 ounces heavy whipping cream
16 ounces fat free half and half
4 ounces skim milk (or 1%, or 2%, whatever you have)
1/8 tsp salt
1 1/2 teaspoon mint extract
2 tsp vodka OR mint schnapps OR “The Good Doctor” (optional)
1 cup mini chocolate chips

In a large mixing bowl whisk together egg beaters, sweetened condensed milk, and sugar until thoroughly mixed. Add heavy whipping cream, half and half, skim milk, salt, vodka or schnapps, and mint extract. For the very best results (who wants anything less?), let the mix chill in the refrigerator for about four hours which allows the mix to “age” before freezing according to the directions with your ice cream freezer. Add the mini chips in the last 5 minutes of freezing. This recipe makes the perfect amount to fit in a 1.5 quart ice cream maker. Makes between 4 and 5 cups of ice cream.

My revised preparation:
1. Pour half and half into small saucepan and heat, stirring occasionally, until steam rises. Remove from heat.
2. In a separate bowl, use a whisk or electric mixer to beat Egg Beaters, sweetened condensed milk and sugar together. Beat in 1/2 cup of hot half and half and then stir this mixture into the saucepan with the remaining half and half.
3. Cook over medium-low heat, stirring almost constantly. Continue until the mixture reached 170-180 degrees or is slightly thickened. Do not bring the mixture to a boil.
4. Pour the mixture into a separate bowl and stir in the cream and milk.
5. Once the mixture has cooled slightly, but is still hot, add the salt, mint extract and vodka. Taste the mixture and add more sugar or mint as needed.
6. Chill the mixture for several hours. You can speed up the process by placing the bowl containing the mixture in a large bowl filled with ice and water.
7. Freeze in ice cream maker according to manufacturer’s directions Add the mini chips during the last five minutes.

Cream-Filled Cupcakes (Lulu’s Cupcakes)

Monday, February 16th, 2009

I spotted these Hostess cupcake look-alikes in the February/March edition of the Food Network Magazine. The recipe is provided by Sally Russo, the owner of Lulu’s Bake Shoppe in Boston. With their shiny, smooth ganache topping, these cupcakes looked mouth-wateringly good. I’ve wanted to try making them since I bought the magazine a month ago, but figured they were worth saving for a special occasion. Since my husband and I did not out on Valentine’s Day, these were the perfect treat for our night in.

Since I filled the muffin cups a little more than I should have, I ended up with 21 cupcakes, and not a full 2 dozen. Despite the fact that the cupcakes baked through perfectly, the centers of most of them did not rise completely. Filling the cupcakes was easier then I thought, but I had a hard time following the “do not overfill” direction. I only used about half of the filling. I’m not sure if this is because my dimpled cupcakes had less room for filling, or because it’s a generous recipe.

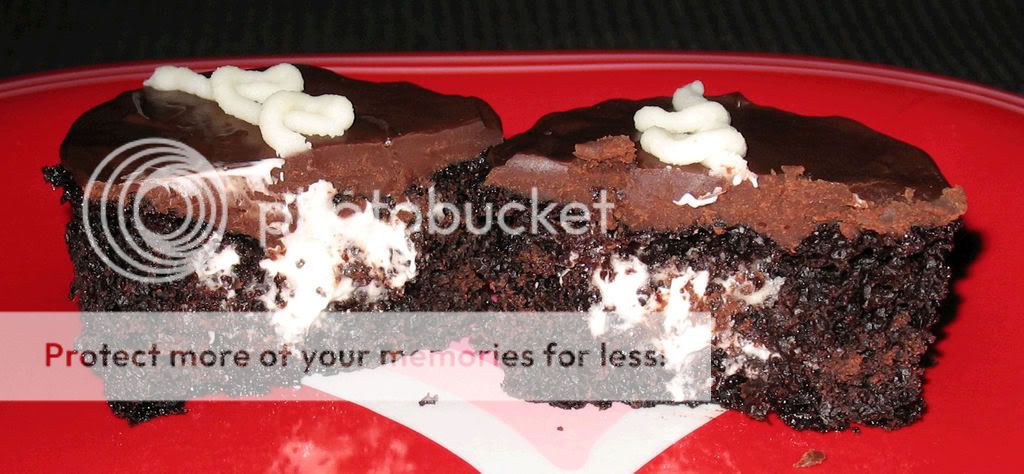
I ran into a little bit of trouble with the ganache topping. I think I let is cool a little too long, so it started to set up as I was still working on the cupcakes. Because of this, the ganache went on thickly and only a few of the cupcakes have a really glossy finish. The finished product still looked and tasted great.

This cream-filled cupcake recipe was pretty time-consuming to work through, simply because there were so many components. None of the steps are complicated, but you need to prepare the cupcakes, cream filling, ganache topping and decorator frosting. It’s a lot of work for one baking session. Next time, I will plan to bake and fill the cupcakes one day, and then top them with ganache and frosting the following day.

These cream-filled cupcakes were well worth the time I invested. The cupcake itself has a rich chocolate flavor, and a dense, moist consistency. The cream filling is a fun, sweet surprise and the bittersweet ganache topping is rich and smooth. I will be definitely be making these again!
Lulu’s Cream Filled Cupcakes

Yields 24 cupcakes

FOR THE CUPCAKES
1 1/4 cups all-purpose flour
2 tsp baking soda
2 tsp baking powder
1/4 tsp salt
1 1/4 cups granulated sugar
4 oz unsweetened chocolate, chopped
1 stick butter, cut into pieces
2 tsp vanilla extract
2 large eggs, lightly beaten

FOR THE FILLING
4 tbsp butter, at room temperature
1 cup confectioner’s sugar
2 tsp vanilla extract
3 tbsp heavy cream
1 cup marshmallow creme

FOR THE GANACHE AND ICING
6 oz bittersweet chocolate, chopped
1/2 cup heavy cream
1 stick, plus 1 tbsp butter
2 1/4 tsp vanilla extract
1 tbsp milk
2 cups confectioner’s sugar

1. Position a rack in the center of the oven and preheat to 350. Place paper liners in two 12-cup muffin pans.

2. Prepare the cupcakes. Sift together the flour, baking soda, baking powder and salt in a bowl.

Bring the sugar and 1 cup of water to a boil in a saucepan, stirring until the sugar dissolves, about three minutes. Pour into a large bowl; add the chocolate and butter and let sit, stirring occasionally, until the chocolate is melted and the mixture has cooled slightly. Stir in the vanilla.

Using a mixer, beat in the eggs, then mix in the dry ingredients.

3. Divide the batter evenly between the prepared pans (about 1/4 cup batter per cupcake) and bake until a toothpick inserted in teh center comes out clean, about 25 minutes. Cool in the pans for about 25 minutes, then transfer cupcakes to rack to cool completely.

4. Meanwhile, prepare the filling: Using a mizer, cream the butter until light and fluffy. Beat in 1/2 cup confectioners sugar. Add the vanilla and 1 tbsp heavy cream; beat until smooth. Beat in the remaining 1/2 cup confectioners sugar and 2 tbsp heavy cream in batches, alternating after each addition. Beat in the marshmallow creme; set aside.

5. Prepare the ganache: Place the chocolate in a stainless-steel bowl. Heat the cream and 1 tbsp butter until just boiling, then pour over the chocolate; let stand for 5 minutes. Whisk until smooth. Add 2 tsp vanilla; let stand until cool but still glossy and liquid.

6. Spoon the filling into a pastry bag wit a medium tip. Insert the tip into the center of each cupcake top; fill until the cupcake is heavier (do not overfill). Dip the cupcake tops in the ganache. Chill for at least 15 minutes.

7. Meanwhile, prepare the icing: using a mixer, beat the remaining 1 stick butter, 1/4 tsp vanilsl, the milk and confectioners sugar until smooth. Spoon into a pastry bag with a small tip; pipe onto the cupcakes to decorate.

Chocolate Mint Sorbet

Tuesday, February 10th, 2009

I was a relatively late adopter of the KitchenAid stand mixer. Just about everyone that I know registered for one when they got married. I looked at it and said “It’s big, heavy and expensive. Why would I possibly need it?” While I certainly could get by without it, I have come to love mine. Making breads, cookies and other concoctions is just so effortless. As Lisa’s husband said “You put things in, and food comes out.”

When I decided I was ready to jump on the KitchenAid bandwagon last fall, I researched prices and rebate deals. I was fortunate to catch the end of a fantastic rebate deal: purchase a KitchenAid Artisan Stand Mixer from anywhere but Bed Bath and Beyond and get a slicer/shredder attachment or ice cream maker attachment free.

Armed with a 20% off coupon, I visited my local Linen’s ‘n Things (right before they started their going out of business sale) and emerged with an Artisan Stand Mixer in Metallic Chrome. I happily filled out my rebate form, figuring that my ice cream maker attachment would arrive in time to make delicious frozen concoctions in the dead of winter.

I’ve been bookmarking ice cream, sherbet and sorbet recipes in anticipation of my gadget’s arrival. It arrived on Friday. I was so excited. I think my husband was amused by how much effort I put into deciding what I would make first.

Ultimately, I decided to make chocolate sorbet, using a recipe that Lisa gave me (originally from Recipezaar). since my husband and I love mint chocolate, I added 1/2 tsp of peppermint extract.

I was amazed at how easy it was to make this sorbet. After heating the base, I chilled it in the refrigerator for about four hours before processing it in the ice cream maker. After running the maker for 30 minutes, the sorbet had a soft-serve consistency, so I transferred it to a 2-quart airtight container and put it in the freezer.

Four hours later, we sampled the chocolate mint sorbet for the first time. Wow. It’s amazing that something with so few ingredients and so little preparation can be so decadent. The finished product has a smooth, dense, luxurious look and feel. It has a rich dark chocolate flavor (almost bittersweet) with a cool hint of mint. If you’re looking for a lighter flavored chocolate dessert, this is not the one for you. But, if you want a taste of intensely satisfying dark chocolate, I highly recommend it.

Chocolate Mint Sorbet

Yields 6 servings

1 cup cocoa
3/4 cup sugar
2 1/2 cups water
1 tsp vanilla extract
1/2 tsp peppermint extract

1. Combine all but vanilla in a saucepan.
2. Heat on medium, stirring frequently, until the mixture reaches a boil.
3. Turn off heat, and stir in vanilla and peppermint extract.
4. Chill in fridge for several hours.
5. Put in ice cream maker and run according to manufacturers directions until it reaches desired consistency.

The sorbet will have a soft-serve consistency. Sorbet will be firmer after several additional hours of freezing.

Whoopie Pies

Wednesday, February 4th, 2009

This past full, I stumbled across a Martha Stewart recipe for Mini Pumpkin Whoopie Pies. I love whoopie pies and was interested in trying to make them, but I wasn’t interested in her pumpkin filling. After searching several sites, I decided to use Martha Stewart’s recipe for the cookie and a traditional filling recipe from Epicurious.

I was so anxious to try these that I started preparing them at 9:30 on a weeknight. My husband was two hours into what was supposed to be a 20 minute conference call and I was bored, so baking seemed like the perfect remedy. My efforts were rewarded with a fun, delicious dessert.

For the cookie part, I barely diverted from the published recipe. I only make the cookies a little larger than proscribed size. The original recipe results in 20 mini whoopie pies (40 individual cookies), while I usually end up with 12 moderately sized whoopie pies (24 individual cookies).

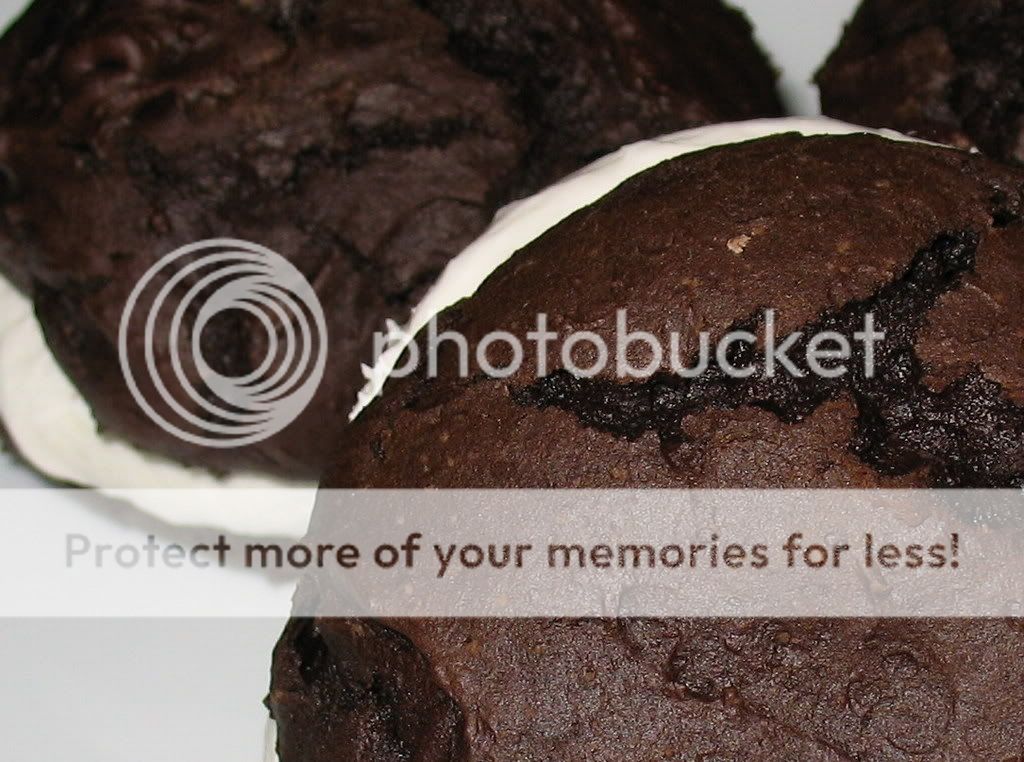
This time, I made my cookies a little too large and ended up with 18 individual cookies. The dough didn’t spread well and the tops of the cookies crackled quite a bit. This usually doesn’t happen. Despite the cracked appearance, they tasted great!

My filling differs slightly from the original recipe at Epicurious, in that I use a little bit more butter than called for.

The resulting whoopie pies are delicious! The cookies are have a rich cocoa flavor and a springy, cake-like texture. The filling is sweet and smooth. On it’s own (you have to lick the beaters when you’re done!) it can seem a little too sweet, but it’s just right when paired with the cocoa cookies.

I would imagine that these cookies would freeze well, but they’ve never lasted long enough for me to test that theory! Enjoy!

Whoopie Pies

Yields 24 cookies (enough for 12 pies)

For the cookies:
1 3/4 cups all-purpose flour
3/4 cup unsweetened cocoa powder (not Dutch-process)
1 1/2 tsp baking soda
1/2 tsp coarse salt
1 tbsp butter, softened
1/4 cup vegetable shortening
1/2 cup granulated sugar
1/2 cup packed dark-brown sugar
1 large egg
1 cup milk
1 teaspoon pure vanilla extract

For the filling:
5 tbsp butter, softened
1/4 cup vegetable shortening
1 1/4 cups confectioners sugar
2 cups marshmallow cream such as Marshmallow Fluff
1 teaspoon vanilla

1. Preheat oven to 375 degrees.
2. Sift together flour, cocoa powder, baking soda, and salt into a medium bowl; set aside.
3. Place butter, shortening, and sugars into the bowl of an electric mixer fitted with the paddle attachment. Mix on high speed until smooth, about 3 minutes.
4. Add egg; mix until pale and fluffy, about 2 minutes.
5. Mix in half the flour mixture, then the milk and vanilla.
6. Mix in remaining flour mixture.
7. Drop about 1 tablespoon of dough onto baking sheets lined with parchment paper, spacing 2 inches apart.
8. Bake until cookies spring back when lightly touched, 12 to 14 minutes.
9. Transfer baking sheets to wire racks and let cool 10 minutes. Remove cookies from baking sheets and transfer to wire racks using a spatula; let cool completely.
10. Make the filling: Beat together butter, confectioners sugar, marshmallow, and vanilla in a bowl with electric mixer at medium speed until smooth, about 3 minutes.
11. Once cookies have completely cooled, spread filling on flat side of one cookie and top with a second cookie.

Peppermint Bark

Sunday, December 28th, 2008

Peppermint bark is tasty, festive addition to your holiday treats. Pre-made peppermint bark can be purchased at many retailers, but it’s typically pretty pricey. With two bags of chips, 8 candy canes and less than an hour of your time, you can make this fun holiday treat at home.

Even though Christmas Day has come and gone, I’m still reveling in the Christmas season and will be preparing peppermint bark for a party this week. It’s not too late to give it a try!

If you melt the chocolate in the microwave, go low and slow so it doesn’t seize or scorch. White chocolate is particularly fussy. It’s always good to have an extra bag on hand, just in case. I usually start heating for 1 minute at 50% power and then heat at 30 second intervals, stirring in between, until it’s sufficiently melted.

Peppermint Bark

1 12 oz. bag white chocolate chips
1 12 oz. bag of milk or dark chocolate chips
8 candy canes
1/4 tsp peppermint extract (optional)

1) Line cookie sheet with wax paper.
2) Unwrap candy canes, place in zip-top bag and crush. Smaller pieces mix more easily and are less likely to fall off of the bark.
3) Melt milk chocolate in double-boiler or microwave.
4) If desired, mix 1/4 tsp. peppermint extract into melted milk chocolate.
5 Spread milk chocolate evenly over entire cookie sheet.
6) Place cookie sheet in freezer for approx. 20 minutes.
7) Once the milk chocolate has hardened, melt white chocolate.
8) Mix 1/2 of the crushed candy cane into the white chocolate.
9) Quickly spread melted white chocolate over the hardened milk chocolate.
10) Sprinkle remaining crushed candy canes on white chocolate, pressing lightly.
11) Return cookie sheet to freezer for at least 30 minutes. When chocolate has hardened, break up peppermint bark.

Mint Chocolate Fudge Brownies

Wednesday, November 19th, 2008

As much as I love to make things from scratch, I?m usually a brownies-from-a-box kind of girl. Grab a box of Betty Crocker mix, throw some sort of chocolate chips on top, and you have a warm, chocolate-y dessert with minimal effort in less than 45 minutes.

I was swayed to attempt making brownies from scratch after my friend Meg brought these amazing chocolate mint brownies for dessert. These brownies require more effort then their boxed counterparts, but resulting dessert is certainly worth it. Since we?ll be visiting with friends for dinner tonight, I opted to make a special dessert treat.

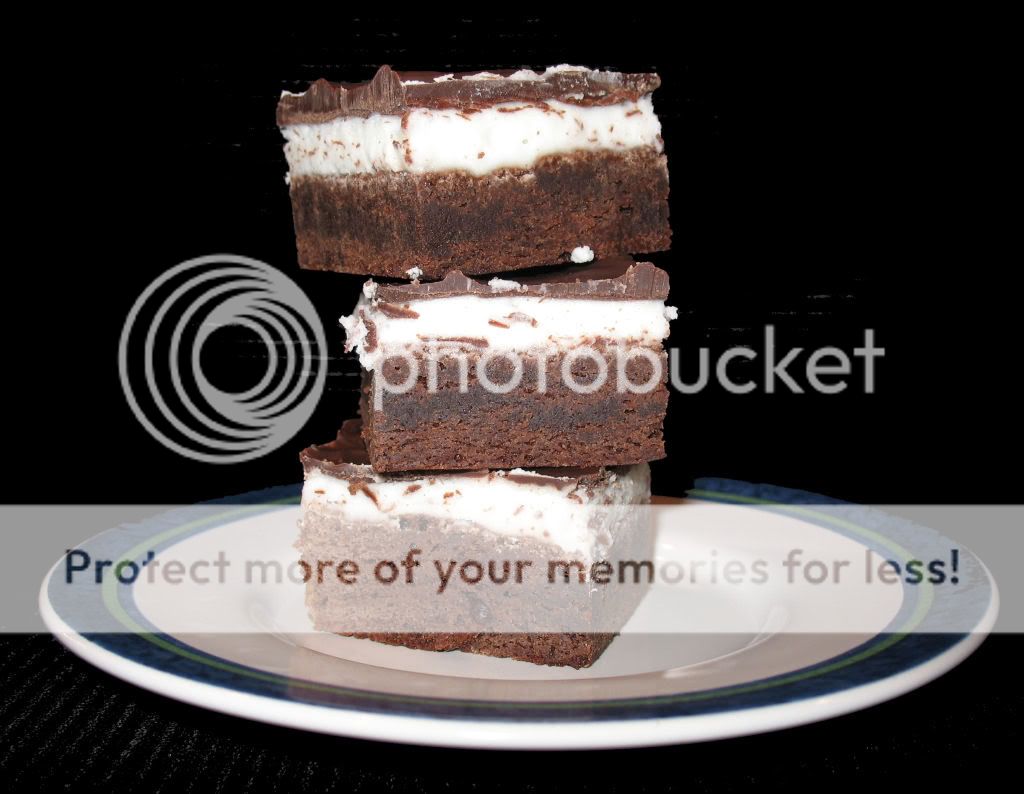
The dense fudge-like brownie is covered with a sweet peppermint frosting and topped with a layer of hardened chocolate. The resulting dessert is more like a piece of candy than a typical brownie. While the final dessert product doesn?t need to be refrigerated, I prefer to store the brownies in the refrigerator and serve them cold. Served straight out of the fridge, these brownies have the taste and consistency of a decadent slice of fudge.

When I received a copy of this chocolate mint brownie recipe from my friend, she had made a few alterations to the original. I have found that her modified measurements (more milk in the frosting, and more chips and butter in the topping) result in smooth, spreadable frosting and enough chocolate topping to easily cover the entire 9×9 surface. Without the changes, I would imagine that the frosting would be too stiff to spread easily and there wouldn?t be enough chocolate topping to cover the brownies. Besides, is it ever possible to have too much chocolate? :)

Mint Chocolate Fudge Brownies

Adapted from familyfun.go.com

Yields about 2 dozen brownies

Brownies
1/2 cup butter
4 ounces unsweetened chocolate
1 1/2 cups sugar
3 eggs
1 1/2 teaspoons vanilla extract
1 cup all-purpose flour
1/2 teaspoon salt

Mint Frosting
1/4 cup softened butter
2 1/2 cups confectioners’ sugar
4 to 5 tablespoons milk
1/2 teaspoon peppermint extract

Chocolate Topping
1 cup semisweet chocolate chips
4 tablespoons butter

Brownies
1. Heat the oven to 350? and grease a 9-inch square baking pan. (lining with foil and coating the foil in cooking spray works well too)
2. For the brownies, place the butter and chocolate in a microwave-safe bowl. Microwave on high for 1 minute, stir, and microwave for 1 minute more. Stir until smooth.
3. In a separate bowl, whisk together the sugar and eggs.
4. Stir in the chocolate and the vanilla extract.
5. Stir in the flour and salt until thoroughly combined. Pour into the prepared pan, then bake for 25 minutes or until a knife inserted in the middle comes out clean. Cool for at least 1 hour.

Mint Frosting
1. Cream the butter and confectioners’ sugar.
2. Add the milk 1 tablespoon at a time, beating until it is smooth and spreadable.
3. Beat in the peppermint extract.
4. Frost the cooled brownies, cover, and chill in refrigerator for at least1 hour.

Chocolate Topping
1. Pour the chips into a microwave-safe bowl, add the butter, and microwave on high for 1 1/2 minutes or until the chocolate melts.
2. Stir until smooth.
3. Pour the chocolate over the brownies and smooth it with a knife. Refrigerate for 45 minutes or until the coating hardens.

Once the coating has hardened, cut the brownies into 24 pieces. When packaging brownies, place wax paper between layers of brownies to prevent sticking.