Authors
Beth
Kathleen
Lisa
Contact
domesticpursuits [at] gmail.com
Categories

Posts Tagged ‘Whoopie Pies’

Pumpkin Whoopie Pies

Friday, October 28th, 2011

Pumpkin Whoopie Pies

In addition to loving just about all things pumpkin, I am also posses an unabashed affection for whoopie pies.  While I have sample many varieties of this fun treat, I had yet to try pumpkin.  My search for the perfect pumpkin whoopie pie recipe led me to Two Fat Cats Bakery in Portland, Maine.   The state of Maine, and this bakery in particular, is know for its whoopie pies.

The filling recipe called for maple extract, which I was unable to find.  I substituted maple syrup and a little vanilla extract, which imparted a warmth and sweetness.

I can’t say enough good things about these pumpkin whoopie pies!  The cakes are soft, fluffy and tender.  The maple filling is surprisingly light in both texture and taste, but holds up very well as a filling. Paired together, the lightly sweet filling beautifully complements the warmly spiced cakes.  I’m happy to say that these pumpkin whoopie pies have earned a place in my regular fall baking rotation!

Pumpkin Whoopie Pies
Yields 18-23 Pies

For the Cakes
3 cups all purpose flour
2 tsp ground cinnamon
1 1/2 tsp baking powder
1 1/2 tsp baking soda
3/4 tsp salt
3/4 tsp ground nutmeg
3/4 tsp ground cloves
6 tbsp (3/4 stick) unsalted butter, room temperature
3/4 cup (packed) golden brown sugar
3/4 cup sugar
1/2 cup vegetable oil
3 large eggs
1 15-ounce can pure pumpkin puree
1/2 cup milk
Nonstick vegetable oil spray

For the Filling
1 cup powdered sugar, sifted
1 cup (2 sticks) unsalted butter, room temperature
1 7-ounce jar marshmallow creme
2 tbsp maple syrup
1/2 tsp vanilla extract

Cakes
1. Sift first 7 ingredients into large bowl.
2. In another large bowl, beat butter and sugars with an electric mixer until well blended.
3. Gradually beat in oil and then add eggs 1 at a time, scraping down bowl and beating to blend between additions. Beat in pumpkin.
4. Add half of the dry ingredients, followed by the milk and then the remainder of the dry ingredients. Between additiona, beat to blend and scrape down the sides of the bowl.
5. Cover and chill batter 1 hour.
6. Preheat oven to 350°F, arranging one rack in bottom third of oven and one rack in top third of oven. Line 2 baking sheets with parchment and spray lightly with nonstick spray.
7. Spoon batter onto baking sheet to form cakes (about 3 level tablespoons each), spacing apart. Let stand 10 minutes.
8 Bake cakes until tester inserted into centers comes out clean, about 20 minutes, rotating sheets halfway through baking.
9. Cool cakes completely on baking sheets on rack. Using metal spatula, remove cakes from parchment.
10. Line cooled baking sheets with clean parchment; spray with nonstick spray, and repeat baking with remaining batter.

Filling
1. In a large bowl, beat sugar and butter with an electric mixer until fluffy, about 2 minutes.
2. Add marshmallow creme and maple extract, beating until blended and smooth. Store at room temperature.

Assembly
1. Spoon about 2 tablespoons filling on flat side of 1 cake.
2. Top with another cake, flat side down.
3. Repeat with remaining cakes and filling.

Source: Two Fat Cats Bakery via Bon Appetite

Mint Whoopie Pies

Monday, February 7th, 2011

There’s a movement underway in the state of Maine to anoint the whoopie pie as its official  state dessert. Apparently, there’s concern that whoopie pies are not a heathly food (Really?  It’s dessert.) and that blueberry pie may be a better option.  As part of a high school class that petitioned the Massachusetts legislature to make Boston Cream Pie the state dessert, I’m familiar with the divisive passions that can be ignited by dessert.

But really, what’s not to love in a whoopie pie?  There’s the delicious tender chocolate exterior – the perfect cross between a cookie and cake.  And then there’s the frosting…oh the frosting.  As one who has been known to eat frosting by the spoonful(s), I love the fact that whoopie pies are an excellent “frosting delivery vehicle” and see that as a plus, rather than the negative purported by a Maine state representative.

This is the third whoopie pie recipe to be posted on Domestic Pursuits.  But can you really have too many delicious dessert options?  This particular recipe from Grin and Bake It uses buttermilk in the cookie.  In the past, I have always substituted skim milk and lemon juice, rather than making a special purchase of buttermilk.  Never again!  It imparts a slight tang to the rich cookie and gives it an amazingly tender consistency.  I opted to stick with my favorite whoopie pie filling recipe, as you can’t have a whoopie pie without marshmallow Fluff.  For those of you outside the reaches of Fluff’s distribution, I’m sorry.  But, you can certainly subsitute marshmallow cream.

Looking for a slight twist on an old favorite, I opted to make my frosting minty.  Since I had some leftover candy canes lying around, I crushed several to a fine powder in my food processor and mixed that into the frosting.  Not only did the crushed candy add a hint of mint, it gave the frosting a pretty hue.

Looking for more sweet treats?  Check out Saturday Sweets on Sweet As Sugar Cookies.

Mint Whoopie Pies
Yields approximate 8 whoopie pies (16 cookie rounds)

For the cookies:
2 cups all-purpose flour
1/2 cup Dutch-process cocoa powder
1 1/4 tsp baking soda
1 tsp salt
1 cup well-shaken buttermilk
1 tsp vanilla
1 stick (1/2 cup) unsalted butter, softened
1 cup packed brown sugar
1 large egg

1.  Preheat oven to 350°F.
2. In a small bowl, whisk together flour, cocoa, baking soda, and salt.
3. In another small bowl (or liquid measuring cup), stir together buttermilk and vanilla.
4. In a large bowl, beat together butter and brown sugar at medium-high speed until pale and fluffy. (3 minutes with a stand mixer, 5 minutes with a handheld)
5. Add the egg, beating until well-combined.
6. Reduce speed to low and alternately mix in flour mixture and buttermilk in batches. Start and finish with the flour, scraping down side of bowl occasionally.
7. Spoon mounds of batter about 2 inches apart onto 2 parchment-lined baking sheets. 8. Bake for 11-13 minutes. When cookies are done, the tops will spring back when pressed lightly. Cook completely on a wire rack.

For the frosting:
5 tbsp butter, softened
1/4 cup vegetable shortening
1 1/4 cups confectioners sugar
2 cups marshmallow cream, such as Marshmallow Fluff
1 teaspoon vanilla
4-6 candy canes, ground to a powder

1. In a large bowl, beat together butter, shortening, marshmallow and vanilla with an electric mixer at medium speed until smooth.
2. Gradually beat in the confectioners sugar, beating until smooth. If frosting is too stiff, add water, 1 tsp at a time, until desired consistency is achieved. If frosting is too soft, add small amounts of confectioners sugar until desired consistency is achieved.
3. Add crushed candy cane to the frosting, mixing until just combined.

Assemble the whoopie pies: Spread frosting on the flat side of one cookie and top with another cookie to make a sandwich.

Peanut Butter Whoopie Pies

Wednesday, August 18th, 2010

For my husband’s birthday, I decided to go off the beaten path a little bit – rather than making cake, I baked whoopie pies!  I’ve been meaning to give them a try for a while now…and as my husband loves all things peanut butter and chocolate related, I figured this recipe would be a winner!  I’ve got to give Martha props here – I didn’t change much about the cookie recipe, except that I did not have shortening on hand and substituted all butter.  The chocolate cookie part of the pie was absolutely perfect - moist, cake-y and rich, yet held up well to the sandwich-forming process critical to the whoopie pie construction.  I did make several modifications to the filling – I simply love the marshmallow-y taste of a classic whoopie pie – so rather than use a straight peanut butter frosting as Martha did, I substituted some peanut butter into a recipe for the classic marshmallow frosting.  It came out fantastic – reminded us of the inside of a Reese’s peanut butter cup.  I highly recommend using parchment as directed with this recipe.  Warning – this is most definitely NOT a health food…but good for the soul!  (As an aside – if you prefer plain whoopie pies – just increase the butter to 1/2 cup and leave out the peanut butter.)

Peanut Butter Whoopie Pies – Adapted from Martha Stewart, marshmallowfluff.com

Ingredients – for the Cookies:

  • 1 3/4 cups all-purpose flour
  • 3/4 cup unsweetened cocoa powder, not Dutch-process
  • 1 1/2 teaspoons baking soda
  • 1/2 teaspoon coarse salt
  • 1/4 cup butter
  • 1/2 cup granulated sugar
  • 1/2 cup packed dark-brown sugar
  • 1 large egg
  • 1 cup milk
  • 1 teaspoon pure vanilla extract
  • Preheat oven to 375.  Sift together the flour, cocoa, baking soda, and salt in a bowl.  In a separate bowl (or a stand mixer if you have one) combine the butter and sugars.  Beat until smooth and fluffy – which for me was about 2-3 minutes.  Make sure to scrape down the bowl intermittently to ensure good mixing!  Then add the egg, mixing for an additional 2 minutes until well combined and light.  Next add about half of the dry ingredients, stirring to incorporate the dry ingredients into the wet.  Scrape down the sides of the bowl as needed.  Add the milk and vanilla, mixing to combine ingredients evenly.  Finally mix in the remaining half of the dry ingredients.  Drop the batter by rounded tablespoons onto a cookie sheet, covered in parchment, and bake in a preheated oven for 12 minutes or until the center springs back when lightly pressed.  Cool completely on a wire rack before proceeding to filling.

    Ingredients – for the Frosting

  • 1/4 cup butter
  • 1/4 cup peanut butter
  • 1 cup confectioners’ sugar
  • 1 cup marshmallow creme (I highly recommend ‘Marshmallow Fluff’)
  • 1 teaspoon pure vanilla extract
  • Beat together butter, peanut butter, confectioners’ sugar, and vanilla until the mixture is smooth.  Spread frosting onto the flat side of a cookie, and press another cookie on top to form the completed pie.  Enjoy!

Whoopie Pies

Wednesday, February 4th, 2009

This past full, I stumbled across a Martha Stewart recipe for Mini Pumpkin Whoopie Pies. I love whoopie pies and was interested in trying to make them, but I wasn’t interested in her pumpkin filling. After searching several sites, I decided to use Martha Stewart’s recipe for the cookie and a traditional filling recipe from Epicurious.

I was so anxious to try these that I started preparing them at 9:30 on a weeknight. My husband was two hours into what was supposed to be a 20 minute conference call and I was bored, so baking seemed like the perfect remedy. My efforts were rewarded with a fun, delicious dessert.

For the cookie part, I barely diverted from the published recipe. I only make the cookies a little larger than proscribed size. The original recipe results in 20 mini whoopie pies (40 individual cookies), while I usually end up with 12 moderately sized whoopie pies (24 individual cookies).

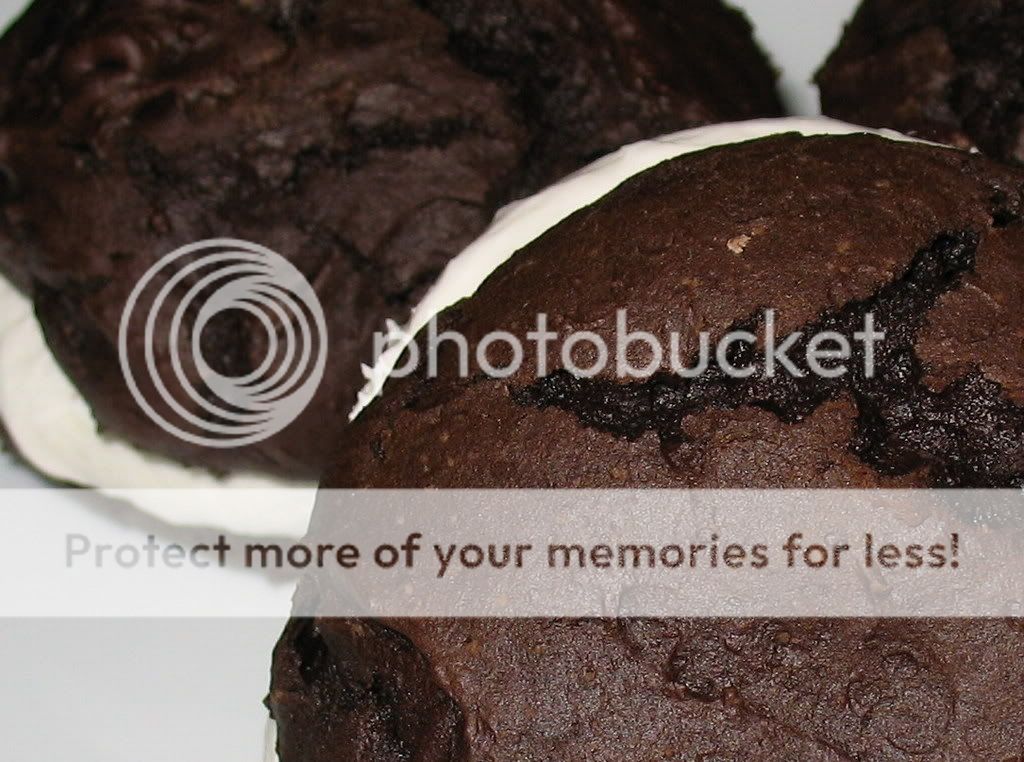
This time, I made my cookies a little too large and ended up with 18 individual cookies. The dough didn’t spread well and the tops of the cookies crackled quite a bit. This usually doesn’t happen. Despite the cracked appearance, they tasted great!

My filling differs slightly from the original recipe at Epicurious, in that I use a little bit more butter than called for.

The resulting whoopie pies are delicious! The cookies are have a rich cocoa flavor and a springy, cake-like texture. The filling is sweet and smooth. On it’s own (you have to lick the beaters when you’re done!) it can seem a little too sweet, but it’s just right when paired with the cocoa cookies.

I would imagine that these cookies would freeze well, but they’ve never lasted long enough for me to test that theory! Enjoy!

Whoopie Pies

Yields 24 cookies (enough for 12 pies)

For the cookies:
1 3/4 cups all-purpose flour
3/4 cup unsweetened cocoa powder (not Dutch-process)
1 1/2 tsp baking soda
1/2 tsp coarse salt
1 tbsp butter, softened
1/4 cup vegetable shortening
1/2 cup granulated sugar
1/2 cup packed dark-brown sugar
1 large egg
1 cup milk
1 teaspoon pure vanilla extract

For the filling:
5 tbsp butter, softened
1/4 cup vegetable shortening
1 1/4 cups confectioners sugar
2 cups marshmallow cream such as Marshmallow Fluff
1 teaspoon vanilla

1. Preheat oven to 375 degrees.
2. Sift together flour, cocoa powder, baking soda, and salt into a medium bowl; set aside.
3. Place butter, shortening, and sugars into the bowl of an electric mixer fitted with the paddle attachment. Mix on high speed until smooth, about 3 minutes.
4. Add egg; mix until pale and fluffy, about 2 minutes.
5. Mix in half the flour mixture, then the milk and vanilla.
6. Mix in remaining flour mixture.
7. Drop about 1 tablespoon of dough onto baking sheets lined with parchment paper, spacing 2 inches apart.
8. Bake until cookies spring back when lightly touched, 12 to 14 minutes.
9. Transfer baking sheets to wire racks and let cool 10 minutes. Remove cookies from baking sheets and transfer to wire racks using a spatula; let cool completely.
10. Make the filling: Beat together butter, confectioners sugar, marshmallow, and vanilla in a bowl with electric mixer at medium speed until smooth, about 3 minutes.
11. Once cookies have completely cooled, spread filling on flat side of one cookie and top with a second cookie.

Subscribe
Email Registration  Email
  RSS
Recipe Sites
  • All Recipes
  • Cooking Light
  • Epicurious
  • Food Network
Archives
Sitemeter