Authors
Beth
Kathleen
Lisa
Contact
domesticpursuits [at] gmail.com
Categories

Archive for the ‘Breakfast’ Category

Pumpkin Scones

Thursday, October 27th, 2011

So I really love the Pumpkin Scones that are available this time of year at Starbucks – I do not however like the impact they have on my wallet.  A few bucks every time I pick up an afternoon coffee really starts to add up!  This year I set out to find a Pumpkin Scone recipe that would be delicious, yet not cause me to drop those extra few dollars every time I go for a coffee run this fall.  This recipe is a winner.  It’s quite easy and the scones come out light and fluffy.  I cannot vouch for healthiness – but really, doesn’t one mostly eat scones because they are good for the soul?  These ones are particularly good for enjoying with afternoon tea by a warm fire. 

The first time I made these, I assembled the dough entirely in my food processor – which worked quite well indeed, particularly for ensuring even butter distribution.  The second time just for kicks I tried making it in my stand mixer, which also came out quite well although I did have a few larger chunks of butter left over.  It didn’t seem to affect the scones in any way though.  I can honestly recommend both manners of constructing these scones.  I also will emphasize the importance of baking on parchment – this prevented the scones from caramelizing on the bottom. 

I really didn’t make any major substitutions the first time, except for leaving out cloves and ginger again (darn it, I really need to pick up ground ginger!), and also completely eliminating the glaze as I prefer my scones to be not quite so sugary.  I also added chocolate chips, because who does not like chocolate chips!  The second time, I realized I didn’t have any half and half, milk, or cream on hand – so I ended up using non-dairy flavored coffee creamer (this one happened to be caramel) which added a little extra something to the flavor.  The texture still was perfect.  Also, I was going for more of a breakfasty treat this time, so left out the chocolate chips.  Don’t be afraid to experiment!  We would love to hear about a modification you try to one of these recipes.

Pumpkin Scones – adapted from Sweet Pea’s Kitchen

For the Scones:

  • 2 cups all-purpose flour
  • 1/4 cup plus 3 tablespoons granulated sugar
  • 1 tablespoon baking powder
  • 1/2 teaspoon salt
  • 1/2 teaspoon ground cinnamon
  • 1/2 teaspoon ground nutmeg
  • 6 tablespoons cold butter, cut into 1-inch cubes
  • 1/2 cup pumpkin puree
  • 3 tablespoons milk/half and half/non-dairy coffee creamer (flavored is fine!)
  • 1 large egg
  • Additional milk and sugar for dusting

Preheat oven to 425 degrees F.  Mix dry ingredients (flour, sugar, baking powder, salt and spices) together the bowl of your stand mixer (or food processor – or really any large bowl if you would rather do this by hand!)   Mix dry ingredients well.  Add cubed cold butter to the dry ingredients and turn on your stand mixer/food processor (or use a pastry cutter to cut the butter into the dry ingrediends by hand) until the butter is broken into small pieces and the mixture resembles the texture of cornmeal.  In a separate bowl, whisk together pumpkin, egg, and milk (or whatever substitute you pick).  Gently fold the liquid ingredients into the dry ingredients. (The key to flaky light scones is not overworking the dough; I used the food processor for this step the first time and they came out fine, and I used the stand mixer on low for this step the second time.)  Turn the dough out onto a lightly floured surface and pat into a 2 x 6-8inch diameter circles of dough, about 1 inch thick.  Cut each circle of dough into 8 pieces.  Place on a parchment-lined baking sheet.  Brush each scone with a light coating of milk (or whatever substitute you pick) and sprinkle lightly with sugar.  Bake at 425 degrees F for about 12-14 minutes, or until the tops are lightly browned.  Enjoy!

Pumpkin Waffles with Apple Cider Syrup

Monday, October 24th, 2011

This is seriously my favorite fall breakfast dish ever.  Ever.  I found the recipe in the Gooseberry Patch Pumpkin Cookbook which I had downloaded on a whim onto my Kindle – it’s a pretty awesome little cookbook.  This recipe combines all the things I love about fall flavors with all the things I love about waffles – they are delicious and light and crispy on the outside, and have a lovely sweet-spicy flavor perfect for a cool autumn morning.  It also makes enough waffles for a small army; this recipe easily fed 6 adults at a recent brunch, and we still had 3 belgian-sized waffles leftover for later.  I have one of those rotating waffle-bakers popular in college cafeterias the world over, and it’s seriously one of my favorite appliances in the kitchen.  I made this once with pumpkin puree that I made myself, and the second time I used puree from a can – both times they were perfect.  I did make a few teeny modifications – I typically don’t keep ground cloves in my pantry as they just really don’t get enough play in my cooking, and additionally I was out of ground ginger.  So, those were just eliminated entirely.  And that’s about it for modifications - the second time, I did realize that I was out of milk as I was nearing completion for the recipe – so I swapped out the milk for water and the waffles still tasted perfect.

I also made my own syrup for these delicious pumpkin waffles.  This recipe, also from the Gooseberry Patch Pumpkin Cookbook is fantastic.  I was a little bit intimidated by making my own syrup, truth be told.  Turns out, it’s actually pretty easy – take something sweet and delicious, add some sugar, and reduce.  And poof – you have made your own syrup.  The apple cider on top of the pumpkin waffles is the perfect finish for these already delicious waffles.  I’m sure they would also be delicious with maple syrup too…but give the whole package a try – it really is quite easy, and you will not be disappointed.

Pumpkin Waffles – from Gooseberry Patch Pumpkin Cookbook

  • 2 and 1/4 cups flour
  • 1/4 cup brown sugar
  • 4 tsp baking powder
  • 1 and 1/2 tsp cinnamon
  • 1 tsp nutmeg
  • 4 eggs, separated
  • 2 cups milk (or water, if you happen to be out of milk as I was)
  • 1 cup pumpkin puree
  • 1/2 stick of butter, (1/4 cup) melted

Conbine flour, brown sugar, baking powder and spices in a large bowl.  Set aside.  Combine egg yolks, milk and pumpkin in a second large bowl.   Stir in wet ingredients into dry ingredients.  Stir in melted butter.  Beat egg whites using an electric mixer until soft peaks form.  Fold egg whites into the batter until well combined.  Bake using a preheated waffle baker.  Serve warm with apple cider syrup.

Apple Cider Syrup - from Gooseberry Patch Pumpkin Cookbook

  • 3/4 cup apple cider
  • 1/2 cup brown sugar
  • 1/2 cup corn syrup
  • 2 tablespoons butter
  • 1/2 teaspoon lemon juice
  • 1/8 teaspoon cinnamon
  • 1/8 teaspoon nutmeg

Combine all ingredients in a medium saucepan.  Simmer over medium heat until reduced and liquid appears thick and bubbly.  Let cool slightly before serving on top of waffles.

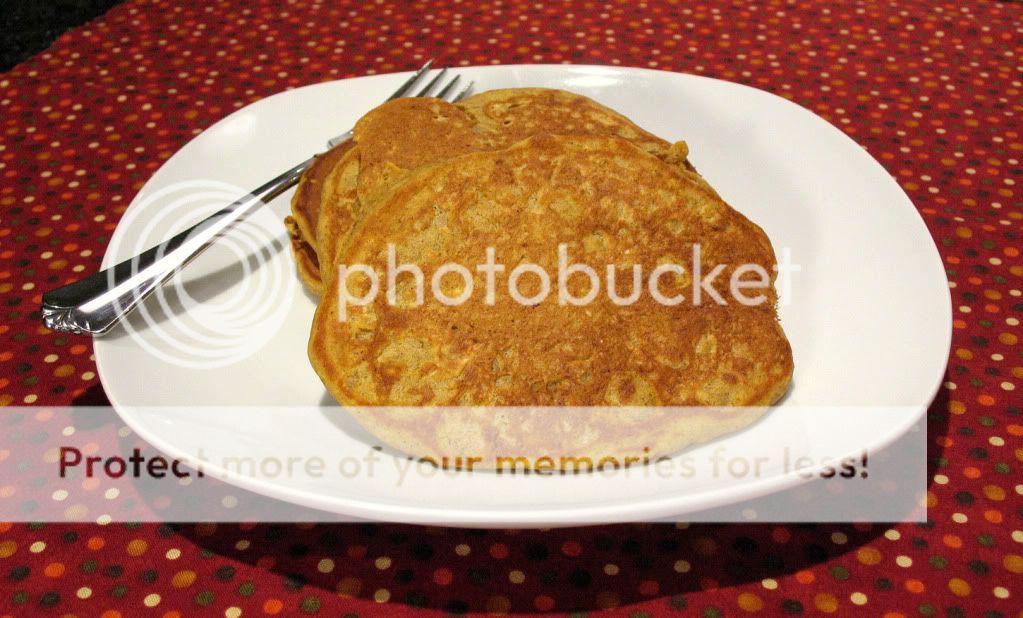
Cinnamon Bun French Toast and Turkey Sausage

Thursday, August 25th, 2011

Ok so I am combining two ’30-while-30′ dishes into one post because that’s how we enjoyed them.  I think this actually makes a really good breakfast combination – the sweetness of the french toast can be a little overwhelming, but with the spicy sausage by its side it was just about perfect.  I fell in love with cinnamon bun french toast at a little cafe in Wayne, PA called ‘Nudy’s’ – it’s not what you think, it’s actually a very sweet little gourmet breakfast cafe with a lovely outdoor seating section and to-die-for eggs benedict and french toast.  My favorite dish has always been the cinnamon bun french toast – it’s super healthy, obviously, but absolutely delicious.  We once drove from Philly 40 minutes each way just to have this for breakfast.  (As I write this from New England, I am debating driving 5 hours just for cinnamon bun french toast.  It’s that good.)  This recipe was a close-enough approximation – it’s not quite the same, mostly because I used those cinnamon rolls that come out of a tube from the grocery store, so the french toast pieces were very small.  However, they did have the flavor pretty spot-on.

I made turkey sausage because my husband loves all manners of breakfast sausage however I never know exactly what goes into most commercially available sausages so I nearly never order it or buy it when I’m out.  One thing is for sure, I’m sure that long list of ingredients contains some things that are not all good.   I figured making my own I would know exactly what went into it, and therefore would also know that it’s not sooooo bad for me.  It basically just requires a package of lean ground turkey and some spices, and poof you have breakfast sausage.  I personally added more spices than the recipe called for and it was delicious.  If you really wanted to fuss with casings and whatnot, be my guest, but we figured making sausage patties was the way to go.

Cinnamon Bun French Toast

Adapted from Pillsbury.com

  • 1 tube of ready-to-bake cinnamon buns
  • 2 eggs
  • 2/3 cups milk

Bake cinnamon buns according to package directions.  Let buns cool, then slice in half crosswise.  Beat together eggs and milk.  Dip each cinnamon bun half in the egg mixture, allowing it to sit for several seconds to absorb.  Cook over medium heat until the slices appear golden.  Drizzle with frosting and enjoy!

Turkey Breakfast Sausage

Adapted from Judy, via allrecipes.com

  • 1 pound lean ground turkey
  • 3/4 teaspoon salt
  • 1/2 teaspoon ground sage
  • 1/2 teaspoon ground mustard
  • 1/4 teaspoon dried thyme

Combine all ingredients in a large bowl, mixing well.  Create small patties.  Cook over medium heat until all the pink is gone from the meat.  Enjoy!

Eggs Benedict

Sunday, August 21st, 2011

Eggs benedict has been a favorite breakfast item of mine for years, but it always seemed way too complicated to make at home.  In case you have never tried this out at your local breakfast stop, Eggs benedict consists of canadian bacon and poached eggs atop an english muffin, topped with hollandaise sauce.  To some extent, it is a challenge - I definitely had to learn how to poach eggs, and also how to make hollandaise sauce for this recipe, however man was it worth it – I think it may have been tastier than it is at the local diner.  As with a couple of my dishes on my 30-while-30 list, I actually made this twice over the last year, yet am blogging about it in the 11th hour, as the first time the hollandaise sauce was far too difficult - I first used my go-to chef Alton Brown’s method but A) making a homamade english muffin?  Really?  and B) honestly who at 8 in the morning has time to move a skillet on and off of a warm burner for several minutes at a time all while whisking?  Not me. 

So, instead, I did some searching and came up with this much easier way to make hollandaise sauce.  It took me about 5 hands-off minutes with my trusty food processor.  It was just as delicious, however, as my first try.  I used pasteurized eggs to increase the food safety aspect of this dish, as the sauce is not really cooked.

The other secret to making a delicious eggs benedict is making a well-poached egg.  This took me a few attempts to figure out, but I finally seem to have a good method.  The way that worked best for me is to start a large deep saucepan of water simmering – not boiling – over medium heat.  I added some vinegar to the water, which helps the outside of the egg whites to come together faster so that your poached egg doesn’t turn into egg-drop soup.  I cracked an egg into an individual bowl, then slid that into a ladle.  Then I slowly lowered the egg in the ladle into the simmering water bath and gently let the egg slide out of the ladle.  It takes about 2-3 minutes to get a soft poached egg, such as you would likely want with eggs benedict. 

Now that I’ve finished blogging about this, I think I may actually go make it for breakfast again.  It’s that good.

Eggs Benedict

(Hollandaise sauce from Elise via Simplyrecipes.com)

  • 4 english muffins
  • 8 slices of canadian bacon
  • 8 eggs to poach
  • 3 egg yolks
  • 1 stick of butter, salted
  • Juice of 1 lemon (about 1 tablespoon)
  • 1 pinch of cayenne pepper (optional)

In a small saucepan, melt the stick of butter over low heat so that it doesn’t boil off all the moisture in the butter.  To make the hollandaise sauce, place egg yolks and lemon juice in a food processor or blender.  Turn it on and combine until the mixture starts to appear slightly lighter in color.  At this point, slowly drizzle in the melted butter.  The mixture will thicken up and your hollandaise at this point is done!  Start a large at least 3 inch deep saucepan of water heaing with a small amount (2-3 tablespoons) of vinegar.  When it just barely starts to simmer, reduce the heat – you want tiny bubbles coming up from the bottom of the pan, not a roiling boil here.  Lower each egg gently into the water bath - I use a ladle for this, and gently slid the egg of when it was already in the water bath.  Poach for about 2-3 minutes for a soft egg yolk, longer if you want firmer egg yolks.  To assemble your finished product, split english muffins and lightly toast.  Fry canadian bacon in a large skillet over medium heat until it starts to appear browned.  Layer an english muffin half at the bottom, topped wtih a slice of canadian bacon, a poached egg, and a tablespoon or two of hollandaise for a delicious (easy!) breakfast, and Enjoy!

Peach Ginger Preserves

Thursday, August 18th, 2011

So until I took on this 30-while-30 post, I had never canned anything.  I was rather intimidated by the whole process, mostly because I didn’t understand how it worked.  However, making preserves was enough of an impetus for me to figure it out.  I will caveat this with you absolutely do NOT have to can these preserves – in fact, they are so delicious you likely will finish them in a very short period of time, and therefore not need to can them – however, it’s a really fun treat to pull homemade preserves out of the pantry, say for a tea party with a friendly co-blogger.   It is very, very easy to make your own preserves – basically you just boil fruit with some sugar and voila – preserves. 

When I tackled this process, I figured if I am taking the time to make my own preserves, I would go off the beaten track and make a flavor I couldn’t find at my local grocery purveyor.  Ginger peach preserves sounded just about perfect – particularly because they do not include pectin, and I am still a little intimidated by using pectin.  I cut the amount of sugar in the recipe by over half, and also omitted the allspice because I just didn’t think the recipe really needed it.  It came out absolutely fantastic – the spice of the ginger goes very well with the sweet peaches, and add that little something extra to make this spread stand out.  These preserves happen to go absolutely perfect with Beth’s orange chocolate chip scones.  Try it, you will not be disappointed.  They also go very well with crumpets, english muffins, on vanilla ice cream, and nearly anything else. 

Ginger Peach Preserves

From Mirj via food.com

  • 3 lbs peaches
  • 1 cup granulated sugar
  • 3 tablespoons finely chopped fresh ginger
  • 2 teaspoons lemon juice

In a pot of boiling water, drop peaches to cook for about 1 minute, or until the skins loosen.  Remove from the boiling water and immediately immerse into a waiting ice bath.  Remove peach skins and chop into small uniform pieces.  Add the peaches, sugar, ginger, and lemon juice to a thick bottomed skillet and cook for about 30 minutes or until the mixture appears thickened.  Cool and enjoy!!

If you plan on canning these preserves – I found this guide to be particularly helpful.  I processed (boiled) mine for 15 minutes in the jars.  Good luck!

Beer Pancakes

Monday, August 1st, 2011
Ok, have you ever thought in practice something sounds tasty, but then when it’s actually go-time…the finished product is ‘meh’ at best?  I’ve gotta tell you, I am in the ‘meh’ camp regarding beer pancakes.  I love, love, love beer – so it’s not that I didn’t know what I was getting into.  My husband and I are amateur beer snobs and we’ve met many a food item created with it.  But, well, pancakes?  It just didn’t work for me. (Where did I even get the inspiration for this, you ask?  We picked up a beer newsletter at our favorite beer distributor in Philadelphia, Bella Vista, just before we relocated to New England and beer pancakes was a recipe in it I thought sounded fantastically interesting.  Of course, then we moved, and I lost it, and had to go finding this recipe to substitute.)   

They still looked pretty tasty.

Now, if you insist on trying this - I would highly recommend using a beer that is very light on hops, and heavy on the malt.  Perhaps if you have a good belgian beer you wouldn’t mind sacrificing, that would work. (Maybe this was our problem??  We tend to drink our good Belgian beers.)  We used a porter, which I thought would be okay – turns out, it just sort of tasted like we made our pancakes with beer.  The flavor was rather…frat-house on a Sunday morning.  If you really must, though, here is the recipe I used.

Beer Pancakes

Adapted from chubbylittletoro, via Allrecipes.com

  • 1 cup sifted all-purpose flour
  • 1/4 cup white sugar
  • 3/4 teaspoon baking powder
  • 1/2 teaspoon salt
  • 1 egg, beaten
  • 1 cup beer
  • 2 tablespoons butter, melted
  • Combine flour, sugar, baking powder and salt in a large bowl.  Stir in the egg, beer and butter until well combined.  Head a skillet over medium heat, and drop about 1/4 cup at a time onto the griddle.  Cook on one side until bubbles start to appear on the pancake surface, then flip and cook until golden.  Serve with butter and maple syrup.  Enjoy…?

    Homemade Chocolate Walnut Spread – (wal)nutella

    Saturday, February 26th, 2011

    I almost never buy Nutella and here’s why: if we have some in our pantry, it’s gone within 2 or 3 days.  I absolutely love the chocolatey, nutty flavors and enjoy it on everything from bagels to fruit.  It’s a sure way to ruin any healthy eating kick I start.  Lately, however, I’ve really been in the mood for some of the tasty treat - probably because of this recipe on Smitten Kitchen a few weeks back – and it got me thinking about how great other types of nuts would be in a similar chocolate spread.  Why let peanuts, almonds and hazelnuts have all the fun with chocolate?  I personally happened to have walnuts on hand, and so I decided to give making homemade chocolate walnut spread a try. 

    While I didn’t have quite all the things to make the recipe as stated in the link above, I did (surprisingly to me) have all of the ingredients for this version, courtesy of Martha Stewart.  It was a breeze to make, although it most definitely requires a food processor.  I also hate using a double boiler (it just seems very labor intensive and every time I use one it makes a mess) so I cheated and used the microwave to melt the chocolate.  It was a little liquidy at first, but we put it in the fridge and it set into the perfect texture in short order.  It turned out great – and was much, much easier I imagine.  The walnuts give a fantastic flavor but I imagine this recipe would work great with any manner of nut.

    …and in case you’re wondering, so far we’ve had this in the house for 2 days, and it is literally 50% gone. 

    Chocolate Walnut Spread

    adapted from Martha Stewart

  • 2/3 cup walnut pieces
  • 3/4 cup sweetened condensed milk
  • 1/2 cup semisweet chocolate chips
  • 3 tablespoons honey
  • Preheat oven to 400 degrees.  Spread walnut pieces onto a cookie sheet.  Toast walnuts for 5-6 minutes, or until light brown.  Place toasted walnuts into the bowl of a food processor.  Process until the nuts are liquified (a step beyond paste – it was pretty obvious when this happened, the mixture appeared quite liquidy and was splashing around in the bowl for me.)  Place chocolate chips into a medium microwave safe bowl.  Microwave on high for 15 second increments, stirring between each, until the chocolate chips appear smooth and melted.  Add honey, sweetened condensed milk, and liquified walnuts.  Stir until well combined.  Refrigerate for about 1 hour, or until the mixture appears firm.  Enjoy!

    Homemade Pancake Mix

    Thursday, January 20th, 2011

    Pancakes have recently become a favorite meal in our household.  Thankfully we’re only cooking for two, because making pancakes with our medium-sized frying pan on an electric stove-top was a slow process and sometimes disastrous process.  While I loved the idea of an electric griddle, I was concerned about storage space.  My husband was pretty gung-ho about the whole thing, but understood my hesitation.  As Christmas approached and I brainstormed ideas for my husband, I thought of his desire for a griddle and mentioned it to my parents.  They picked one out for him.  Imagine my surprise when I opened a rather large, oblong box on Christmas morning and found an electric griddle inside.  My husband opened his a few hours later when my parents came for dinner.  What can I say, great minds think alike? :)  Oh, and our griddle goes quite nicely with my husband’s Darth Vadar spatula (a great stocking stuffer!)

    Now, we’re happily griddling away and pancakes seem to have become a Sunday night tradition.  We whip up a batch of pancakes and lounge in front of the fireplace for the evening.  Alton Brown’s recipe for “Instant” Pancake Mix makes it easy to throw together a tasty batch of pancakes in no time.   After mixing a large batch of dry ingredients ahead of time (keeps for about 3 months), all you have to do is add butter, eggs and buttermilk and you’re good to do.  The resulting pancakes are far superior and far cheaper than any mix you can buy at the store.

    If you don’t have buttermilk on hand, never faear,  you can still make these pancakes by using an easy substitution (details below).  They’re delicious either way, but wow, real buttermilk really takes them to the next level!

    Homemade Pancake Mix

    6 cups all-purpose flour
    1 1/2 tsp baking soda
    3 tsp baking powder
    1 tbsp kosher salt
    2 tbsp sugar

    Combine all of the ingredients in a lidded container. Shake to mix.

    Use the mix within 3 months.

    Make the Pancakes
    Yields 12 pancakes

    2 eggs, separated
    2 cups buttermilk *
    4 tbsp melted butter
    2 cups homemade pancake mix, recipe above
    1 stick butter, for greasing the pan
    2 cups fresh fruit such as blueberries, if desired

    1. Heat an electric griddle or frying pan to 350 degrees F.
    2.  In a small bowl, whisk together the eggwhites and buttermilk. **
    3. In large mixing bowl, whisk the egg yolks with the melted butter.
    4. Add the buttermilk mixture to the large bowl and whisk until thoroughly combined.
    5. Add pancake mix to the large bowl and mix the batter until just combined. Don’t try to work out all of the lumps.
    6. Once the griddle is heated, butter it lightly and wipe off with a paper towel. No butter should be visible.
    7. Ladle the batter onto the griddle and sprinkle with fruit, if desired.
    8. Flip the pancake once the bubbles around the edges of the pancake begin to set, and the griddle-side of the pancake is golden.
    9. Continue to cook until the pancake has set completely.

    * Don’t have any buttermilk? Make your own! Add one tablespoon of lemon juice or white vinegar to one cup of milk and let sit for a few minutes. Mix well and use in any recipe that calls for buttermilk.

    ** Looking to cut down on dishes? Measure the buttermilk into a liquid measuring cup. Melt the butter in a microwave safe mixing bowl that’s large enough for your dry ingredients. When you crack the eggs, separate them directly into the liquid measuring cup and large mixing bowl.

    Crumpets

    Thursday, January 20th, 2011

    This year for Christmas, I got a fantastic cookbook for any Harry Potter-phile who knows their way around the kitchen - The Unofficial Harry Potter Cookbook.  It’s got plenty of great recipes for the treats found on the Hogwarts Express, dishes prepared in the kitchen by house elves, and all kinds of other tasty bites popular ‘across the pond.’  Coincidentally, on my list of 30 things to make while I’m 30, I happened to include the popular British tea-time snack the crumpet which expectedly is included in this book filled with British recipes. 

    When I told my husband I was going to be making crumpets, he said…”what’s a crumpet?”   Crumpets are, in fact, a very tender and delicate cake similar to an English muffin in shape, but decidedly different in flavor and texture.  They are light and tender, as well as both sweet and savory.  My first crumpets were bought from a grocery store, wrapped in plastic and with a shelf life that probably rivals Twinkies.  I had always enjoyed them even if they were mass-manufactured, but I figured they couldn’t be that hard to make and sure enough, that’s true.  The most challenging part is that they require a circular mold to ensure they have the perfect circle shape – certainly you can go purchase a set of English Muffin rings like I did, but if you have a 3 or 4 inch round cookie cutter, or even a (well washed) tuna can with both ends cut off, these would work just fine.   Enjoy your crumpets toasted with butter and jam alongside a hot cup of tea – like Harry did, with the Minister of Magic.

    Crumpets – from ‘The Unofficial Harry Potter Cookbook’ by Dinah Bucholz

    Ingredients:

    • 1 cup flour
    • 1 teaspoon yeast
    • 1 tablespoon sugar
    • 1 teaspoon salt
    • 1 cup milk
    • 2 tablespoons of melted butter

    Whisk together dry ingredients.  Slowly mix in milk and butter until the mixture is smooth.  Let sit in a warm place for about 90 minutes, or until the mixture becomes bubbly and increased in size.  Grease English Muffin rings, and a griddle.  Preheat over low heat.  Scoop 1/3 of a cup of crumpet batter into each ring.  Cook for about 5 minutes, or until the top appears bubbly.  At this point remove the rings (They will be hot, so be careful!  Use tongs or an oven mitt.)  Flip the crumpets, and cook for another 4-5 minutes.  Cool completely on a baking rack, and store in an airtight container.

    Pumpkin Pancakes

    Monday, November 15th, 2010

    Between September and January, pumpkin puree does not last long in my house.  Here in New England, we’ve been fortunate enough to miss the canned pumpkin shortage that has plagued parts of the country for the past two baking seasons.  Last year, I was so concerned that we’d encounter a shortage that I bought multiple cans each time I went to the grocery store, resulting in quite a stockpile!  I’m not worried this year, but that hasn’t stopped me from stocking up.

    These pumpkin pancakes are an excellent use for any pumpkin you may have lying around.  Fluffy and flavorful, they add a tantalizing taste of fall to your breakfast table.  A generous serving of maple syrup makes them extra heavenly.

    The original recipe yields a large amount of pancakes, so I halved it and ended up with a good amount for just my husband and I.   The only complaints I noticed in the original recipe was that the pancakes didn’t cook well.  Since the batter was thick, it didn’t spread as much as pancake batter usually does.  I remedied this problem by gently spreading the batter with a rubber spatula until I reached the desired thickness.  The pancakes cooked up beautifully – light, fluffy and fully-cooked.

    Pumpkin Pancakes
    Yields 8-10 medium-sized pancakes

    1 cup all-purpose flour
    1.5 tbsp brown sugar
    1 tsp baking powder
    1/2 tsp baking soda
    1/2 tsp ground allspice
    1/2 tsp ground cinnamon
    1/4 tsp ground ginger
    1/4 tsp salt
    3/4 cup milk
    1/2 cup pumpkin puree
    1/2 egg * (see below)
    1 tbsp vegetable oil
    1 tbsp vinegar

    1.  In a large bowl, mix the milk, pumpkin, egg, oil and vinegar.
    2. Whisk in brown sugar.
    3. In a separate bowl, combine the flour, baking powder, baking soda, allspice, cinnamon, ginger and salt.
    4. Stir the dry ingredients into the pumpkin mixture until just combined. Do not over-mix.
    5. Heat a lightly oiled griddle or frying pan over medium high heat. Pour or scoop the batter onto the griddle, using approximately 1/4 cup for each pancake. Brown on both sides and serve hot.

    * Q:  How do I add 1/2 of an egg?  A:  Crack the egg into liquid measuring cup and beat with a fork.  Note the measurement on your measuring cup and add half of that to your recipe.

    Subscribe
    Email Registration  Email
      RSS
    Archives
    Sitemeter